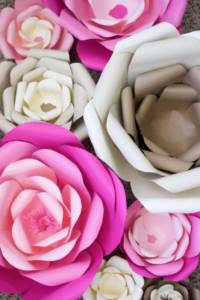
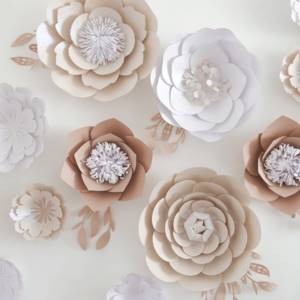
Need gorgeous, stunning party decorations for virtually no cost? Do DIY large paper flowers, you can’t imagine a better setting for a party, wedding or any celebration. They're perfect for wall decorations, little girls' rooms, photo backdrops for weddings and parties... and they're just so pretty.
Making large paper flowers is in some ways even easier than making regular sized ones, you just need more material. Here are 30 master classes on how to make large paper flowers with step-by-step photos, links to instructions, paper flower templates and other useful information.
How to make large paper flowers
Learning how to make large paper flowers with your own hands is actually surprisingly easy. It all depends on how many flowers you want to make and how big or small each flower is will affect how long the project will take you. You won’t need too many materials and tools to get the job done.
- Foam board measuring 50 x 80 cm glue stick
- 5 sheets of patterned paper 30 x 30 cm
- 50 sheets of cardstock (colors vary depending on your theme)
- Scissors
- Glue gun
How to make large paper flowers with your own hands
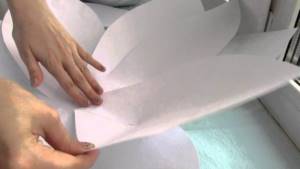
Place the board on a large flat surface. You will need plenty of space to cut, assemble and arrange your flowers. You can paint the board or leave it white. Cut out petals from cardboard. This step depends on how big you want your flowers to be. You can break down the petal sizes for small, medium and large flowers.
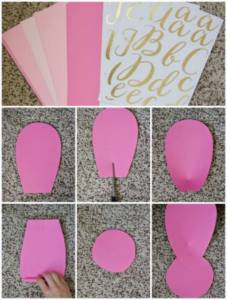
The easiest way to cut out all the petals is to cut out one petal and then use it as a stencil to cut out the rest of the petals. Use a pencil or glue stick to twist and fold the edges of each petal. After cutting the petals, fold them according to size and make a small cut at the base. Take each petal and fold one cut side over the other and glue, this will create a curve in the flower. Flip the petal over and, using a glue gun, apply a line of glue to the very bottom. Attach the petal to the paper circle. Continue gluing petals to the circle until you complete the circle.
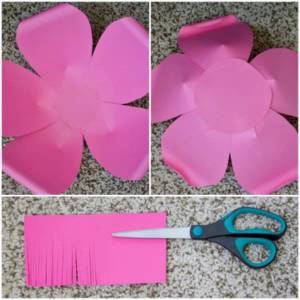
Continue gluing the petals to the circle, layer by layer, until you reach the center. Using the scraps, cut even strips of paper for the center buds. Cut line by line until you reach the end of the paper. Glue both sides together and then glue to the center of the flower.
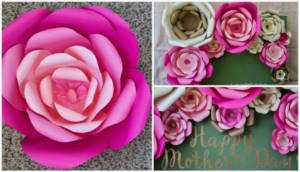
Once you have collected each flower, arrange them on the board the way you like and then glue them on. Use letter stickers to write your message. You can do this in a variety of ways, larger or smaller, and use any color of cardboard you want. Or use fabric instead of paper if you want a difference in texture. These flowers can be used for a variety of purposes - table decorations, hanging them on the wall, gluing them to make a banner, or decorating a gift.
Photo source: www.staceyhomemaker.com/make-large-paper-flowers/
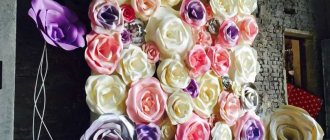
What should you pay attention to when installing a frame for a photo zone?
If the photo shoot area is constructed of wood, then it is necessary to take care of the safety of the structure and ensure reliable installation.
«>
Wooden beams are attached with special tools in the form of a frame. The height of the structure for comfortable filming should be at least 2-2.5 meters.

A pre-prepared banner or canvas is attached over the entire area of the frame, which will serve as the main background.
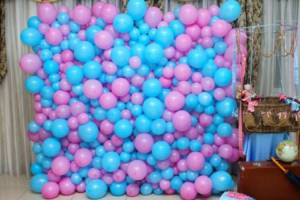
Decorative elements are attached to the background - balls, flowers, themed decorations.
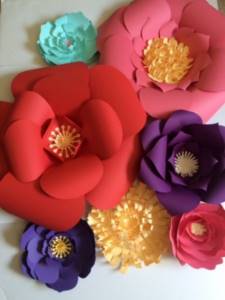
What kinds of flowers are there for decoration?
There are many different colors that can be created using paper. The origami technique is also used. It involves folding the material in question into different formats and objects. You need to use paper painted on both sides, glue and scissors.
The process of making life-size flowers is quite simple:
- a sheet of colored paper with a square shape is prepared;
- it is bent halfway until smooth edges are obtained on each side; straight bends are also made, which are formed by folding the square in half;
- a fold is made directed to the center of one of the vertices;
- similar actions are implemented with the remaining corners;
- folds are made along all the triangles so that it can be folded, initially the triangle is formed along one edge, then when forming the fold, in a different way;
- the element is turned the other way;
- the corners of the square are bent;
- the workpiece is rotated;
- on the folds located on the triangles bent towards the central part, the same actions are performed. Folds are made in the middle of the figure and smoothed out.
The same actions are done for the remaining triangles, wrapping and turning the flower over. All the corners turned out to be similar to the petals of a flower that need to be unfolded. The ends of the resulting flower are slightly sharpened on the outer part.
Flowers can be created using colored paper. In this case, it will be possible to involve children in the process. You will use plain paper of different colors. There are many methods for creating a bouquet, but it is better to use simple methods.
In the first case you will need:
- when using a ruler, take measurements and mark them with lines on paper, which are used to form a template. Narrow strips are cut out of them, acting as a blank for the future flower;
- each strip is bent halfway and the ends are secured using glue;
- then, using a yellow sheet of paper and a compass, make a circle that will be the core of the flower;
- petals are attached on the reverse side;
- The petals and stem are made from green paper.
The composition can be placed on a white sheet. There is also another way to create a flower. You will need to make a template to design the bud. For this purpose, a spiral is reflected on the sheet. You need to cut along the drawn lines and use them as a blank.
The entire spiral is twisted, with the end point being the beginning, and the stem and leaves are formed. To do this, you need to use a sheet of green paper. Before connecting the parts in question, you need to slightly press the spiral.
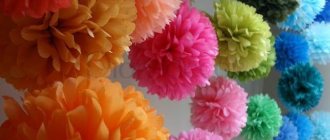
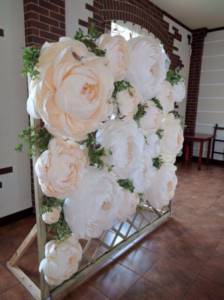
Options for decorating the hall with large elements
Interior art offers several options for decorating the living room with voluminous paper flowers.
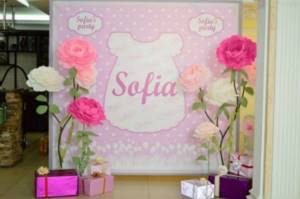
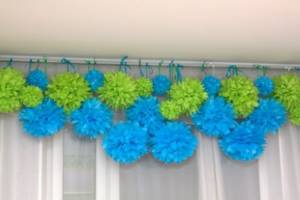
You can place finished decorations on the ceiling, walls, tulle or curtains. Huge flowers placed on the floor have an original look.
Advice! If you plan to decorate the living room walls with flowers, then you can use both flat and volumetric color options.
Professionals are convinced that daisies are the most profitable option for creating flat decoration. They can be made in different colors. For example, make one row of petals from white paper, and make the second row yellow. To make the center of such a daisy, you can take red paper.
If you plan to make voluminous daisies from which the garland will be made, the center of the flower is also made voluminous. To do this, fluff the circle by making numerous cuts that do not reach the center of the circle.
The ceiling can be decorated with either individual flowers or garlands consisting of small flowers.
If the hall has high ceilings, you can string garlands just below the ceiling, making the room mysterious and unusual.
Advice! In a hall with a high ceiling, single large flowers suspended on transparent threads from the base of the ceiling look original.
On the curtains you can place garlands of small flowers, reminiscent of Hawaiian garlands. Professionals also allow curtains to be decorated with individual decorative elements.

This option is suitable for decorating a room for children's parties. For example, you can decorate the curtains with exotic flowers so that the children who are invited to the party get the impression that they are in the African jungle.
By March 8, you can replace them with delicate tulips, bringing a feeling of spring and tenderness into the room.
Depending on how your mood changes, it will be enough to simply replace some paper flowers with others, without spending money on redecorating the room.
Corrugated paper is considered by decorators to be a pliable material, convenient for creating decorative elements.
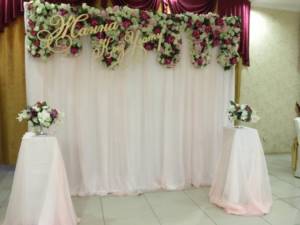
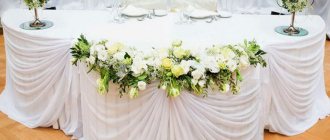
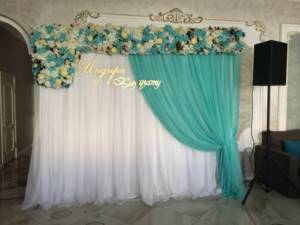
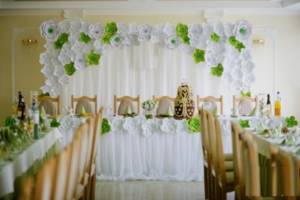
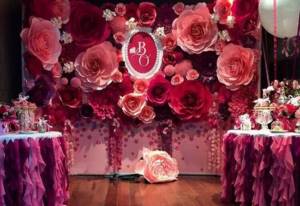
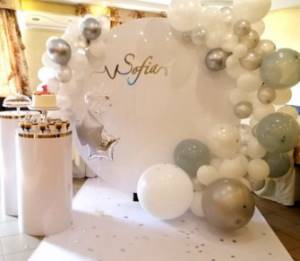
Wedding photo zone
If there are such holidays that can easily be done without a professional photographer, then this is definitely not a wedding. The most important day of two loving hearts must be remembered forever, and high-quality photographs taken in a decorated area will help with this.
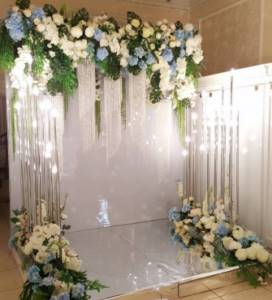
A photo zone for a wedding can also be decorated with your own hands. The most popular option for a wedding photo area is a flower arch. The design can be of absolutely any size and shape.
Do-it-yourself grain crusher: types, principles of operation and tips on how and what to make an effective crusher from (85 photos)
Do-it-yourself ski mount: installation and tips on how to install various types of mounts correctly (115 photos and videos)
How to make a castle with your own hands: building decorative medieval castles and fortresses (110 photos)
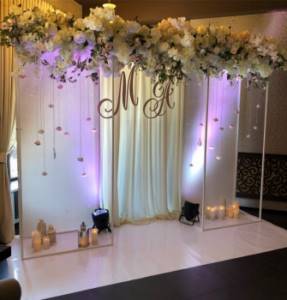
As decoration, you can use both fresh flower arrangements and lace ribbons, light, flowing fabric and balloons.
Also recently, round arches have become popular for first family photographs.
If you take into account the wishes and taste preferences of the heroes of the occasion, then creating a spectacular area for beautiful, memorable photos is not as difficult as it might seem at first glance.