Tips for assembling a flower arrangement
We offer recommendations given by florist experts. Things to consider:
- Check the style carefully. Already at the idea stage, you should clearly understand who the surprise is being prepared for. Important: gender (calla lilies, chrysanthemums and other masculine options are suitable for men), age, situation and reason for presentation.
- The best image is natural; it is better to allow asymmetry and unsystematicity.
- Each element of the composition must be self-sufficient and visible at first glance; for this, the buds cannot be “hidden” under the foliage.
- You need to decide where is the front and where is the back. If you are making a ball shape, as with wedding designs, there should be the most successful angle - the main one.
- The color can be different (it’s good to play with contrast, for example, beige and burgundy) or the same, but in the latter case, with different varieties of flowers, it is worth choosing different shades so that all the plants do not mix into one color spot.
- White looks great. It visually enlarges the bouquet and also combines with other flowers.
- You can use a photo and make bouquets of fresh flowers step by step, then you will definitely not forget the sequence and do everything well the first time.
How to collect songs
Auxiliary tools and plants should be used. In the process of tying the stems, they need to be applied one to the other so that they are laid between different fingers. This will allow you to check the specific distance that needs to be created. When you have determined from the head (top part) how close and in what place the buds should be, you can insert a wad of tape between the stems. If you don’t need to move them apart, you can simply rewind the legs at the required angle.
The tool immediately used is a pruning shear. Sharp scissors that are powerful enough to cut through the strong base of a flower. If you collect plants from the front garden, then you probably have one. Do not immediately adjust the length. You may have to rearrange the composition. You just need to remove the strongly interfering, protruding parts.
Now you need to do this sequence several times in a row, and at the very end, wrap the entire junction of the elements with tape. Move on to decoration.
Let's see how the wizard does it:
How to make a beautiful bouquet of fresh flowers with your own hands
Now let's move on to beauty. Home-grown flowers often differ from store-grown ones. They are less smooth and have errors. These are small flaws if you make them up correctly. The first problem is that they do not have perfectly straight stems, and the length is often different. For this reason, it is almost impossible to do without packaging. You can use craft or corrugated paper, patterned cellophane, or special packaging materials that are commercially available.
You need to fill the space between the buds with something. We recommend adding sprigs of greenery - they look advantageous and refresh the composition.
For registration you should:
- decide on the size of the flowers, trim the lower part according to this imaginary line;
- cut the packaging into equal pieces;
- apply it in layers so that the sheets overlap each other;
- fasten them with a stapler from the inside so that no folds are visible from the outside;
- use tape for tying.
In this section, we will give recommendations on which shades of wrapping paper go well with the color of the composition:
- red and burgundy roses - beige, black, white, with newspaper-shaped ornaments;
- >pink buds – lilac, blue, brown, mint;
- white, beige, other light shades - any nude tones of paper.
You can almost always use a game of contrast. If you don’t know what palette to use for the design, use transparent cellophane or discard it altogether.
Here's how a florist does it:
What to consider before assembling a bouquet
The first experiences of making a bouquet can be completely addressless, and take place on the dining table or bedside table. But when making a bouquet for someone as a gift, consider the following points:
- Who is it intended for: man, woman or child.
- What color palette to use: monochrome (one color in different shades), similar (close adjacent colors), contrasting or rainbow.
- The proximity of plants selected for the composition according to physical compatibility: donor plants, oppressor plants.
- The volume and size of the bouquet in accordance with the place and occasion of the gift.
- Combination of plant textures: smoothness, terryness, needle-likeness, splendor.
- The ratio of plants in a bouquet: quantitative composition for each type of flower and greenery.
- How much time will it take to prepare the flowers before assembling them into one composition: for some it is enough to remove the lower foliage, for others it is necessary to remain in a separate container for a day.
- What type of decor will be appropriate and will actually complement and not spoil the idea.
A few recommendations for floristry
Below we present three different types of compositions that are made at home.
How to make and arrange bouquets of fresh flowers step by step
Let's define the term simplicity. In floristry, this word means mono-bouquets, combinations of two, less often three varieties or flowers. No need to play with position and placement, with sizes. Example: three-color ikebana made from home-grown lilies.
- We cut 9 stems - 3 of each shade. We make the leg longer and straighter; this variety assumes large, spreading branches. Colors are white, yellow and orange.
- We remove excess branches that interfere with connecting and placing the stems next to each other. Cut them carefully so that the skin does not begin to stretch over the entire base.
- As stated above, we apply the flowers, forming a single cap - from the center along the circumference downwards.
- The color should be spread asymmetrically so that three tones do not touch next to each other.
- Now we bandage the point of contact.
- We trim the lower part, leaving 7 - 10 centimeters from the tape.
Lilies don't need packaging because they have beautiful lush foliage, which is why this option is called easy.
What does a specialist think about this:
How to make a mini-bouquet of fresh flowers yourself
Miniature compositions hold well in the hand, can be easily transported, do not get in the way when worn, and can easily fit into almost any vase. Their peculiarity is that, having a small height, they are quite padded. In some ways they resemble classic wedding ones, but are not as heavy and take up much less space in diameter. How to cook them:
- Since there will be only a few components, you should not take many varieties. The best option is 2 different varieties and some greens.
- Suitable combinations: eustoma + chamomile; gerbera + chrysanthemums; hydrangea + cloves.
- >Twigs can be: gypsophila, fern, ruscus, salal.
Now we adhere to the recommendations for drawing up:
- One (or three) large bud, the rest are small.
- The shape is an envelope, that is, on a plane, there are flowers placed higher up and those that are lower.
- You need to use packaging; craft paper usually works very well.
- The height of the entire bouquet is up to 50 cm.
This shows how easily and quickly you can pack this option, let’s look at the master class:
DIY rose bouquet step by step with photo examples
What housewife would not have a rose garden in her own front garden? Usually rose bushes are the pride of the gardener, so they are often made up of them. Let's give step-by-step instructions:
- cut the stems so that they are all the same size and even
- domestic roses have very sharp thorns - remove all thorns from the lower half, which you will hold on to;
- choose the form of the further composition, it depends on how many and what colors and sizes of buds, as well as on the subsequent desire to pack it;
- assemble all the legs using tape in the manner described above, tie the tape;
- move on to decoration;
- cut off any excess ends.
We recommend diluting mono bouquets if they are entirely made of flowers of the same color and variety. This can be done with small bush flowers and herbs.
Now let's look at photo examples. You can get inspiration from here:
Let's see how a florist puts together a composition step by step:
What flowers can be combined with each other?
Not all plants do well next to each other.
Here's a little hint on which flowers can be combined and which ones can't:
- roses are combined with delphiniums, tulips, eustomas, irises, bells, violets;
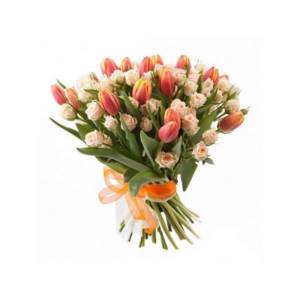
- tulips coexist with chrysanthemums, roses, lilies, callas, irises;
- chrysanthemums look great with large branches of greenery, and of flowers - with irises or lilies. It is not recommended to dilute a bouquet of chrysanthemums with more than one type of plant.
, daffodils, orchids, mignonette do not go well with any flowers You cannot place a lily in a bouquet with wildflowers; it will speed up their withering.
Bridal bouquet
Mostly brides plan this day 2-3 months, six months or a year in advance. During this period, they long ago decided what their main wedding accessory should be; there are several canon requirements for it:
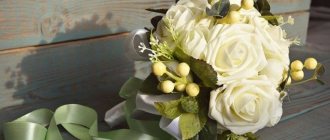
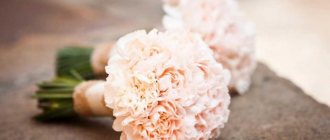
- Compact size. Small in size but wide, round compositions that have a lot of weight due to the fact that they are tightly packed. There are many flowers inside and practically no free space. This is especially true for those who use fairly heavy roses as a base.
- This can be a mono bouquet or a combined bouquet. With one or more varieties, colors, decorations.
- It is advisable not to include plants that quickly wither without constant access to water; you will need to spend the whole day from morning to evening with this accessory in your hands, and only then throw it to your unmarried girlfriends
- Brides often choose a second color. It complements the white (dress) and is expressed in little things - the groom’s tie, shoes, earrings and, of course, the key flowers in the bouquet.
Now let's move on to practice. Rarely do girls do the planning themselves on the eve of the wedding, because it is very responsible and labor-intensive. We offer to order a bouquet with delivery by a certain time in the online floristry store “Tsvetochnyray.rf”. There is a large assortment and the possibility of individual ordering with discussion of details.
How to collect a bouquet of fruits?
In any bouquets related to food, the main thing is hygiene. If you mix fruits with flowers, you can no longer eat them.
Or it is necessary to isolate the fruits so that they do not touch the flowers.

If you are making a bouquet of fruit only, place the fruit on skewers and assemble the bouquet. If the fruit is heavy, you can put it on 2 or 3 skewers. For a fruit bouquet, a spiral technique is more suitable, because with a parallel technique, large fruits will interfere with each other, and everything will fall apart.
Before eating fruits, be sure to wash them!
Amazing compositions from ribbons
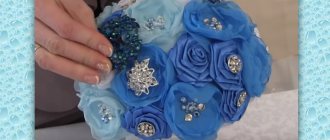
Above we have given step-by-step instructions on how to make simple bouquets of fresh flowers. Now let's talk about compositions made from other materials. The idea of creating jewelry from scrap materials, fabric and decorations (beads, seed beads) arose a long time ago. The advantage is amazing durability - nothing can fray or dry out. Many brides order products from wedding salons or from florists who do this. But you can do it yourself. For this:
- We make the base separately. It consists of a CD on which polyurethane foam will be poured into a neat ball or cone. Excess can be trimmed off after drying.
- The handle can be any plastic pipe, which in diameter should match the inner hole of the disk.
- At the same time, we make the buds themselves - the technology is simple, you can master it using video tutorials. Then the flowers are pinned onto the base, arranged in the desired configuration and decorated.
- Additionally, you can use beads and other decorative elements.
Which bouquet shape to choose
Bouquets differ in shape in several ways:
- size: large and small;
- line of symmetry: symmetrical and asymmetrical;
- main line: S, L-shaped, triangular, crescent-shaped, round, square, cascading, one-sided;
- by design: massive, linear-massive, linear, mixed;
- by technique: assembled freely, parallel or spirally.
The form depends on the recipient and the occasion. Small compositions are appropriate in the hands of the bride, large ones as a gift for the hero of the day. A miniature bouquet is pleasant on a date, and a massive one at a gala concert, in the form of a floor composition.
The line of symmetry, execution technique and direction of the line in the bouquet are determined not by the occasion, but by the idea of the arranger.
Interesting! The shape of the bouquet, reminiscent of the figure of an animal or a fairy-tale character, is a good gift for a child. Such compositions are most often collected on floral foam from long-lasting flowers.
Therefore, the toy bouquet will delight the recipient for no less than 2-3 weeks.
Men's bouquets
You can give flowers, including carnations, callas, irises, and gerberas. They are considered quite masculine and suitable for a male recipient. This is a great option as a ceremonial congratulation or gift to a manager or employee.
Nowadays people often order or make custom floristry themselves. There are no plants in it, but the concept remains - packaging, form, aesthetics, presentation. The idea of an original gift will conquer any man - be it a boyfriend or husband, father, brother, colleague. You can give it for any occasion. Initially, you need to find out what a person prefers - whiskey and cheese, beer and crayfish, or coffee and chocolate. It’s time to purchase everything you need and start decorating. Can be collected in standard paper packaging or placed in a basket.
Fruit bouquet
An alternative to floral ikebana. For these you will need fresh fruit. Perfectly suitable - pineapple, large strawberries on skewers, mangoes, apricots, kiwis, grapes, pomegranates, all citrus fruits and everything that looks beautiful cut or whole and does not spoil. You can also pick more small berries, they look great, but are more difficult to attach. You should also avoid bananas - they can quickly turn black both cut and whole.
Usually the fastening occurs on wooden sticks, which are stuck into the flesh of the fruit. You can keep pre-washed fruits in a gelatin solution and dry them. This will add shine and keep them in their original form longer.
A suitable container is a basket or vase.
Stuffed toys bouquet
A popular option, especially popular among young couples in love. Such a gift will delight the recipient for a long time, since he does not need water or other conditions. For the base you can also take wooden sticks, as well as:
- liquid glue moment;
- small teddy bears, unicorns, dogs - according to the recipient’s taste;
- packaging material, tapes, filler.
By the way, you can combine fresh flowers with toys. Or add to a soft composition of sweets. It all depends on your imagination.
How to collect a bouquet of sweets?
The technique remains the same. If the candies are large, collect them in a spiral; if not very large, you can lay them out in parallel. If you use candies without wrappers, remember about hygiene, and if they are wrapped, you can tie the skewers to the candy wrappers with wire or tape.
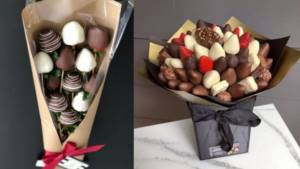
If you still find it difficult to navigate by the picture, we have prepared a video for you:
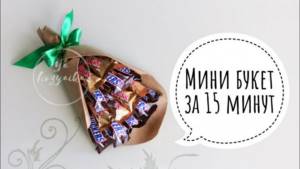
Photo - what you can do yourself
How to pack a ready-made bouquet
If you have already fully prepared a gift, but don’t know how to deliver it, use the old Soviet invention - wrap it completely in a newspaper spread. The format is optimal for capturing both stems and buds. You can fasten it with a stapler. Before delivery, you should unpack the ikebana and hand it to the owner.
What advice can you give to those who are bringing a gift on a long journey? First of all, just before setting out, cut off 1-1.5 cm from the bottom of the stems. The same operation should be repeated immediately upon arrival before placing them in the water.
The second recommendation is to wet gauze or other textile material that absorbs and retains moisture well. The water should be cool. For greater accuracy, you can pre-dilute sugar in it. Now wrap a piece of cloth around the stems so that they are as moist as possible. You can put a plastic bag on top to preserve the created atmosphere.
How to assemble a bouquet on a frame yourself
To assemble a bouquet on a frame of large-headed roses, chrysanthemums and gerberas, we will prepare it ourselves:
- white bush chrysanthemum 2 pcs.;
- burgundy gerbera 1-2 pcs.;
- large-headed pink-yellow and burgundy roses, 2 pcs.;
- pink bush rose 1 pc.;
- ruscus 5-7 pcs.;
- pruner;
- scissors;
- stapler;
- green felt;
- frame to match the felt;
- technical tape;
- decorative pink ribbon.
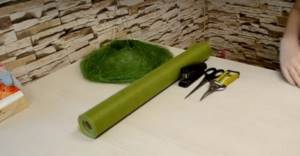
Step-by-step instructions for correctly assembling a flower arrangement on a finished floral frame:
We insert the chrysanthemum into the finished floral frame.

Add a pink bush rose.

Between the chrysanthemum inflorescences we add a burgundy rose and gerbera. We distribute the remaining large-headed roses harmoniously throughout the composition.

Add salal greens around the edge and in the middle.

To decorate the leg, cut a rectangle from a felt roll.
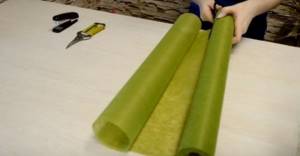
Fold it in half and move it slightly to the sides. Then cut in half again, also at an angle. We get the blank as in the photo.
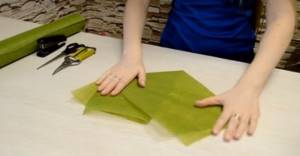
We decorate the flower stems and the lower part of the frame. Smooth out the folds on the felt with your fingers.
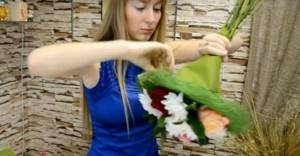
We tie it with technical tape. We hide it under a decorative pink ribbon. We tie a bow.
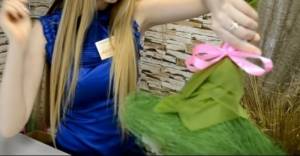
We cut off the excess length of the stems with pruning shears.


