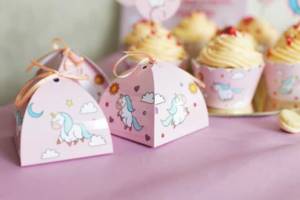
Classic bonbonnieres
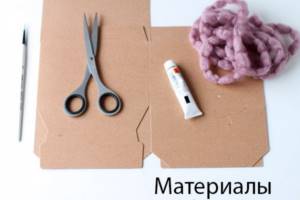
You will need: double-sided colored paper, ruler, pencil, scissors, string, candy, hole punch.
Master Class
- Print the template and transfer it onto colored paper.
- Cut it out.
- Make folds with a ruler to create a central square.
- Make folds with a ruler along the sides of the triangles.
- Make holes with a hole punch.
- Pass the string through the holes as shown in the image.
- Place the candies inside, tighten the rope and tie a bow.
- Make the required number of bonbonnieres in the same way.
Classic bonbonnieres are ready!
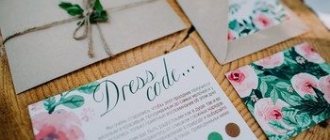
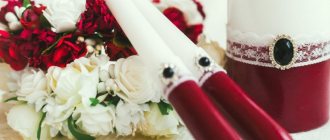
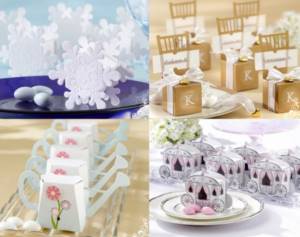
Bonbonnieres for a wedding
A wedding celebration is an important event not only for the newlyweds, but also for each participant in this sacrament. After all, everyone is witnessing the birth of a new family with its own traditions, rules and history.
To make this event memorable for many years, bonbonnieres (printable templates for the bride and groom) will be the best thank you to all participants.
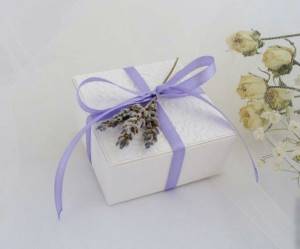
The appearance is diverse, original and fully reveals the multilateral lines of the creation of a new unit of society, the importance of feelings that gave the young people the opportunity to find happiness together.

A simple but at the same time colorful solution is to create candy packages with bright inserts and tasty fillings. A polymer clay label will preserve inscriptions for a long time - wishes written for important and loved ones.
Color motifs and style usually reflect the theme of the wedding scenario, becoming a special addition to the overall ceremony. It can reflect the sea, love, unity, understanding, romance, natural motifs, collected together in a small bonbonniere.
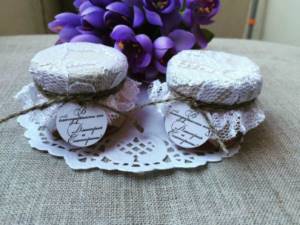
A special moment could be replacing the usual sweets, wedding gingerbread, in the form of loving hearts, doves, in the image of a couple.
Gradually, jars with sweet prizes are replacing them; when decorated in the right way, they look with their own charm.

Appearance is:
- groom's suit;
- bride's outfit;
- hearts reflecting a new family;
- butterflies;
- pigeons;
- swans;
- chests;
- caskets;
- flower arrangements.
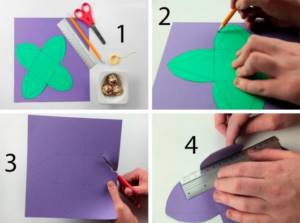
Bonbonniere-berry
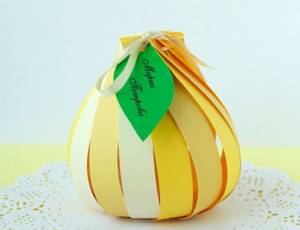
You will need: colored paper, scissors, glue, ruler, hole punch, string, sweets.
Master Class
- Cut 20 multi-colored strips 2cm wide and 15cm long.
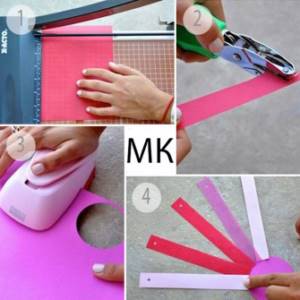
- Punch a hole at the end of each strip.
- Cut out 2 circles of colored paper with a diameter of 7cm.
- Place the strips with the ends without holes along the edge of the circle, then glue them.
- Glue the second circle on top of the circle.
- Cut out a leaf and make a hole in it at the base.
- Pass the string through all the holes.
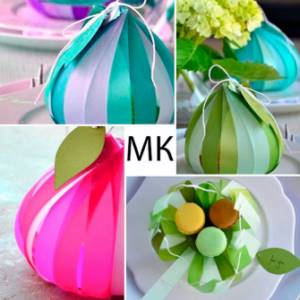
- Place the sweets in the center.
- Attach the leaf, pull the string and tie a bow.
The berry bonbonniere is ready! I recommend watching this video!
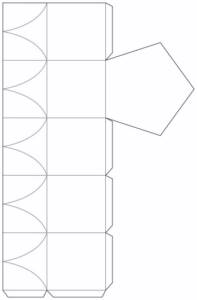
Master class - Box in the shape of a piece of cake!
What are children's bonbonnieres?
You can also use this decorative accompaniment to fill the holiday of the younger generation with a sense of magic, enchantment and miracles. It will look like a gift as a sign of gratitude to the present friends from the hero of the occasion for their active participation in his celebration of life.
And as a gift addition it will delight and add a positive mood. Children's bonbonnieres cover the multifaceted spectrum of children's consciousness. It could be a big cake, colorful butterflies, souvenirs, outfits of fairy-tale princesses and super heroes from your favorite cartoons.
All the rich imagination in one design, and it’s quite easy to find ready-made sketches, because this idea has long been the property of the holiday industry. Well, if you have a talent for drawing, then you can create a new masterpiece yourself, which will pleasantly surprise all the participants in the fun holiday.
Note!
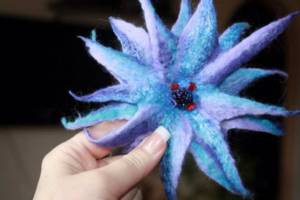
Flowers made of wool (85 photos) - how to felt a flower from felt or a wool brooch. Step-by-step instructions for beginners

What can be made from wool (95 photos): felting for beginners, master class, felting techniques
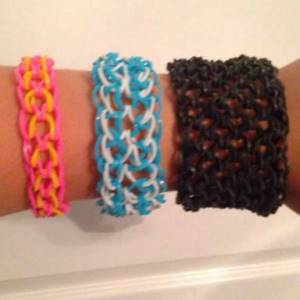
How to weave a “Dragon Scales” bracelet from rubber bands on a machine: photo examples, weaving patterns
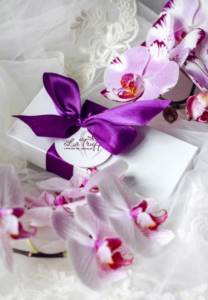
Shiny bonbonnieres

You will need: white boxes, glue, sponge, loose glitter, cardboard, sweets.
Master Class
- Apply glue to the lid of the box.
- Sprinkle glitter onto the cardboard.
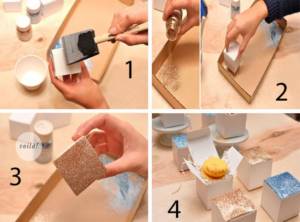
- Dip the box, lid down, into the glitter.
- Leave to dry.
- Place sweets in the box.
- Make the required number of bonbonnieres in the same way.
Shiny bonbonnieres are ready!
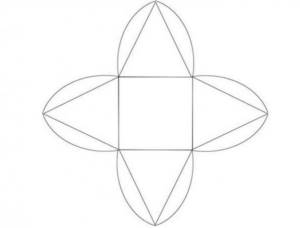
Ready-made templates for bonbonniere boxes
The presented box templates are easy to use for making your own surprises. You need to transfer the diagram in compliance with the proportions onto paper or cardboard of the required size. Afterwards, the workpiece is cut out and bent along the indicated lines in the diagram. You may need additional glue to join the parts together. Once the box is assembled, you will need to decorate it with various elements. You can decorate it using decoupage technique. Place nuts, candies, chocolate-covered fruits or other sweets inside the bonbonniere.
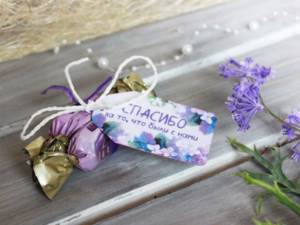
Bonbonnieres in the form of candies

You will need: candy, corrugated paper, cardboard tube, scissors, tape, double-sided tape, cardboard.
Master Class
- Measure the paper to fit the tube and place a strip of tape on the edge of the paper.
- Cover the tube with tape and wrap it in paper.
- Secure the remaining edge with tape.
- Fold one edge of the paper 2 turns, wrap it with ribbon and tie a bow.
- Pour the candies inside the blank.
- Fold the second edge of the paper 2 turns, wrap it with ribbon and tie a bow.
- Prepare a strip of cardboard, write the recipient's name and glue it to the candy.
- Make the required number of bonbonnieres in the same way.
Bonbonnieres in the form of candies are ready!
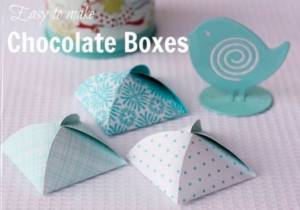
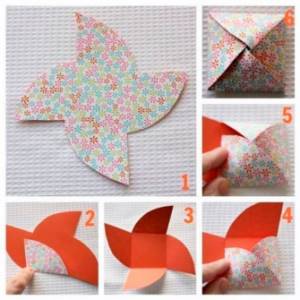
Step-by-step master class with photos
1. Transfer the diagram of the heart bonbonniere to the back of the cardboard. Do not draw dotted lines. The inside of the box should remain clean.
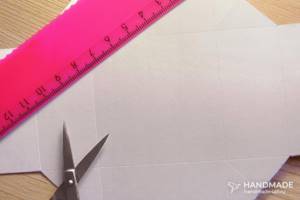
Carefully cut the workpiece along the contour.
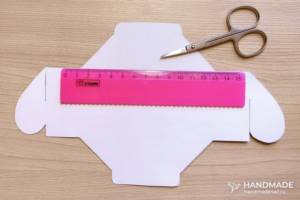
2. Apply deep, but not through, grooves along the dotted lines on the underside of the sheet using a sharp tool.
This technique is called scoring. It is used to prepare thick paper or cardboard to obtain an even and clear fold, without creases or delamination.
Scrapbooking masters use special tools: a board and a roller. You can use scissors with sharp ends (the back side), a special rod, a non-writing ballpoint pen, a knitting needle or hook, or a dull knife. The bigs are carried out strictly according to the ruler. It is important to crush the thick paper without cutting through it.
3. Bend the workpiece along the prepared grooves.
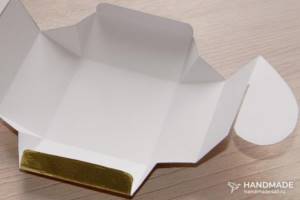
5. Fold the halves of the heart, inserting the slits into each other. Then fold the third side inward. Place a surprise in the bonbonniere and close it completely.
The result is such a beautiful, neat and effective paper candy box. It is quite easy to open and close again, it is not too fragile and quite simple to make.

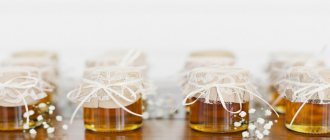
Bonbonnieres in the form of bottles
You will need: small glass bottle, cork, string, wooden tag, thick thread, scissors, adhesive tape, silver spray paint, fresh flower, candy.
Master Class
- Cut the adhesive tape into strips.
- Cover the bottle with stripes, leaving evenly spaced gaps.
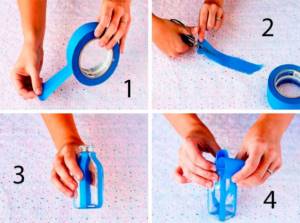
- Spray paint, then wait to dry.
- Remove strips of adhesive tape.
- Fill the bottle with candy, then close the stopper.
- Label the wooden tag, then attach it to the neck of the bottle using thread.
- Attach a flower as decoration.
Bonbonnieres in the form of bottles are ready! I recommend watching this video!
DIY BONBONIERE! The easiest way to make a box!
What to put in a bonbonniere
You can fill a gift box with delicious candies in foil or candy wrappers, glazed nuts and chocolate, cookies in disposable molds, handmade gingerbread, fashionable almond macarons.
It is inconvenient to put unglazed chocolate, sticky candies, soft marmalade, cream cakes, homemade cupcakes and other treats into a paper candy bowl that may spoil at room temperature or stain the bonbonniere.
An excellent solution is to wrap the contents in a cellophane bag or in wrapping paper, for example, in silence.
The surprise in the bonbonniere does not have to be edible. You can put a souvenir, handmade soap, children's crafts in it, or fill it with fragrant dried flowers and herbs as a sachet. However, it is not customary to pack too expensive items, such as jewelry and perfumes, in such boxes. The exception is when the box is used as gift packaging for an expensive but small gift for one person. For example, on Valentine's Day or birthday.

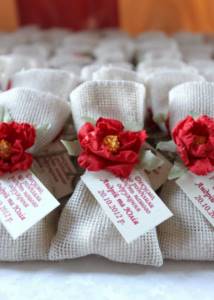
Original bonbonniere
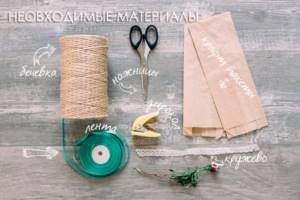
You will need: craft bag, twine, scissors, ribbon, lace, hole punch.
Master Class
- Cut the twine.
- Fold up the corner of the craft bag.
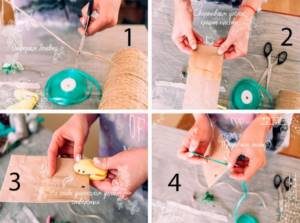
- Make 2 holes with a hole punch on the fold of the craft bag.
- Thread the ribbon through.
- Thread the twine.
- Tie a bow.
- Tie a strip of lace and don't forget to fill the bonbonniere with sweets.
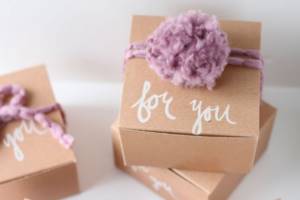
The original bonbonniere is ready!
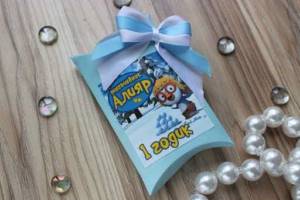
Photos of bonbonniere boxes
There are many options for making bonbonniere boxes. Bags, chests, cylinders, tubes - these elegant, stylish options for surprises will make a positive impression on guests. On the bonbonnieres you can print your initials, the date of the wedding, decorate them with artificial flowers, ribbons, lace, and braid.
Cool bonbonnieres
You will need: bags, glue, brush, glitter, popcorn.
Master Class
- Apply glue to part of the bag.
- Immediately sprinkle with glitter.
- Wait for it to dry.

- Brush off excess glitter.
- Fill the bag with popcorn.
- Make the required number of bonbonnieres in the same way.
Cool bonbonnieres are ready!
Exquisite bonbonniere
You will need: a cardboard blank for the box, scissors, white paint, a brush, textured thread, sweets and a card.
Master Class
- Make a cardboard box.
- Write your wish on the lid of the box with paint and wait for it to dry.
- Place the sweets and card inside the box.
- Close the box, tie it with textured thread and tie a bow.
The exquisite bonbonniere is ready! I recommend watching this video!
Valentine's Day ♥DIY♥ DIY bonbonnieres
Content Options
All couples preparing for their wedding face the question of what to put inside the bonbonniere. As already mentioned, the traditional and symbolic filling of the bonbonniere was exactly 5 candies. However, every country, and sometimes every family, has its own traditions. The most popular fillings for gift boxes for guests are:
- candies;
- cones;
- gingerbread;
- macarons;
- cupcakes;
- dried fruits;
- nuts;
- chocolate;
- cookie;
- lollipops;
- tea;
- coffee;
- popcorn.
The original filling may not be an edible gift, but simply something as a keepsake. Such accessories can complement sweets or be used instead of them. For example:
- keychain, cup or magnet with a photo of the newlyweds;
- Handmade soap;
- aroma candles;
- a small calendar, perhaps with a photo of the couple getting married;
- figurines.
Of course, the contents of the bonbonniere can be the same for all guests of the celebration, however, you can make them personalized, accordingly, the contents can be selected individually for each guest. Materials for making bonbonnieres are cardboard, fabric and tulle. When to present bonbonnieres is the decision of the newlyweds. You can present them after congratulating and presenting gifts to the young couple. Ask the waiters to hand out products or set up a table with treats at the exit from the restaurant.
Related article: DIY basket made from scrap materials for a summer residence with video
Paper bonbonniere
You will need: scrapbooking paper, a simple pencil, scissors, a ruler, sweets.
Master Class
- Print or redraw the template.
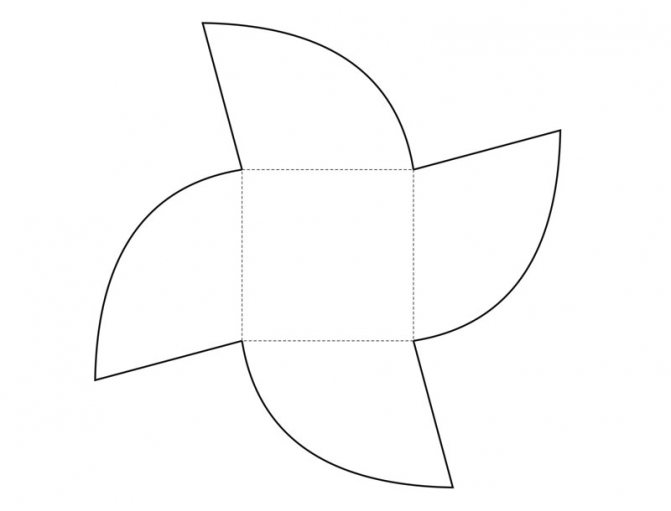
- Cut it out.
- Make 4 folds in the middle, forming a central square.
- Place the sweets and close the box as shown in the image.
The paper bonbonniere is ready!
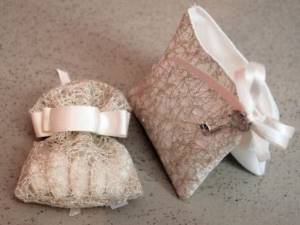
Product made from tulle
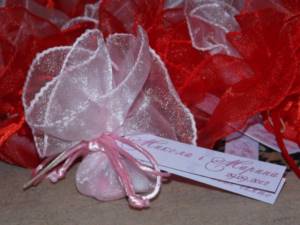
The easiest way to create small gifts is a tulle bonbonniere. To make it, you only need tulle, scissors, ribbons and decor, if necessary. Making a bonbonniere is very simple; even a bride who has never done anything with her own hands can handle it. Let's look at an example.
Related article: How to crochet Christmas balls
Cut the tulle into small pieces in the shape of a square. You can fold the tulle in several layers. For convenience, place it on a small bowl or cup. Place a treat in the center of the vessel. We tie the bonbonniere together using ribbon. Ready!
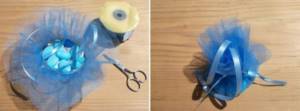
If you trim the corners of the prepared squares, the bonbonniere will come out more round. Also, the edges can be decorated with braid, and the bonbonnieres themselves can be decorated with beads, flowers, rhinestones and other decorative elements.
We will present to your attention ideas for making bonbonnieres with templates. The provided bonbonnieres are made of cardboard, but many of the ideas can be applied in practice for sewing.
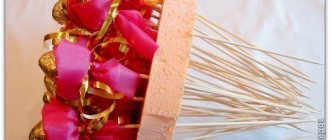
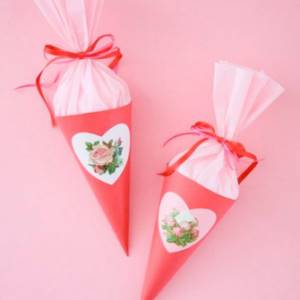
Bonbonnieres-cones
You will need: colored paper, scissors, compasses, corrugated paper, double-sided tape, ribbon, stickers, snacks.
Master Class
- Draw a circle on construction paper, then cut it out.
- Cut off the 4th part of the circle.
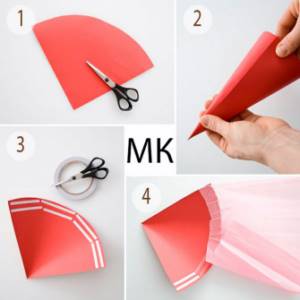
- Pre-twist the cone, then unroll it.
- Place strips of double-sided tape along the edge of the future cone.
- Glue the corrugated paper in folds as shown in the image.
- Form a cone, glue the edges and decorate with a sticker.
- Place the treats inside and tie with a ribbon.
Bonbonniere cones are ready! I recommend watching this video!
Bonbonniere chair/(ENG SUB)/bonbonniere chair/Wedding accessories by Marina Klyatskaya
New Year's bonbonnieres
Candy bowls were originally invented as a decorative addition to the New Year and Christmas. They magically attract a good mood, fill the hall with a feeling of festive bustle and the expectation of an unusual, desired and necessary miracle.

In European society, everything that was on the spruce could be eaten; it either simply decorated it, or was presented in the form of New Year's bonbonnieres.
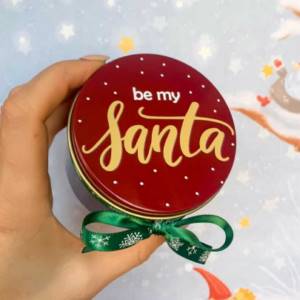
Initially, the shapes of the candy bowl were in the form of a drum, a book, a house, but over time they acquired volume. And they acquired images of animals, plants, and, of course, Santa Claus, with a secret inside, where knowledgeable children always found candy, gingerbread and other delicacies.
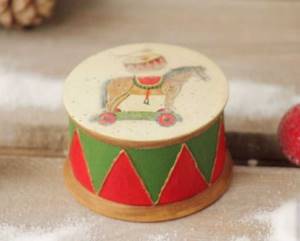
Over time, the forms changed, they were supplemented with fabric, dried plants, figured decorations, seals, and in this form they have survived to this day.
Currently, the main materials are: cardboard, paper, polymer clay, metal, fabric. But for collectors, the earlier works of the masters, where cotton wool and expensive materials were used, are valuable.