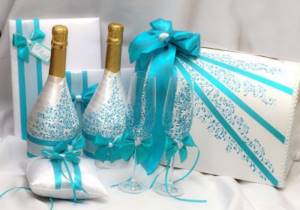
Wedding accessories
- Recommendations for decorating bottles with ribbons
- DIY champagne decoration for a wedding with satin ribbons
- Master class: bride and groom made from champagne bottles
- Groom made of ribbons on a bottle of champagne
- Bride made of satin ribbons on a wedding bottle
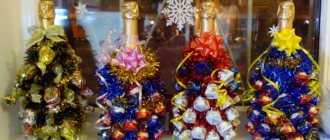
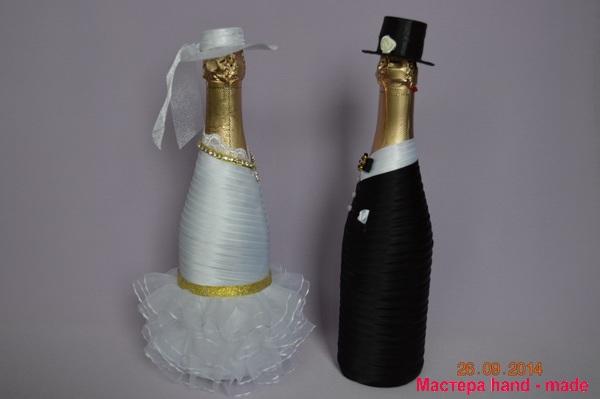
At many weddings, an interesting custom is observed: the newlyweds should have “wedding bulls” on the table - these are a couple of bottles of alcoholic drinks (usually champagne), which are stored and opened during the first anniversary or on the day of discharge from the hospital. According to tradition, the bottles are elegantly decorated . For decoration, satin ribbons, beads, and seed beads are most often used.

Photo of how you can decorate champagne ribbons for a wedding with your own hands
Bottle decoration
There are a wide variety of methods that can be used. These include:
decoupage , which involves transferring a design from one surface to another, while applying a layer of varnish to secure it;
- stucco molding - an ornament in relief or a composition that is transferred to glass and painted over;
- using sand and salt - this method is used to decorate the inside of the bottle;
- painting , which involves the use of acrylic paint;
- weaving using threads and ropes.
In addition, glitter can be used and the design is etched. Some methods imply that a chemical type reaction is carried out, as a result of which the material becomes dull, while remaining transparent.
Decor that involves the use of cereals or pasta. For decoration, you can use fabrics or ribbons, or combine several techniques.
Reference! All methods imply that simple materials will be used, and the result is quite chic.
Photos of young people
Many newlyweds use personal photographs to decorate their bottles. This decor option has gained wide popularity recently. Photos are used instead of labels. In order to place the desired photo on the surface, it is recommended to print it on thin paper. The design is carried out with special care. You will need to think about the photo format, its location, and additional decorations.
Inscriptions with wishes (if the bottle is presented from guests), indicating the names of the spouses, the date and time of registration are suitable as decoration.
The vessel itself needs to be prepared for the technological process. The label is removed with warm water and the surface is degreased. The surface can be painted and a photo can be placed in the center. Small rhinestones will come in handy when creating a frame. The neck can be decorated with a ribbon bow, flowers, and a veil and a man’s hat (for example, a paper top hat) can be placed on the lid.
There are a lot of options for how to decorate this table souvenir.
Attention! Many specialized salons provide services for printing labels with the required image. This sticker will be a smart alternative to the real one.
Details about decorating with ribbons
To use the technique associated with tapes, you will need to initially prepare all the tools:
- stationery knife and scissors;
- large needle and soldering iron;
- bottle;
- tapes.
You can use ribbons of any color. For the purpose of fixation in the situation under consideration, PVA-type glue is used, as well as elements that perform a decorative function. Craftsmen say that you should start from the neck of the bottle, this is due to the fact that the presence of an extension complicates the decorating process.
You need to cut the tapes into equal parts and, when using each next element, overlap the one in front. The material must be laid tightly and neatly, with a slight stretch. This technique is mainly used to decorate bottles intended for wedding celebrations.
Attention! It is easiest to work with tapes with a width of about 2-2.5 centimeters. To make the next turn, you need to take a measurement directly on the bottle and make a neat cut, while leaving a small margin. This element is used to make the subsequent turn.
It is important to pay attention to the fact that you need to calculate the length of the ribbon that will be used to apply this decoration technique. This is due to the fact that a thin tape will be required much more than a wide one. Often, approximately five meters of such material need to be used.
To make the product colorful, it is better to use several varieties of colors.
Using Kazashi technique
To arrange a composition of flowers, you need to use the Kazashi technique. She is also referred to as Kazasi. It first appeared in Japan, where girls decorated their headdresses with such flowers.
You can often see complex compositions in which buds hang down and long threads are used. The basis of this method is that a special folding of the material is performed, as well as pieces of tape, so that as a result, sharp and on the other side rounded petals and leaves are formed.
For assembly, tweezers are used, the free ends are secured with glue. A multi-layered bud made using this technique looks quite beautiful. To do this, you need to collect the petals and overlap each other. The same type of workpiece is used, but different in size.
Then you will get a bouquet of different flowers. The elements made using the method under consideration will combine perfectly with braid or beads, or openwork objects.
Using shibori technique
Another Japanese technique is shibori. It is most often used to create body jewelry. For example, these are earrings, bracelets and other elements; in addition, you can use them to decorate a bottle. The ribbon is made in the form of a crinkled piece of fabric, which has a different color, ombre color scheme.
At the beginning of creating the composition, you need to crumple the material, tie knots , so that the end result is a rainbow-type color. This moment is fully the work of the master’s imagination. During operation, the tape is glued to the glass.
If you do not use decor, the material will still look impressive. However, craftsmen often use fittings and other decorative elements. The composition will be voluminous due to the fact that it uses folds and various decorative elements.
Decor using decoupage technique
The decoupage technique is widely used in the design of various household items and decor. You can also use this decoration method when decorating champagne.
If both the bride and groom have experience in making things with their own hands, you can prepare a surprise for each other.
Tools:
- napkins with themed patterns;
- degreaser;
- soft sponge;
- brushes;
- primer;
- sandpaper;
- acrylic lacquer;
- paints.
Advice. Photos of the newlyweds are also used instead of napkins.
The initial stage is preparation. Bottles must be cleaned of paper labels and wiped thoroughly. Degrease the surface with alcohol. It is recommended to remove the foil from the cork itself.
Primer treatment will help create a suitable background and prepare the surface for further work.
A soft sponge will be useful when processing. The primer must be applied evenly, using patting movements. After the first layer has dried, a second layer is applied. The component must dry thoroughly. After drying, the surface is carefully sanded with fine-grain sandpaper to obtain an even coating.
The required design is cut out from the napkins.
When cutting, you should step back a few centimeters from the ornament. The picture is applied to the selected area and treated with glue. When working with glue, all folds and irregularities are carefully smoothed out. After drying, the edges can be lightly sanded to eliminate any defects and smooth out the contour. Finally – varnish treatment.
How to decorate a bottle for a wedding with ribbons - step-by-step instructions
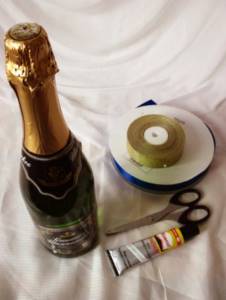
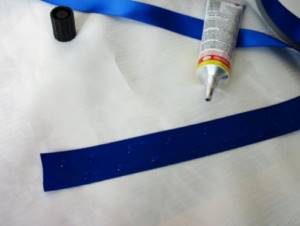
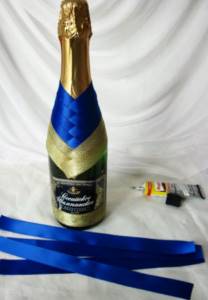
To cover a bottle with tape you will need:
- a bottle of champagne;
- satin ribbon;
- brocade ribbon;
- decorative elements, for example, beads;
- glue and scissors.
Regardless of whether the container is full or empty, it must be prepared in advance. Initially, the label is removed, and the remaining adhesive must be removed.
There are methods that can be used:
- soak the paper using hot water and remove with sharp movements. This technique is not effective enough because the adhesive layer may remain and will have to be removed;
- use dry and hot air to tear off the paper.
In the latter case, you can use a hair dryer that is turned on at full power. When the bottle is clean, it needs to be washed and dried. After this, the glass is wiped using a cotton pad soaked in an alcohol base. This will remove the fat from the bottle so that there is better grip.
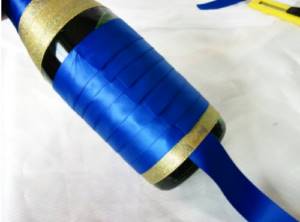
The master recommends using the drink in a bottle with gold foil . The amount of tape depends entirely on the width. The example below uses a material that is 2.5 centimeters wide. If you use a narrow tape, you will need more of it.
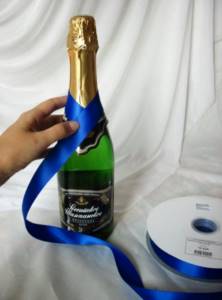
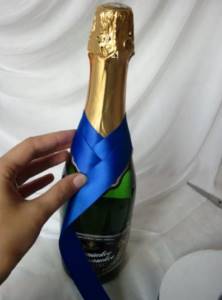
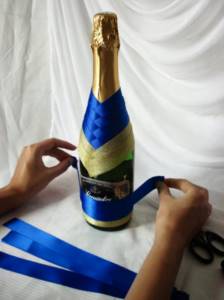
Initially, take the bottle and tape and, using a simple application to the throat, take a measurement. You need to find out how much material will be spent on the first turn.
Make a cut and put dots of glue, but you should not smear it too much, as the substance will begin to flow.
In the example in the photo, a lot of glue was used.
Next, take the cut element and wrap it around the bottle. You need to do this in such a way that the wrapper is not visible. The tape should be taut so that the edges lie flat.
Then measure out the desired tape size again. Due to the fact that the throat has an extension downwards, a different length of material will be required.
When applying glue, put dots and glue the ends of the tape so that it looks like in the first photo. If this condition is met, the weaving will be smooth.
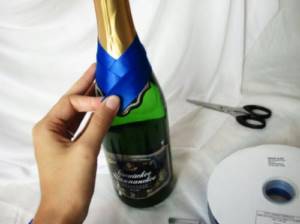
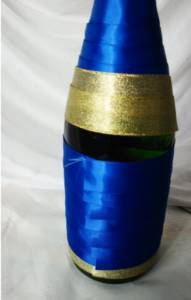
The third and fourth strips are made in the same way, which are measured, cut and glued. Next you should move on to the brocade ribbon, it is quite rigid and tends to stretch poorly. For this reason, you need to use it a little. The process is presented in the same way: measuring, cutting and gluing. This is how two layers are formed.
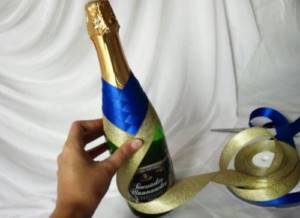
Using the above steps, we managed to reach the place where the neck turns into a bottle. There is a strip of gold color running through the lower part. It is also measured and glued. However, you need to do it in such a way that the seam at the back is even. Next, about eight blue ribbons are cut, they are of equal length.
They are glued with tension.
You need to put one layer on top of the other and use the overlapping technique, approximately in the middle. This means that approximately half of the previous layer will be visible.
The result should be an uneven seam and an unclosed part of the bottle at the back.
You need to close this seam. To do this, use a thin knife to free up space for the tape.
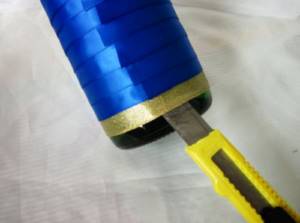
The edge of the tape is glued and inserted into the target.
The entire tape is lubricated with adhesive and pressed by hand.
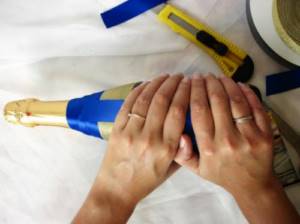
Now all that remains is to glue the last layer of brocade tape.
If the corner of the tapes stick out, you need to cut it, then you get a finished bottle. All that remains are the finishing touches, that is, the decor.
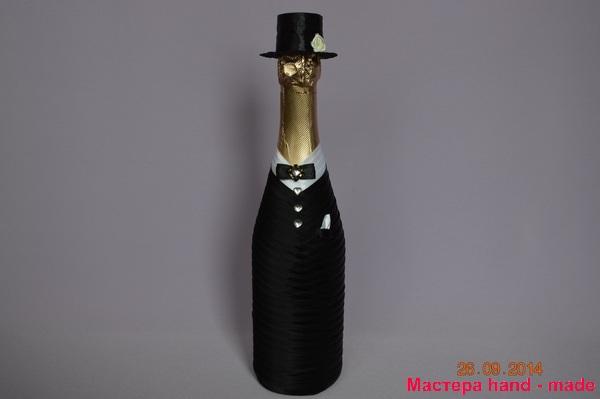
Wedding champagne - groom
The groom is done in the same way as the bride. The only difference is that the first four turns are made of white tape, and all the rest are made of black. Decorated with a butterfly made from a thin black satin ribbon and decorated with rhinestones.
You can see how to make a bow tie here.
I also glued three rhinestones to imitate buttons.
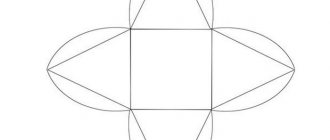
And also, I folded a rectangle of thin black tape - this will be the pocket flap. To which I glued a piece of white tape from the inside - this will be a scarf
And she glued it all at the level of the breast pocket of her tailcoat. Wedding champagne - the groom is almost ready, all that's left is the pot. Master class which can be viewed here.
Wedding champagne - groom
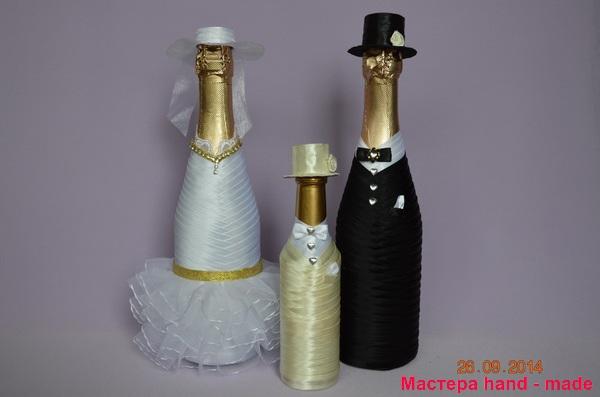
Wedding champagne - bride and groom
Well, the small bottle is made exactly like the groom. And since the bottle was not champagne, I painted the neck of the bottle with gold paint. I covered the surface that I was not going to paint with tape. And painted it with gold paint from an aerosol can.
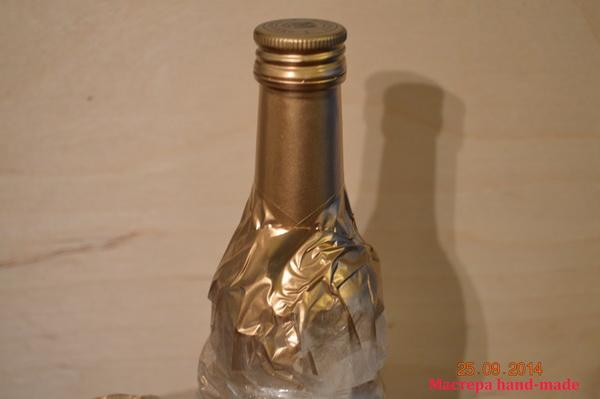
Covered with tape and painted
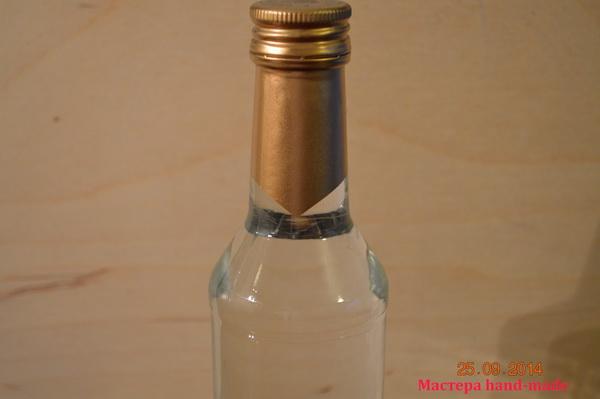
Painted the neck with gold paint
And the tailcoat was made from cream colored tape.
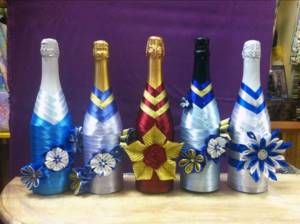
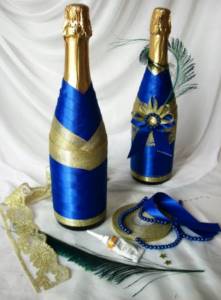
This is how I decorated three wedding bottles of champagne.
DIY wedding champagne
Well, here’s a photo of the complete set: wedding champagne and wedding glasses.
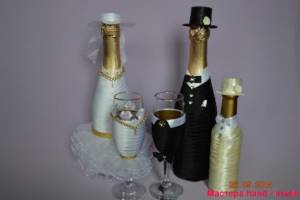
Wedding champagne and glasses
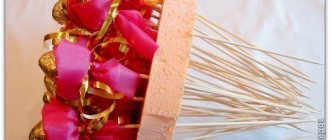
For this set of wedding glasses and champagne, you can make a Wedding Basket with your own hands.
Have you already calculated how much champagne and other drinks you will need for your wedding? If not, then use our alcohol calculator