Many modern couples do not want to buy classic wedding rings for their wedding, but come up with something more interesting so as not to be like others. And if you won’t surprise anyone with non-standard wedding jewelry with stones or complex designs, then homemade wedding rings are something new, at least in the CIS countries. In Europe and the USA, newlyweds have long loved this idea!
Making wedding rings with your own hands does not mean demonstrating your desire to save money, because in many cases, hand-made ones in terms of materials, execution time and labor costs are more expensive than ordinary gold bands. But the final result will be worth it! The Svadebka.ws portal will tell you in detail about how and where you can make designer rings, which will have no analogues.
What can you make a ring from with your own hands?
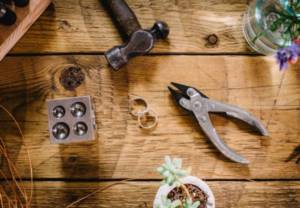
Materials for making jewelry at home can easily be found in craft or hardware stores. You can even make a ring with your own hands from silver or gold - you just need special tools and the ability to melt the metal.
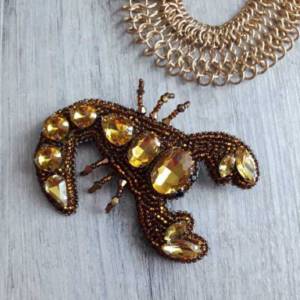
The most popular materials for making rings : wire, polymer clay, buttons, beads, beads, old paper, coins, leather, wood, brass.
Watch the video of the “Ring Making” course and you will learn how to make the most original jewelry.
DIY ring photo
Read here - Do-it-yourself medical mask - TOP 100 photos and step-by-step instructions with diagrams of the best ways to create
Did you like the article?
0

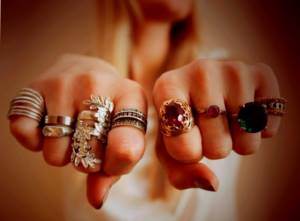
Types of rings
Finger jewelry is classified according to the design, function, style, and treatment of stones that adorn the jewelry. At the beginning of the 21st century, piercing rings, which are inserted like earrings into the nose, lips, and ears, became popular. Their analogues, open-ended decoys, are also popular. You don't need to pierce anything to wear them.
The broadest classification is simple and complex. The first type includes both ordinary rings without decorations and those decorated with engraving, perforation, weaving, and small patterns of precious stones or crystals. The second type is distinguished by large inserts and complex decor.
Varieties by design:
- cocktail - with especially large and bright stone inserts (patterns in the shape of berries, flowers, butterflies);
- Trinity - a composition of three intertwined rings, the classic version - of three types of gold;
- ring – a gold or silver decoration with a large precious or semi-precious stone or natural pearl;
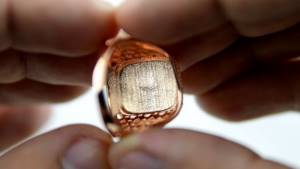
- signet is a subtype of ring with an engraved pattern; in the 19th century and earlier, the engraving served as a family coat of arms. This decor was used as a seal on documents. Worn predominantly by men;
- “slave bracelet” – a ring connected by a chain to a bracelet or other ring (the number of links is usually small);
- with suspension;
- open;
- for 2 or 3 fingers;
- phalangeal - two (or more) small rings connected by original decor. Worn on the second and third phalanges of the fingers.
Types of jewelry by function:
- wedding bands - most often simple gold bands, sometimes with decorations or engravings;
- engagement - differ from the previous type in a luxurious and complex design;
- archer rings - wide, specially shaped jewelry for the thumb, were popular in the ancient East, now they are sometimes worn by archery enthusiasts;
- mourning - black or white rings containing any detail associated with the deceased (name, initials, years of life), were common in the 18th-19th centuries in European countries.
Finger jewelry is divided into types according to style (modern, classic, vintage), method of stone attachment (solid cast, pavé setting, etc.), gender and age (men's, women's, children's). Products should always be combined with earrings and other jewelry and outfit.
How to make wedding rings for a car and is it worth the trouble at all?

Photo from the site: vmeste-ryadom.ru
Circumstances, in fact, can develop differently in life, and it happens that wedding decor is simply unavailable for some reason. Moreover, buying such an original decoration for a car in a store will not be a cheap pleasure. Moreover, all the models that are displayed on the shelves in the showroom are practically the same and not original; they are unlikely to help you stand out from the gray mass. By making wedding rings for your car with your own hands, the photo is worth examining as closely as possible; you will make your wedding cortege exclusive, something that no one else in the whole world will have, especially if you show imagination and creativity.
It is clear that the rings will become the main decoration of the car in which the newlyweds, who have just consummated their marriage at the registry office, will drive. Therefore, they should be very beautiful, decorated with flowers and ribbons, and the materials for their manufacture can be chosen exactly the same as indicated in our master class, or you can come up with something of your own, then the rings for the wedding car will be completely original.
On a note
Flowing ribbons, bows and garlands of flowers look very beautiful, but it is worth understanding that they can not only quickly tear and lose their appearance if caught on something, but also pose a danger, so they should never be made excessively long.
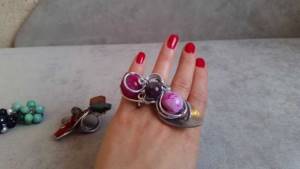
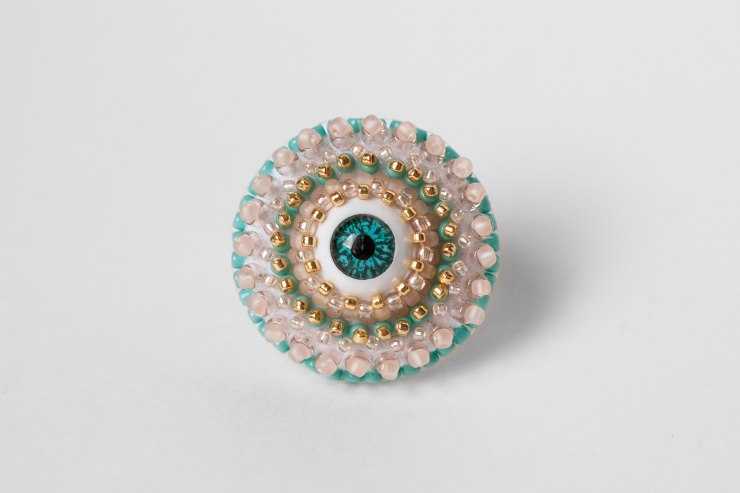
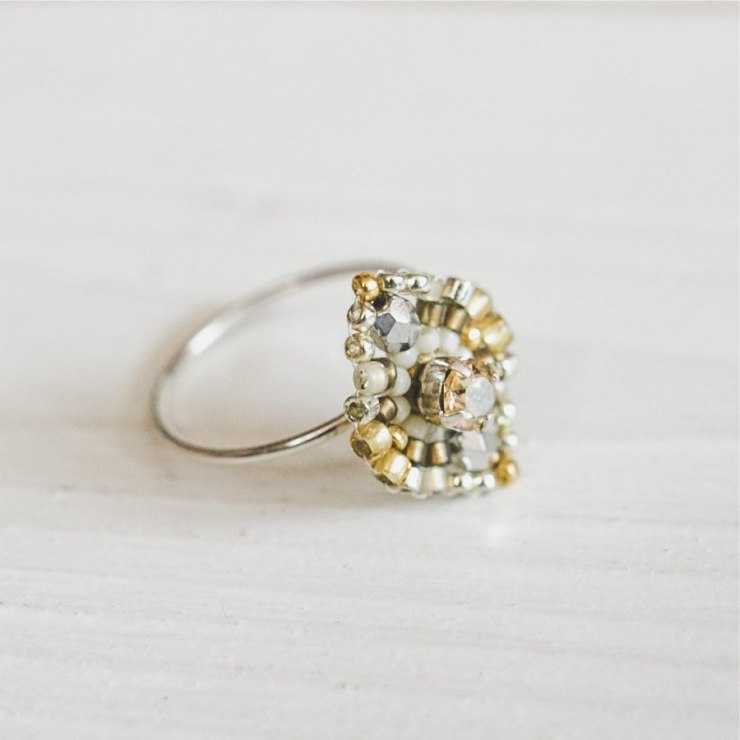
DIY ring with stone
Jewelry with stones is made on a special round base, which can be purchased at a craft store.
Required materials for production:
- natural or artificial stone;
- the basis;
- strong glue;
- handmade paint, brushes, foil;
- wire - if desired.
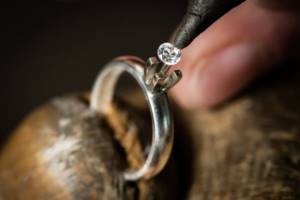
To make a ring with an alexandrite, emerald, diamond or any other precious or semi-precious stone, you need to draw an imitation of the frame at the bottom of the stone, glue it to the base, leave it and dry for a period of 7 to 10 hours. If the stone is artificial, after gluing it and the base can be braided with wire and painted.
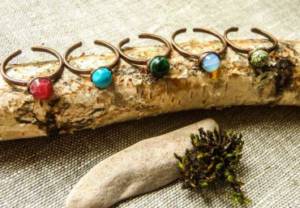
How to make a copper ring with your own hands
A copper ring is the name given to jewelry made from either a solid strip of copper or wire.
How to make a ring with your own hands:
- Cut a ribbon from thick copper or 2-3 from a thin sheet.
- Apply flux to the surface to prevent the copper from oxidizing.
- Lay out the solder - a special material for soldering, and heat it up.
- Immerse the strips in acid, which is sold in specialized stores. As a result, they will stick together tightly.
- Using sandpaper, smooth the edges of the resulting copper plate.
- Bend it into a closed ring with pliers.
- Place it on the mandrel and hammer it to give the correct shape.
- Sand the edges and surface with sandpaper.
- To get the usual dome-shaped shape, it is recommended to sand it with a special machine.
- At the very end, polish with cotton wool.
It is much easier to create a decoration from twisted wire . To do this, you need to wind a piece about 0.5 meters long onto a crossbar or its substitute, leaving long ends, then start twisting them into a spiral, holding it with your finger so that it is even. When the spiral reaches the desired size, remove the ring, press the coils with pliers, cut off the ends, fold the remaining pieces and press them to the wrong side. It turns out to be a beautiful ring with a spiral decoration.
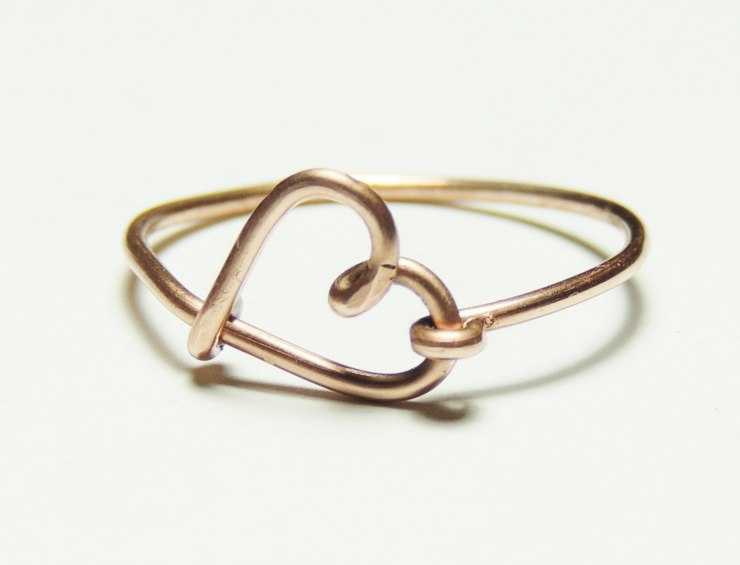
Wire rings
It’s worth noting right away that you will need not ordinary wire, but golden wire. You can purchase it in specialized stores at a very reasonable price. You can make a wire ring with your own hands in literally 5 minutes, having all the necessary elements.
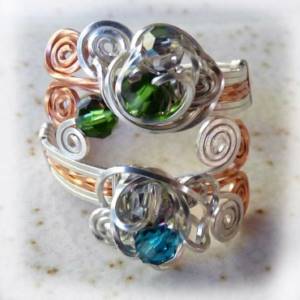
To begin with, again, you need a blank of paper for the finger on which it is supposed to be worn. Then, a neat circle is made from wire, corresponding to the workpiece. After this, this circle must be carefully wrapped in layers of wire to give the ring strength. Once at least 2 of these layers have been applied, you can think about how to decorate the ring.
We recommend reading:

DIY crown: TOP 100 photos of new products and exclusive options. Step-by-step instructions on how to make a beautiful crown (video + master class)- How to make a wooden door with your own hands - detailed instructions from masters on how and what to make an entrance and interior door from

Sew curtains with your own hands: the best sewing ideas and stylish options for making curtains (100 photos)
It is quite possible to make a pattern from wire applied on top, which will differ slightly in color. Or you can use an ordinary pebble and golden paint to make a whole “piece of gold”.
You just need to paint the pebble and wait until it dries. After this, tie it with gold wire to the ring.
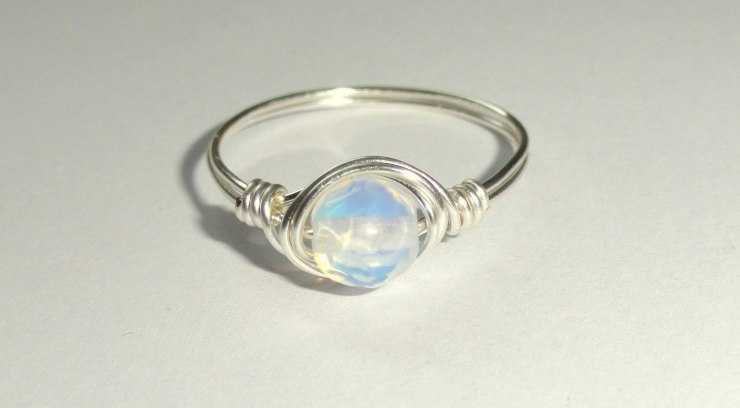
The result is an excellent ring, which is quite suitable for costume parties and theme nights.
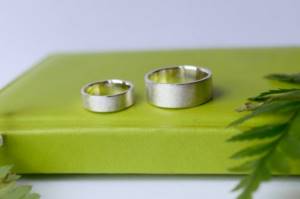
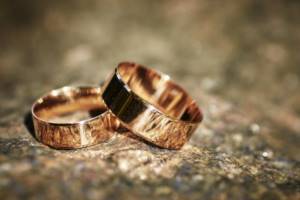
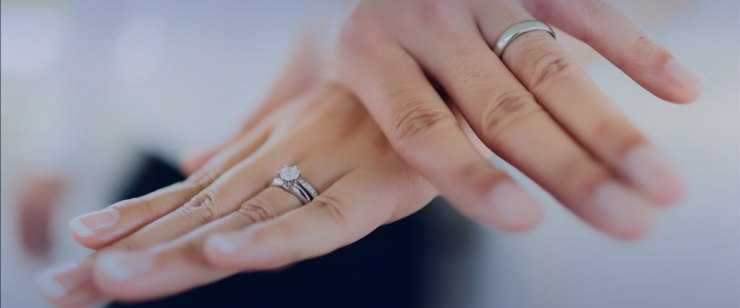
How to make wedding rings with your own hands
Making wedding rings with your own hands is possible. Special master classes are held in Moscow. The manufacturing technology - melting - is reminiscent of creating jewelry from copper or metal with stones.
Scheme for making wedding rings:
- Melt a piece of gold (or silver) in a crucible.
- Pour into a cast iron mold.
- When the workpiece hardens, roll it out in a rolling press, the result will be a strip.
- Heat it, roll it into a ring, and solder the ends.
- Place it on the crossbar and use a hammer to give it a rounded shape.
- Sand with a machine and use a rubber pad at the final stage.
You can make a festive decoration correctly under the guidance of a specialist.
Master classes
This is not only an interesting pastime, but also a great way to test your soulmate, especially if it comes to the wedding.
First, a rough sketch is drawn, then measurements are taken from the ring fingers. The type of silver is selected. Next, you can start making wedding rings.
We recommend reading:
Do-it-yourself brooch: master class from and step-by-step instructions on how and what you can make a brooch from (125 photos)
DIY birdhouse - the best ideas and tips on how to make a beautiful and decorative birdhouse (video + 120 photos)
How to make a candlestick with your own hands - the best ideas, instructions and master classes on making candlesticks (95 photos + video)
Ingots are melted, blanks are rolled, and inscriptions are stamped on the inside of the rings. After this comes an important point - soldering. However, after the work is completed, the seam will not be visible at all. Finally, the couple enjoys the original rings.
Engraving
It's usually used on wedding rings, but it looks good on any metal thing.
To make engraving at home you will need:
- clear nail polish;
- liquid for removing it;
- toothpick;
- a glass of salt water (2 tablespoons, you can add a spoonful of soda);
- phone charger.
To engrave your own ring, you need:
- Coat the product with varnish.
- Draw the desired pattern with a toothpick and write the text.
- Thoroughly stir the salt in the water, put another metal object (spoon, plate) into the glass and lower the decoration with the place where the engraving is applied.
- Connect the charger with the positive terminal to the ring, and the negative terminal to the object in the water, turn on for a period of 1 to 5 minutes. This will begin the etching reaction - the liquid will boil and darken.
- Remove the ring and wipe off the varnish.
In order for the engraving to be smooth and accurate, you must first practice on other objects.
How to make a signet ring
Making a unique designer signet ring is possible using an ordinary nut. For work you will need a grinder, a file, sandpaper (grit - from 220 to 600), a file, a knife, a vice.
Manufacturing algorithm:
- Secure the nut with a vice and round all sides except one - leave untouched for printing.
- Grind down the sides and the inside threads using a drill.
- Smooth the surface with a file, polish with sandpaper until the resulting product becomes matte.
The pattern on the signet is made by engraving.
DIY coin ring
You can make a ring from both ancient and modern coins. To work, you need a crossbar or its substitutes, a hammer with plastic heels (so as not to damage the design), a drill, a torch, water and polishing tools.
How to make a ring with your own hands from a coin:
- Drill a hole in the middle to fit your finger.
- Heat on the burner and cool: steel - slowly, carefully moving it away, metal - sharply, lowering it into water.
- Place on the crossbar and hammer into shape.
- Smooth corners and polish.
To remove the sloppy thickening on the side, it is recommended to use a Dremel - a tool for cutting any metal.
Simple but beautiful DIY car rings: master class for dummies
It is clear that first it would not hurt to carefully examine and study the rings for the car, photos of which can be found on the Internet, in order to at least roughly imagine what should happen in the end. While it doesn't hurt to experiment and improvise, the more you add personality to each detail, the better.
Let's start from the beginning: the plumbing pipe turns...
So, having picked up the corrugated plumbing hose you bought the day before, you have to figure out how to make rings for the car from it. First you need to cut the hose, but not into equal parts, because one ring, supposedly male, should be larger, and the second, female, on the contrary, smaller. Make the sizes of the segments arbitrary, but too much difference will ruin the entire composition, so it’s worth exercising moderation.

Photo from website: rukodel.tv
The sections of the hose must be secured in the form of a ring with tape, and its entire surface must be completely covered with the same sticky and universal material. This way we will remove its ribbed, corrugated surface, which may interfere with subsequent decor.
Wedding rings for a car: how to decorate them with ribbons
We take the selected ribbon for flowers, two centimeters wide, and begin to methodically wrap the resulting rings around the perimeter, strictly making sure that there are as few gaps as possible.
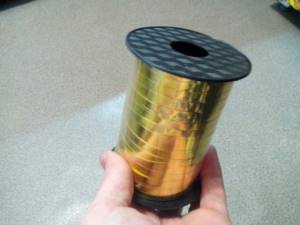
Photo from the site: kolca-na-mashinu.ru
It is quite acceptable to walk around the perimeter several times so that they become beautiful and you won’t notice a regular hose underneath them. In the same way, you can wrap the rings in a fabric of any color of your choice, but gold, of course, is best.
Installation of rings on the “pedestal”
Taking the rings with your fingers, you need to try them on the piece of foam plastic that you prepared in advance. Moreover, you need to make sure that they look beautiful. Secure them together by tying them tightly with thinner ribbons for flower decoration.
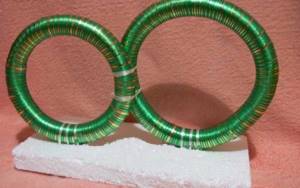
Photo from the site: liveinternet.ru
You can pierce holes in the foam using a knitting needle, and then stretch thin ribbons through them. It is these ribbons that will secure the rings to the pedestal. Make sure they are all tied well.
Making fastening tapes: how to attach rings to a wedding car
Next, you need to cover the bottom of the foam stand with any fabric, wrap the edges of the fabric and sew with a suitable thread. This will prevent either the flowers or the foam itself from scratching the roof or hood of the car, depending on where they will be attached. Next, all that remains is to tie the fastening ribbons, and all that remains is to decorate our rings with flowers and bells.
Take wide satin ribbons and cut two pieces of three to four meters from the total roll. Pull the ribbons under the rings and foam, and then tie just where they attach to the foam. This way, the entire decoration on the wedding car will appear to be in two loops with long ends, which we will use a little later to teach you how to attach wedding rings to the car.
The finishing touch: decorating with flowers and bells
At the end, you need to take the artificial flowers selected in advance and, cutting off their stems, carefully insert them into the foam at the base of the rings. Moreover, you should definitely use glue from a gun, if you have one, so that the flowers do not fly away from the wind when the wedding procession rushes to the registry office or to church.
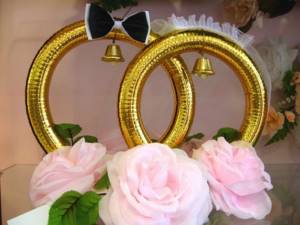
Photo from the site: svadbavo.ru
Moreover, your imagination is not limited by anything; you can choose snow-white or scarlet roses, lilies or even violets. Even plastic orchids, which can now be easily found on sale, will look original.
It will be nice
At the top of each ring you can attach the same bells that we have already talked about. Of course, they may not ring like a troika of bells, but they will add charm.