Needlework
06.28.2018 Anastasia Prozheva
When preparing for a celebration, such as a wedding, you can paint the glasses yourself. The master class includes several ideas and techniques for creating original drawings and patterns on a glass surface. The main difficulty in painting glasses is the need to ensure that the paint does not spread or smear. Therefore, for painting on glass you should use special paints: stained glass, acrylic, contour. A set of any type of paint can be purchased at a craft store.
Also for painting you need regular squirrel brushes of different thicknesses. You can also use sponges, cotton pads to apply a pattern according to the template, as well as cotton swabs and toothpicks to draw small details.
General rules
Having decided to test your talent in needlework and demonstrate your taste, be patient and remember the main working points.
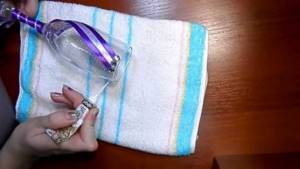
Before you start decorating the glasses for the wedding, you will have to wash them until they shine, and then degrease the glass surface. To do this you will need pure alcohol or acetone. The processing will be better if you wipe the wine glass with a cotton swab. The glasses must be degreased first.
The creative process should be carried out with cleanly washed hands. It is necessary to keep wet wipes ready. They will remove droplets of glue from your hands.
To remove adhesive drips formed when decorating glasses with your own hands, use any solvent, including acetone used for degreasing. Depending on the size of the glue stain, it can be removed using:
- ear stick;
- toothpicks;
- needles.
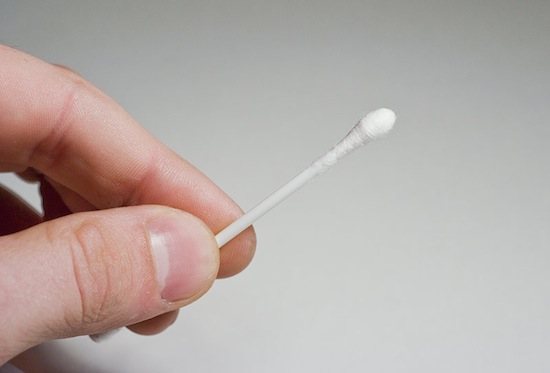
Remove glue stains with ear sticks
Ensure high-quality lighting of the workplace, otherwise many small defects may remain on the wine glass. It would be a shame if they ruined the impression of the original design of the wine glass.
Since champagne glasses can be decorated with a variety of materials, it is useful to know what glue to use to fix what.
So, textile elements are glued with ordinary PVA, miniature details, such as beads and rhinestones, are attached to an adhesive composition with a cyanoacrylate base, and bulky beads are forced to stay in place with “liquid nails.”
Volumetric parts are attached with a glue gun
How to paint wedding wine glasses with an outline on glass - master class
Painting glasses for a wedding with an outline on glass is a fairly easy technique. But at the same time, you need to try to create dots and lines on the paper so as not to spoil the workpiece.
For painting you will need:
- contour paints;
- masking tape;
- cotton pads and alcohol;
- stencil.
Glasses are cleaned and degreased with alcohol or acetone. After preparation, thin strips of tape are used to glue the stencil onto the bowl.
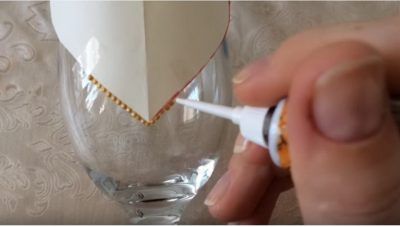
Take a tube of paint of the main color and begin to apply dots along the outline of the stencil. When the figure is completed, the adhesive tape is removed and the gluing area is degreased with a cotton swab.
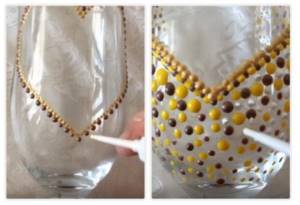
After the glass has dried from the alcohol, the boundary is closed and the next stage is started. Sometimes there is a more complex method of execution - drawing a solid line.
When the main figure is completed, dots begin to be drawn on the sides of the wine glass. At the same time, they try to ensure that the different colors and sizes of the circles are distributed randomly.
The dots gradually become smaller, leaving large gaps between them. At the same time, a clean strip the size of the main pattern is maintained at the back. This is done to make the glass look lighter and lighter.
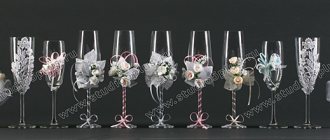
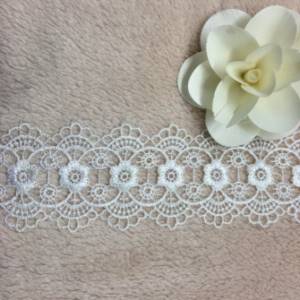
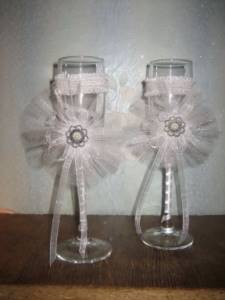
Decorating glasses with lace
Lace is often used to decorate wedding glasses, as it conveys a feeling of lightness, grace and femininity.
To create a wedding glass you will need:
- Lace, lace ribbon;
- Glue gun or transparent super glue;

Attention! Before applying any decorations to the surface of the glasses, it must be thoroughly cleaned using a cloth with alcohol.
Step-by-step instruction:
1. Take the lace of the required length, leaving an allowance of a few millimeters. Glue the lace using a glue gun or super glue to the surface of the glass.
2. To decorate the stem of the glass, gather the lace using a needle and thread and glue it with glue. 3. The presented instructions are a basis that can be varied with various decorative elements. For example, add a small ribbon bow to the stem of a glass, or glue rhinestones, beads, and sparkles using a glue gun.
Read on the topic: Indoor hibiscus (Chinese rose): home care, types and reproduction
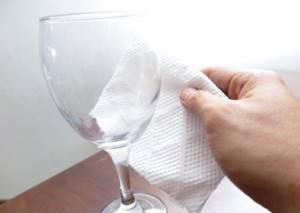
Clean the surface of the glasses
You need to clean the surface of the glass with alcohol and a paper towel. This will help remove dirt, oil, fingerprints and soap film that can mar the designs on your glasses. Leave the glass to dry for 7-10 minutes after wiping.
If there is no alcohol, then you can use regular white table vinegar, as it has similar cleaning properties.
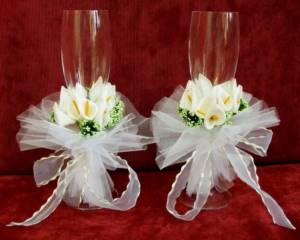
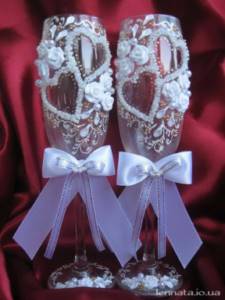
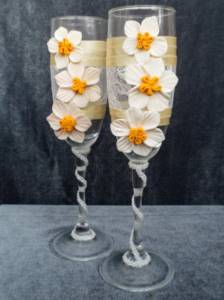
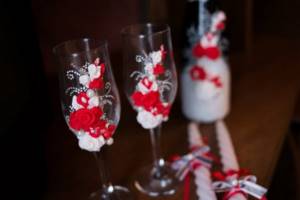
Decoration with lace flowers
Glasses decorated with flowers made from lace ribbons will look impressive. You can create them yourself using various types of lace.
To create lace flowers and decorate wedding glasses with them you will need:
- Lace fabric with a beautiful motif or ribbon lace 3-4 cm wide;
- Satin ribbons, in shades that are similar or identical to the overall color palette of your wedding;
- Beads for decoration - 3-4 pcs.
- Rhinestones
- Glue gun or super glue
Step-by-step instruction:
1. Cut the lace along the length of the glass, leaving a few millimeters to frame the edges. 2. Glue the lace just below the rim of the glass.
Attention! Try to use minimal glue for gluing lace, otherwise it will go beyond the material and ruin the appearance of the product.
After gluing, you need to hold the lace with your hands for a few minutes.
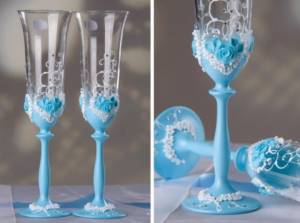
3. While the lace is drying, you can start decorating the stem of the glass. To do this, take a thin satin ribbon and wrap it around the leg in the form of a spiral. The ends of the ribbon can be decorated in the form of a bow or the ends can be hidden using a bead or rhinestone. 4. Let's proceed to the most important stage - creating a lace flower. It is better to create a flower from ribbons of bright and contrasting colors.
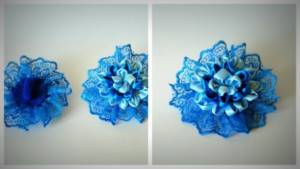
To form a flower, roll the ribbons at your own discretion. These could be roses, forget-me-nots, etc.
Using ready-made flowers will not spoil the wedding glass at all, so before you sit down to decorate wedding accessories, you need to think about the future design in advance and prepare decorative elements.
Look how beautiful the glasses look, decorated with ready-made flowers and bows.

You can complete the design of the glasses with rhinestones, beads or elements painted using stained glass paint.
Apply adhesive tape
Since some paints are quite toxic, it is important to leave the rim of the glass free of paint. Its height should be approximately 2 cm. To do this, you need to glue adhesive tape of the appropriate width to the rim of the glass.
You need to make sure that the tape is even. For best results, use masking tape. It can be glued evenly, and it will not form wrinkles.
Feathers
It looks very unusual and stylish. The main thing is that the feathers do not shed - be sure to check this before you start decorating the glass. Feathers can be attached to the bottom of the workpiece or to the leg. Multi-colored feathers laid out in layers look great. The more contrasts, the better!
For inspiration, you can look at examples of decorating wedding glasses with photos and create something of your own based on this. Beads can be attached to feathers.

It’s better to fix everything with superglue. But PVA will also work. True, it often smells too intensely, and glasses will need to be made in advance to keep them in the fresh air and eliminate the smell.
Stained glass paints
Painting wedding glasses with stained glass paints is more suitable for experienced craftswomen; for beginners, such decoration will be a little more difficult. To complete the work you will need the following materials:
- paints for painting on glass;
- circuit;
- paste;
- putty knife;
- napkins;
- beads, rhinestones, ribbons;
- pearlescent paste;
- palette knife.
To decorate wedding glasses using glass painting, follow this sequence of actions:
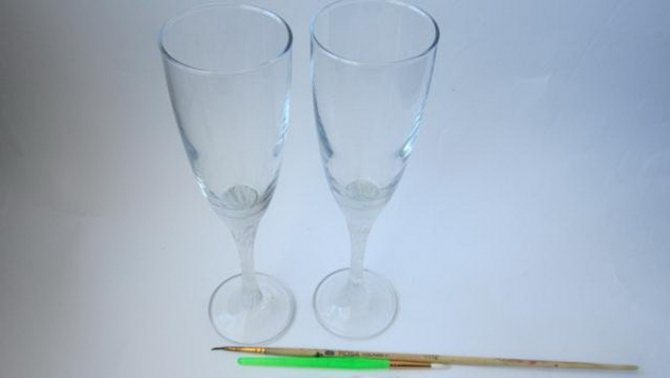
- Degrease the surface of the glasses by wiping them with alcohol or glass cleaning liquid.
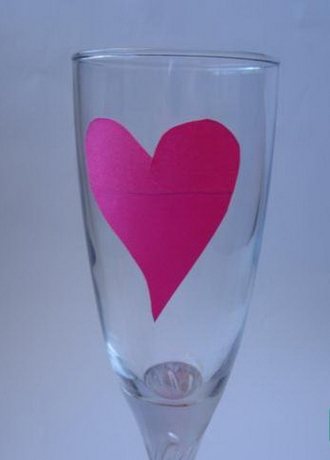
- Draw a small sketch of a heart on paper, cut it out, attach it to the glass and trace the outline.
- To obtain an accurate design, experienced craftswomen recommend placing the glass on a soft surface; a small pad will do. You need to place it on the table and apply drawings, so your hand will not tremble.
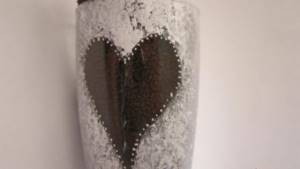
- After applying the contour, the paint must dry for 6 hours.
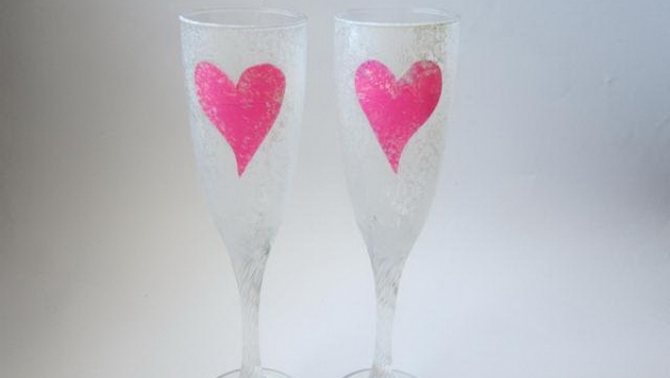
- When the outline is dry, it is painted over with stained glass paints. An outline decorated with rhinestones, golden or silver sand or manicure powder will also look beautiful. Do not forget to cover the entire surface of the glass with a palette knife, which will protect it from moisture.
- Tie the glass with a beautiful openwork ribbon.
0 Comments
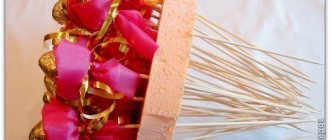
Rose petals
How beautiful these glasses turn out! The only negative is the fragility of the composition. Therefore, it must be done right before the celebration. In order not to worry about the result, you can prepare backup glasses with a different design just in case.
You need to take the living roses apart into petals and glue them overlapping from the edge of the glass to the stem. You need to start with small petals and attach larger ones to the bottom.
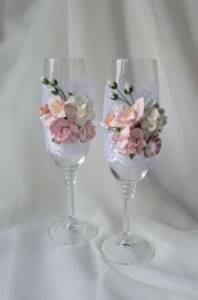
You need to wait until each row dries. The leg can be wrapped with tape in a spiral or simply secured with a small braid, hiding the traces of the fastening of the petals.
An alternative would be to use petals from artificial flowers if the couple has no prejudices. This will save a lot of time and nerves, because the glass will definitely turn out spectacular, and it can be made in advance.
Try to implement one of these ideas so that the glasses become a wedding decoration and delight the newlyweds!
Preparing for the creative process
The most unpleasant moment in the creative business of painting glasses comes when the bride and groom turn out to be great specialists in hand-made techniques. It is terribly difficult for them to choose one favorite craft to decorate their accessory in this particular style.
But before any intended decoration method, do not forget to perform several mandatory steps:
- Bring at least 3 finishing glasses (preferably more) so you have extra in case one of the two breaks.
- Wash the wine glasses thoroughly, wipe dry and degrease with alcohol, acetone or regular cologne.
- Immediately remove drops of adhesives or excess paint with a cotton swab dipped in solvent. In the same acetone, for example.
Be sure to practice in advance on a regular glass. It’s better to do it several times to master a new technique and consolidate your skills. Only then proceed to your glasses.
Decorating a wine glass for the bride and groom is a good tradition and an interesting activity
Decoupage technique
“This decorative technique is often used when decorating wedding bottles with your own hands.”
A very unusual way to decorate glasses for a wedding. You need to prepare:
- rice paper (white);
- decoupage napkin with a themed pattern;
- pearl paint;
- glue;
- Polish for hair;
- two-centimeter wide masking tape;
- regular varnish.
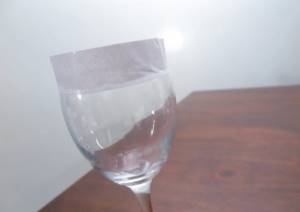
We prepare the surface for decoration. Use masking tape to protect the edge of the bowl. We wrap the remaining part with rice paper so that it fits closely to the edge of the tape. The side ends of the paper are fixed with an overlap, with a wrap of no more than 0.5 cm. The excess wrapper is torn off.
Initial stages of decoupage of glasses
The next stage of decorating wedding glasses with your own hands is fixing the paper to the surface of the glass. This is done as follows. The bowl is moistened with water and wrapped in paper. The paper will get wet and cover the glass evenly. All that remains is to fix it in this position by covering it with decoupage glue. It is applied with a flat brush. The base for decor is ready, and it is sent to dry.
This will be followed by colorful decoration of wedding glasses. We select the necessary fragments of the drawings and lay them out on a file or cling film. We treat the pictures with hairspray several times. This will promote better adhesion of the parts to the surface. Place the pictures one by one on the bowl of the wine glass and coat the top with glue.
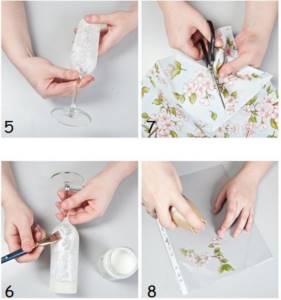
Spray the pictures with hairspray several times
At this stage of decorating wedding glasses with your own hands, you need to be especially careful. The pictures should not wrinkle or deform, so the glue should be applied from the center to the periphery and very short strokes should be made with a brush.
After all the elements are laid out and the glue has dried, the bowl of the wine glass is coated with glassy varnish and dried again. The glass is ready to use.
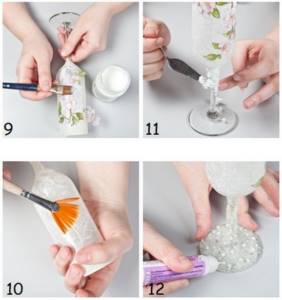
Final coating of glasses with varnish
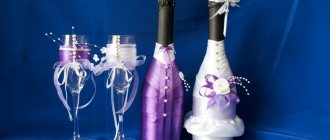
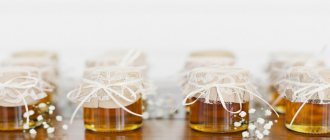
This decorative technique is often used to decorate wedding bottles with your own hands. Decoupage will make it possible to indicate the purpose of each of them. Don't understand what we're talking about? Whether wedding guests will drink from decorated bottles or not is a rhetorical question, but two beautifully decorated bottles must be on the newlyweds’ table. They will not be uncorked.
This champagne has a different mission. The first bottle will be unsealed to celebrate the first wedding anniversary, and the second will wait until the birth of the first child. The theme of decorating wedding bottles with your own hands is intuitive. The one that is destined to be drunk on the occasion of a new addition to the family can be decorated, for example, with angels; the second one, it makes sense to veil it under fabric. Choose a small floral pattern to look like printed chintz.
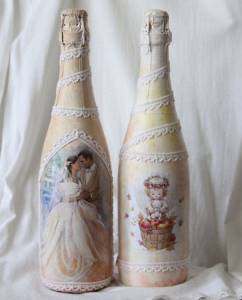
Decoupage bottles for a wedding
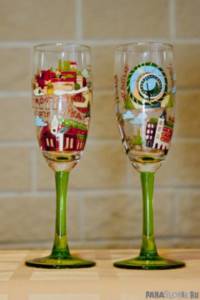
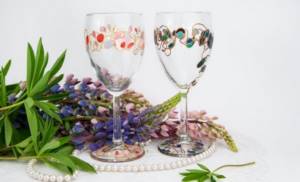
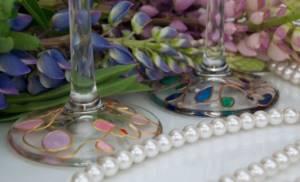
Painting with acrylic paints on glass and ceramics - glasses in Gaudi style
This summer I was in Gaudi's park-museum in Barcelona "Güell". It made an indelible impression on me - the play of shapes combined with a bright, enamel-like mosaic of small pieces of ceramic tiles of all colors! What a joyful mood these memories gave me during the long autumn. And now our gray winter has come, when you want even more bright colors around. And I decided to surround myself with a bright mosaic, painting it myself on everything that came to my hand. The glasses were the first to come across: there are so many holidays ahead, why not give them a joyful mood? Then bottles, mugs, and glass frames were used. When everything was over at home, I went to my friends to give them a bright mood. And today I want to share my secret with you.
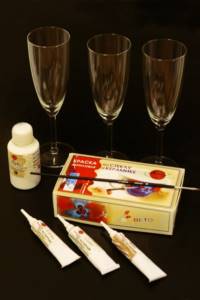
To paint glasses in Gaudi style you will need:
— Glass glasses or any other glass objects.
— Paints for glass and ceramics.
— Contour paste “Tair”, 2-3 colors
— Acrylic glossy varnish “Tair”.
— Thin elastic bristle brush No. 1-2. I prefer speakerphones, but synthetics are also suitable.
Before starting work, the glass must be thoroughly degreased. Both acetone and alcohol will do.
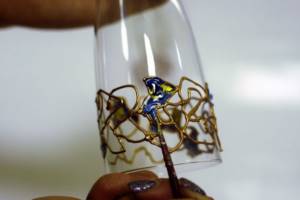
Now take the contour paste.
In the photo it looks like a contour: the same tube, the same tip, but in reality it is much thicker. It was developed for the restoration of cracks in baguette, so its color range reflects all shades of noble metals, but it can be used as an outline, although it will be more embossed, similar to metal wire. That's why I chose her.
Only I don’t draw it, but rather throw it from a distance, turning the glass in a circle. It itself lies in arbitrary intersecting lines, forming an intricate ornament of the future mosaic.
It's okay if the line is accidentally interrupted - after all, you can start from anywhere. The main thing is that the cells formed from the intersection of lines are not too large.
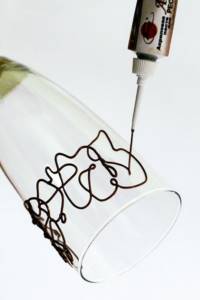
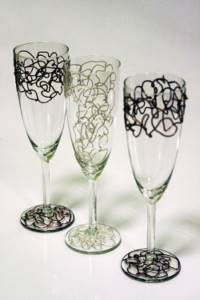
I have several glasses. I apply contour paste of different shades to each glass, here there is copper, light silver, and bronze. You can also play with the shape - somewhere it’s an oval, somewhere it’s the top rim of a glass.
To ensure that the final product does not look too busy, the design should not occupy more than 1/3 of the surface.
Let the product dry. You can continue working in an hour, and you can return to it the next day.
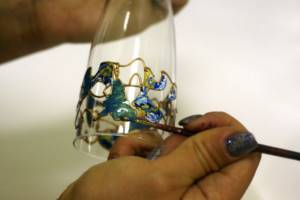
Now we will paint the cells with different bright colors. Next I will tell you a few techniques on how to make it interesting and original. It is important that cells with the same color do not lie close to each other. And you need to fill the entire area of the cell with paint.
Paints for glass and ceramics are not very transparent, but they are bright, concentrated colors that mix well and adhere tightly to the surface and at the same time do not flow.
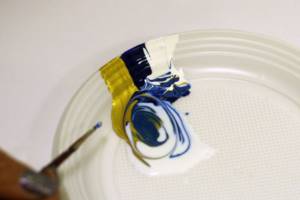
So, the first step:
We put on the palette two contrasting, but well-combined colors when mixed, and silver or gold between them. I took white, blue and gold. White and blue will give me all the depth of blue shades, and gold will add shimmering golden threads to them. Now I put three colors on the brush at once without mixing, and carefully place them on the glass, filling the entire cell. In this case, the paint is mixed and stretched in any combination. The colors do not mix completely, and this is how the effect I need is achieved.
Do not strive for a thin layer - the contour paste helped us create a high, even, relief line - the paint should not “run” over the edge.
Method two:
The most beautiful mosaic effect is achieved by the heterogeneity of adjacent cells. Let's take a little blue paint on the palette and mix it with gold to a uniform emerald color, and to make it thinner and more flexible, add a little acrylic glossy varnish to it.
The varnish appears milky and matte, but after drying it is completely transparent.
Let's fill some more cells with this color. I choose them randomly. Some, by the way, can be left empty - this will give our product lightness.
The third and almost final technique:
now take a little blue paint and mix it with varnish in a 1:1 ratio. This will give the paint transparency after drying. These cells will be completely stained glass.
This way I not only alternate the color in my work, but also the degree of transparency of each cell individually. Remember - the more diverse they are, the more interesting the effect will be.
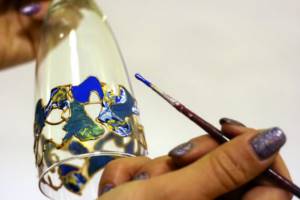
Well, the last trick:
Let's add bright contrasting spots to breathe life into our product. For this I take yellow. A bright, joyful color, it goes well with blue, and will complement and highlight gold, which is implicitly, but still present almost everywhere. We mix it with acrylic varnish 1:1, like blue, and apply it with bright spots not very close to each other, painting over the remaining cells.
Our product is ready!
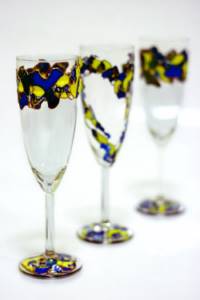
Well, that's not all. The last secret for a long and bright life for our paints:
after thorough drying, they should be baked for a day or better in a regular household oven. Baking increases the adhesion of the paint to the surface, and the glasses can be washed and used every day.
To bake, put the glasses in a cold oven, heat it to 120 degrees Celsius, but not more than 150 degrees Celsius, and wait 20-30 minutes.
You need to keep an eye on your glasses. They will not break, but if the paint or outline begins to bubble, you have not completely dried the product. If the colors begin to darken, the temperature is too high. You shouldn't bake them for more than half an hour. Turn off the oven and leave to cool without opening. After cooling completely, we take out our glasses and wash them. That's it!
Oh, and also how to care for them: you can wash them with any dishwashing liquid, avoiding the use of abrasive sponges. If the dishes are used for food, then only the outer surface is painted. Do not wash hand-painted items in dishwashers.
I wish you a bright mood from me, Larisa Sosnovskaya, and.
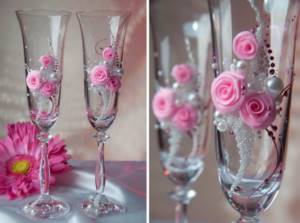
Modeling decor
A very exciting job that can become a hobby in the future. Do-it-yourself decorative elements for decorating glasses are made from polymer clay. At the modeling stage it will be possible to view a sketch of the future design. Don't be afraid to apply the composition to the glass and correct any imperfections. As soon as all the details are sculpted, they are baked.
Decorative molding on glasses
Before attaching decorations to champagne glasses, arm yourself with a wide nail file, carefully align the bases of your leaf flowers and open them with a layer of varnish. Now they are ready to decorate the glasses for the wedding. To complete the picture, you can add stems with a marker or add beads and rhinestones.
Read on the topic: Crafts from lids: the best models and creative solutions for beginning craftsmen

Add beads to complete the decor
Stages of dot painting of glasses
You should start by degreasing the surface, for which any of the above liquids is suitable. A cotton pad is perfect for processing a glass, but you can use regular cotton wool. You need to carefully treat the working surface, that is, the one directly on which the drawing will be applied.
After the processing process, you need to inspect the glass for the presence of cotton wool residues; there should be no small fibers on the glass. The degreasing procedure must be carried out with any painting technique. Since a greasy surface interferes with the durability of the design, very soon the paint on the painted glasses will begin to peel and peel off.
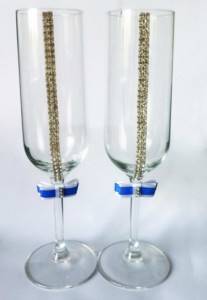
Rhinestones, sparkles and beads
Champagne glasses decorated with rhinestones and sparkles look festive and solemn. Ideally, their shape and size should match the decor of the wedding dress. Only the back part must be flat.
There are special rhinestones that already have glue applied to them. If not, use cyanoacrylate glue or clear nail polish.
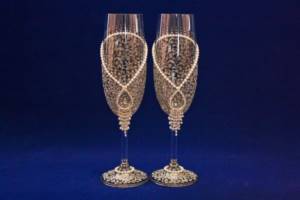
You are limited only by your imagination. Take rhinestones of one or several colors, lay out patterns, monograms, first and last names, hearts, flowers, rings and so on. Print out complex patterns, glue them to the inside of the glass and lay them out with rhinestones on the outside.
You can simply scatter rhinestones over the glass in a chaotic manner. At the bottom there is an almost continuous layer, at the edge there are separate droplets.
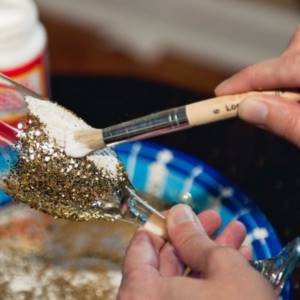
Decorating a wine glass with glitter with your own hands is also very simple. There is no need for a master class here. Just paint what you need with a thin brush dipped in glue, sprinkle it thickly with glitter and shake off the excess. Leave the glass until the glue dries.
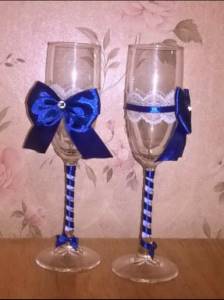
Decorating glasses with ribbons
Another material often used to decorate wedding glasses. The result of its use depends not only on the imagination of the decorator, but also on the level of his skill. Since with the help of tapes it is easy to create both light and complex elements. It is important to choose the right material. Ribbons can be of different textures, but must be the same width. Before use, be sure to process their edges. Otherwise, all the guests at the wedding may notice how they have begun to fray.
And then you need to create. You can make flowers of different sizes and shapes with your own hands, for example, roses. Even if you just make a knot from a thin ribbon, it will resemble a small bud. You can also make bows.
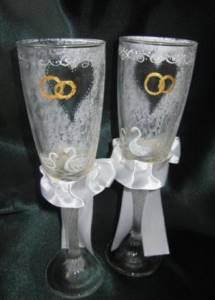
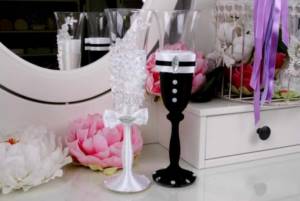
Nowadays it is fashionable to wrap wedding wine glasses with black and white ribbons, depicting the bride and groom.
A glue gun is most suitable for the job, thanks to which the material will last longer.
Expert advice
Of course, creating important attributes for a wedding is very exciting. But in the process of decorating, a lot of pitfalls can emerge that can ruin the whole job. For this reason, you should familiarize yourself with some advice from professionals in this matter.
- In order for the result to look neat, without pieces and threads of dried glue being visible, it is better to choose a special glue for glass and ceramics. It is distinguished by the fact that it hardens in a matter of seconds and has an absolutely transparent color. Silicone can be an excellent analogue of such a material.
- Many craftsmen prefer to use cyanoacrylate glue to attach the decor. It fixes beads, rhinestones and other small elements especially quickly. Its main advantage is that it is not afraid of moisture. You can really find it in any store selling construction supplies.
- PVA is often mentioned in master classes. It is well suited for decoupage and decoration with textile materials. It also leaves almost no residue. If inaccuracies do appear, they can be eliminated with alcohol or warm water.
- Before you start decorating wedding wine glasses, you should try out the chosen technique on any unnecessary dishes.
- Glasses should always be washed and dried well before use. Any remaining dirt or fingerprints can lead to the decor simply falling off at the most inopportune moment.
- After completion of the work, the glass can be coated with colorless paint or varnish for glass surfaces. This will hide all the imperfections in the work and make the decorations stick more firmly.
- Glass decorations can be purchased much cheaper at office supply stores or sewing supply stores.
- In order not to waste money on unnecessary materials, it is recommended to clearly decide on the technique in advance, think through each step and write a list of everything you need.
To make the glass beautiful in the end, choose glue for glass and ceramics
Before you start decorating, the glasses should be thoroughly washed and dried.
A wedding is one of the most important events in the life of a couple in love. In order to leave as many pleasant memories as possible from this event, you should not neglect the decor and decoration of the holiday. Glasses are what will be in the hands of the heroes of the occasion throughout the day. Therefore, wine glasses must be exclusive. And it’s better to make them yourself.
Such handmade products will appeal to all guests and will be kept in the family home for a long time. The main thing is to choose the most suitable and affordable method for decoration. If you have time, you can decorate glasses for guests. It is important to consider that glassware for sparkling drinks should not stand out from the overall composition.
How do you decorate glasses for a wedding?
Depending on the execution technique, certain paints are used, which vary for each case. When the drawing is done in a mixed style, several types of materials are used.
The main types of paints used to decorate a glass:
- Water-based acrylic (stained glass) paints acquire a muted glossy sheen when they harden, and when undiluted they give a slightly convex pattern. The picture on the glass takes a long time to dry; it may require firing to consolidate the result, but this method is dangerous for thin-walled wine glasses.
- Solvent paints, also classified as stained glass paints, are based on varnish compositions, which is why they are more fluid and harden quickly. Therefore, to increase transparency, a special solution will be required. Pictures look good on glass, especially if the design does not involve a ribbed surface.
- Contour paints are a thick mass placed in a tube with a sharp spout, made specifically for drawing thin lines. To make the pattern convex, the manufacturers created a fairly dense texture. After all, it is used for drawing details or contours.
Techniques used to paint wedding glasses:
- Dotted or confetti. The selected colors are applied with matches, toothpicks or cotton swabs, depending on the required diameter. In this case, acrylic paints are used to create the pattern.
- Decoration. Thematic motifs are depicted using brushes. Most often, buds or other plant patterns bloom on the glass. This technique will require some experience in drawing and working with glass.
- Picture in stained glass style. This design creates a specific pattern using stained glass paints, after which, after drying, an outline is applied depicting lead or gilded bindings. To make the glass look like a real cathedral, the base paint should be slightly translucent, showing the passage of light rays through the picture. This creates the feeling of a mosaic.

Stained glass paints are often used to create drawings, especially in an authentic style. And contour pictures are used to draw schematic pictures, or individual small details that should protrude above the surface.
DIY photo of wedding glasses
Sources
- https://yellowhome.ru/2018/01/21/oformlenie-bokalov-dlya-shampanskogo-svoimi-rukami/
- https://svadba.expert/podgotovka/banquet/bokaly/rospis
- https://kitchendecorium.ru/accessories-decor/dekorirovanie/rospis-bokalov-svoimi-rukami.html
- https://superarch.ru/otdelka/rospis-bokalov-akrilovyimi-kraskami
- https://ratatum.com/oformlenie-svadebnyh-bokalov-svoimi-rukami/
- https://svoimirykamiinfo.ru/svadebnye-bokaly-svoimi-rukami/
- https://yellowhome.ru/2018/02/13/oformlenie-svoimi-rukami-bokalov-i-butylok-na-svadbu/
- https://DekorMyHome.ru/sdelaj-sam/oformlenie/oformlenie-bokalov.html
- https://svadebka.ws/article/svadebnye-bokaly-svoimi-rukami/
- https://www.dizainvfoto.ru/dekor/oformlenie-svadebnyx-bokalov-vybor-materialov-texniki-master-klassy.html