DIY wedding decoration ideas
To decide what you can do for a wedding with your own hands, you need to know the list of basic attributes. Variations of homemade decorations, wedding ideas:
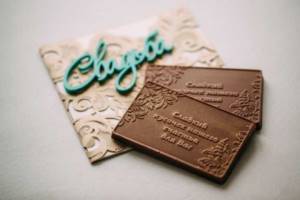
- invitation cards for guests;
- the bride's bouquet;
- holder for rings in the registry office;
- boutonnieres;
- painted glasses for the newlyweds;
- decoration of bulls;
- cards on the table for seating guests;
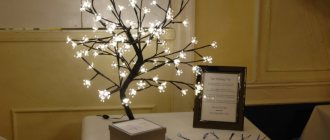
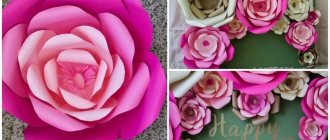
- decor for the hall, garlands, pompons, roses, balls, etc.;
- chest for collecting money;
- candles for transferring the hearth from parents.
Whatever you decide to create yourself, stick to the general style and color scheme of the celebration. The color of the event can be chosen based on the time period, the preferences of the couple, etc. Having chosen the main color, you can purchase attributes and begin making decorations for the wedding, following step-by-step instructions.
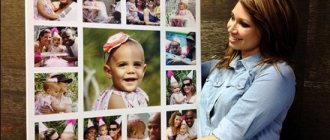
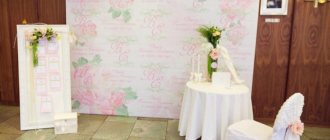
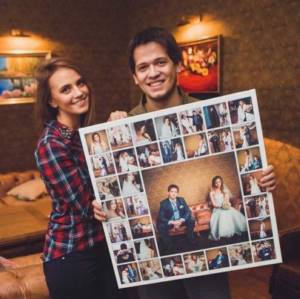
Attributes for a photo shoot
A wedding album is a memory for a lifetime. Therefore, young people take the selection of attributes for a photo shoot very seriously. Some of them can be made with your own hands. This could be flowers, props, three-dimensional letters, an unconventional background, or signs with inscriptions.
Editor's choice: Glasses for oval faces for women: suitable models and tips

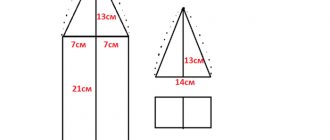
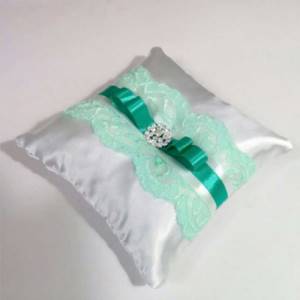
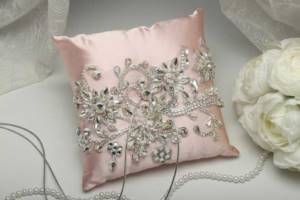
Ring pad
A pillow for rings is necessary for painting in the registry office. You can buy it in a specialized store, or make it from available materials. You will need:
- silk or satin of any color at your request;
- threads that match the fabric;
- cardboard;
- scissors;
- needle;
- filler for volume;
- ribbons that will serve as holders for rings;
- at your request - beads, lace.
Stages of work:
- select the bed shape and size (square, heart, circle);
- take cardboard, draw the desired shape on it (if it is a square, then the size is no less than 10 * 10), cut it out;
- apply it to the fabric, cut out the same two blanks from the fabric;
- fold the two sides face together, making sure the edges are even;
- we sew two halves on three sides, leaving one alone;
- We turn our cover inside out and fill it with filler (preferably padding polyester);
- sew up the free edge;
- Next we move on to decoration;
- sew on a ribbon for the rings (you can sew around the pillow and twist bows or simply form them in the shape of bows);
- Then everyone can make it based on their preferences and purchased accessories, sew on lace or trim with beads.
The bed for the wedding rings is ready. The result is a beautiful wedding accessory made by yourself, with minimal cash outlay.
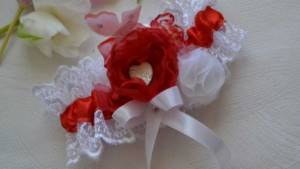
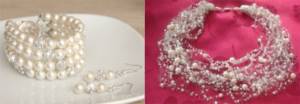
Making a Garter for the Bridesmaids
The tradition of taking bridesmaids and dressing them in identical dresses came to us from the West. In addition, everyone knows that all girls should have a garter on their wrist, distinguishing them from other guests. Some people order such bracelets in specialized stores, while others undertake to make them themselves.
In order to make such an accessory, stock up on ribbons, beads, flowers, etc. In our version you will need:
- ribbons;
- large pearls, stones;
- scissors;
- lighter or matches.
What we do:
- cut the ribbons to the required length, according to the volume of the girlfriends’ wrists;
- We burn the edges so that they do not unravel;
- We string a certain amount of pearls onto the prepared bracelets, depending on their size;
- we fix our beauty with knots;
- We connect the edges of the bracelet, tying a beautiful bow.
The bracelet is ready! This is the easiest way to create a garter; if you wish, you can add something of your own. For example, cover the entire length with glass beads, or sew on lace. Instead of a ribbon, you can use a thick thread. A little imagination and the garter will be no worse than in the store.
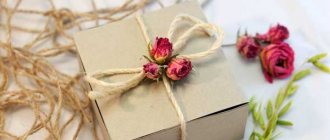
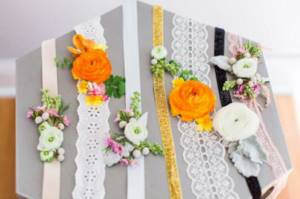
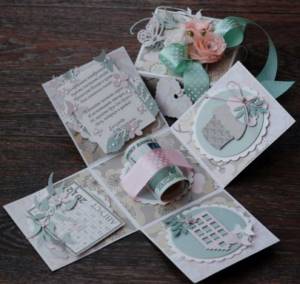
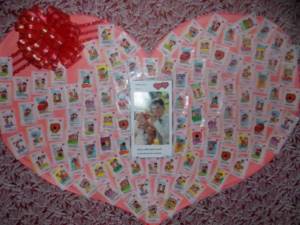
How to make a box for the newlyweds' treasury
At weddings, there is often a tray on which cash gifts in envelopes are placed. But this is not very practical, because money can easily fly away from him. Therefore, it is better to make a box that can be called the “ Treasury of the newlyweds ” - such a creative souvenir will definitely not go unnoticed.
A master class on how to design such a craft involves creating a heart-shaped box. But if you have an empty candy box of the desired shape, then the task will be greatly simplified.
What you will need:
- thick cardboard;
- masking tape;
- stationery knife;
- satin fabric;
- beads or rhinestones, beads;
- heat gun;
- scissors.
Progress:
- Draw a round heart on a piece of cardboard. Cut out two copies - this will be the top and bottom of the box.
- Cut a long strip of cardboard approximately 20-30 cm wide (depending on the desired height of the product). Using your hands, make a bend in the shape of a heart, cut off the excess length. Attach to the bottom using masking tape.
- Make a slit about 10 cm long and 1 cm wide on the top of the heart.
- Using masking tape, glue the top to the box.
- Cover the craft with satin or any other fabric, gluing it not over the entire surface, but only along the edges. Cover the joints with beads, rhinestones or any decorative details. To decorate the box, you can use not only fabric, but also shiny spray paint. But to prevent it from crumbling later, you will need to coat the surface with varnish.
- Decorate the perimeter of the money slot with beads. Decorate the upper part of the box with fabric flowers.
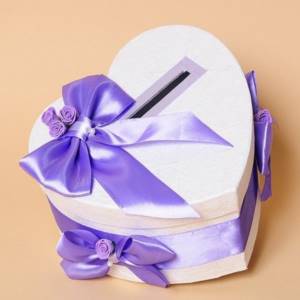
Wedding box in the shape of a heart
Wedding anniversary craft
One year of marriage is as important a holiday as the wedding day itself. If you don’t know what to present or don’t have a large amount of money for an expensive present, you can create it yourself.
- wood - collage for cards on the wall, boxes, kitchen sets, figurines, candlesticks, souvenir hearts, etc.;
- foil, corrugation - flower arrangements, photo collages, posters, numbers with the date;
- beads – weaving in the shape of hearts, flower arrangements, personalized pillows, napkins embroidered with beads;
- fabric - napkins, blankets, tablecloths;
- knitted items - funny figures of the bride and groom, hearts, bouquets, paired sweaters;
- clay - plates, figurines, cups.
Advice! It is important that the gift is made with high quality, so choose a material that you can work with. It’s better to create something not complicated, but professional.
You can also choose a product based on the anniversary that is being celebrated. For the first years, you can come up with something made of paper, and for crafts for a golden wedding, you can choose gold-colored foil.
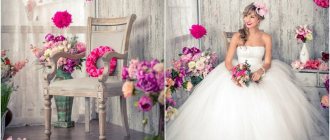
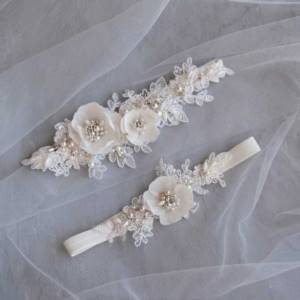
Elements of the image of the bride and groom
Wedding accessories for the bride and groom are no less important than the outfit. Similar elements can also be made using needlework.
Jewelry for the bride (jewelry, tiara), made with your own hands, will highlight the style of the bride, giving her a special charm. What and how to do?
It's easy to make a necklace using seed beads, seed beads, or even satin ribbons. It is also possible to use various small wedding accessories from the bride’s maiden box. It is better to use high-quality fittings so that the jewelry looks stylish and rich. Jewelry should be in harmony with the bride's outfit, and also match the theme of the wedding.
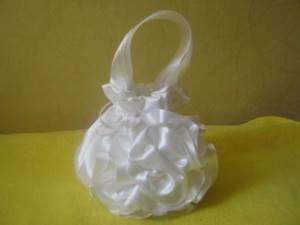
You can make your own tiara, a basket for rose petals, or a small bride’s handbag.
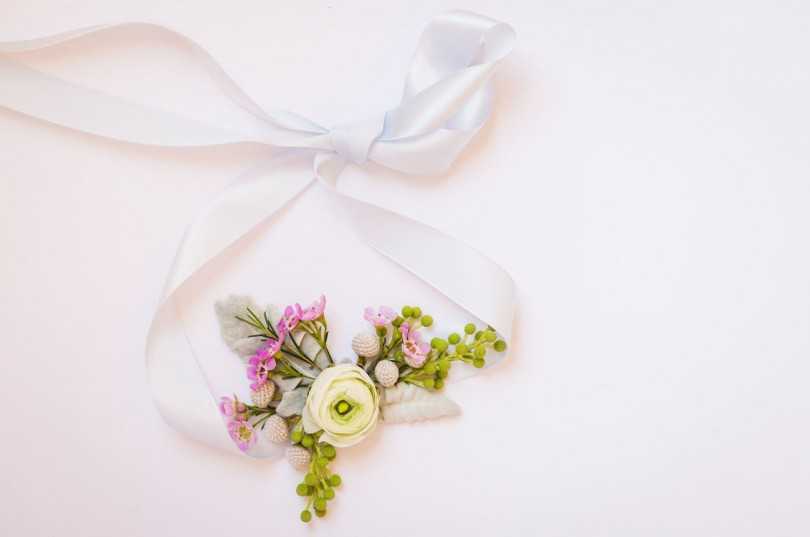
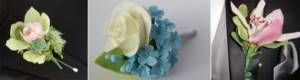
A boutonniere is considered an integral element of the groom’s image, which is also easy to make with your own hands. Important advice: this decoration should be in the same style as the bride’s bouquet and in the same color. For this purpose, compositions of fresh or artificial flowers, or porcelain flowers can be used. A porcelain boutonniere will look impressive and will retain its original appearance throughout the day, unlike decorations using fresh flowers.
How to make your own boutonniere, watch the video master classes:
https://youtu.be/QkQW-BYzJV0https://youtu.be/5QgQhf1kcDU
_
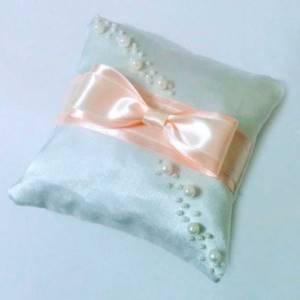
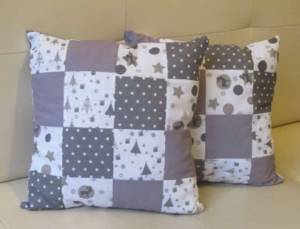
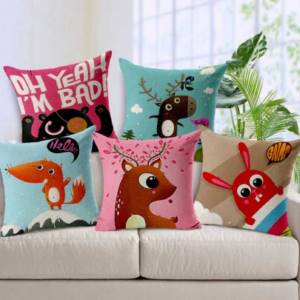
Master class on making decorative pillows
A decorative pillow for a sofa can be an interesting surprise. In its design you can use photos of anniversaries, symbols with names, numbers, hearts, funny pictures related to family life, etc.

We offer an option with embroidered names of the heroes of the day and the date of creation of the family. Prepare:
Note!
- How to make a snowman from plastic cups: step-by-step photo/video instructions + master class

Wedding invitations - original and unusual handmade samples with photos, video invitation example
Master class on Easter crafts: making an Easter egg with decorations, paper souvenirs on the theme of Easter
- a small pillow;
- satin or other material;
- openwork threads for embroidering letters and decoration;
- needle, thread according to color;
- beads;
- scissors.
Let's get started:
- measure the workpiece and cut two squares from satin according to its size;
- on the intended front side, using threads, embroider the first letters of the names of the heroes of the day and the date of their painting;
- From the remaining threads, arrange bows or flowers and decorate them with stones;
- sew them on the sides of the inscription;
- Place the two sides of the prepared pillowcase together facing each other and sew all edges except one;
- turn out the cover and put on the workpiece;
- Sew up the remaining edge.
The product is ready! To decorate it, you can also use beads, gold or silver threads, and coins as a symbol of prosperity.
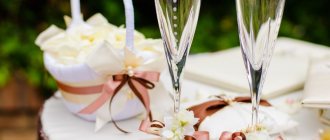
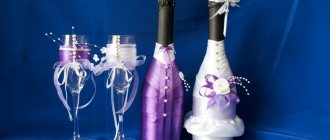
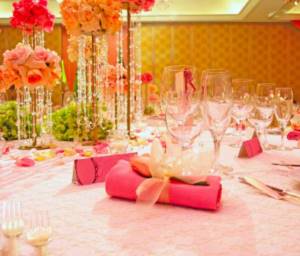
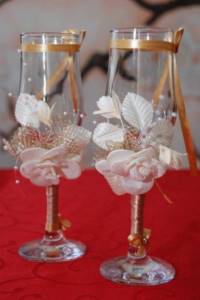
Glasses for young people
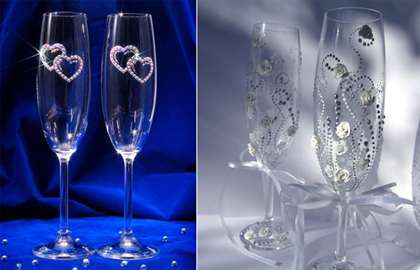
Particular attention is paid to setting and decorating the table for newlyweds. It’s not difficult to make the selected glasses sophisticated and delicate with the help of tips. Try it and you will be surprised how easy it is. These elegant glasses are available to you too.
To prepare them you need to prepare:
- 2 glasses;
- paint, preferably acrylic (in this embodiment, snow-white pearlescent is used);
- small sponge;
- superglue or glue used by a manicurist;
- aerosol varnish, glossy looks better;
- gel for gluing and producing pearls;
- clay for flowers or plastic flowers;
- construction paper tape;
- rhinestones;
- contour on glass.
For ease of use and to protect the edge of the wine glass, it should be covered with tape.
Dipping the sponge into the paint, gently touch the glass from bottom to top.
This is what it looks like after painting.
Instead of the used tape, glue a new one, but a little higher than the previous one, so that the varnish completely covers the paint. Treat the surface carefully so that there are no varnish drips.
After the varnish has dried, you can proceed to the next stage. Using pearl-making gel, we frame the processed edges and the stand of the glass.
Editor's choice: What fashion is in summer 2021, main trends
When the pearls are dry, glue ready-made flowers from polymer clay or create the ones you need yourself.
The leg is shaped in the same way.
All that remains is to add rhinestones - the masterpiece is ready.
Anniversary surprise for parents
Parents, like no one else, want to present something from the heart. What you can come up with and do yourself:
- homemade fruit basket;
- presentation with family images;
- postcards;
- plant bouquets with decorated sweets inside;
- family portfolio;
- embroidered paintings;
- wall newspaper.
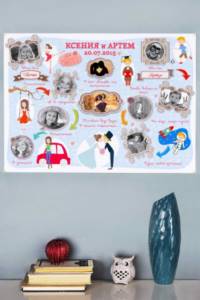
Master class of walls - newspapers
A wall newspaper with photographs of the heroes of the occasion can serve as a good present for a long memory. You can use both new and old ones, for example, footage from the day of painting. You will need:
- whatman;
- glue;
- photos;
- frame slats;
- marker;
- any paint.
Select and print photos in advance of various events, children being discharged from the hospital, general holidays, etc. Next, let's move on to improving the poster:
- take whatman paper, apply markings and find the middle;
- we write in curly numbers and letters, for example, an inscription such as, 25 years together, etc.;
- around it we randomly place the selected cards and fix them with glue;
- we design the images by tracing them with a marker, felt-tip pen, or glue with glitter;
- We make a frame from slats to the size of the poster and paint it with any paint;
- take good glue, attach whatman paper to the frame, if possible, insert glass.
Advice! To decorate a wedding anniversary gift for parents, you can use glitter markers, self-adhesive gold paper, paper plant arrangements, etc.
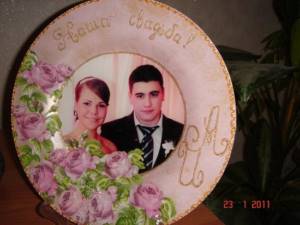
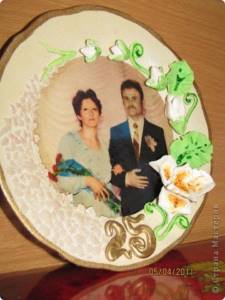
silver wedding
25 years is a big part of life, so a couple who celebrates such a holiday deserves respect. Therefore, a beautiful plate with a memorable photo of the spouses will be a very expensive gift for them.
Necessary materials for work:
- plate or dish;
- photo;
- porcelain glue;
- scissors;
- paint brush;
- acrylic lacquer.
First you need to choose a photo, try it on the plate, and cut out all the elements. Next, use a brush to apply acrylic varnish to the photo in 5-6 layers. Apply each layer before the previous one dries. Place the varnished photo in a container with water for 15 minutes. Remove the photo from the water and carefully roll up the unnecessary layer with your fingers.
Next, you should degrease the plate; this can be done with a cotton pad and alcohol. Then you should apply a small amount of porcelain glue to the plate, and spread the wrong side of the photo with this glue. Wait a few seconds and stick it on a plate.
Then cover the entire surface of the plate with porcelain glue to smooth the edges of the picture. When the plate is dry, put it in the oven for 30 minutes at 150 degrees. If desired, you can decorate with beads or other decorative elements. Ready!
Related article: Do-it-yourself wall-mounted key holder in the form of a house: master class with video
Wedding decorations: photos
Please repost
0