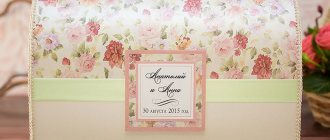
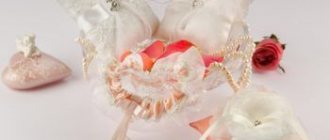
If your loved ones are planning a wedding, you often want to do something special for them, present your gift in an interesting and bright way so that it will be remembered for many years. Do-it-yourself surprises are becoming especially popular, since the soul is put into the process, and the result is individual and unique. For example, a ship made of candy for a wedding is a very successful present.
The newlyweds will certainly appreciate such a gift, which stands out from the background of banal cards and envelopes. In addition, wedding ships made of candies in the photo look stylish and unusual.
What are holiday desserts for?
Pre-wedding preparation is not the most difficult stage for newlyweds. In practice, it turns out to be much more difficult to survive the day of celebration itself, filled with events and bustle. By the end of the evening, the bride and groom are exhausted, but despite this, they maintain a positive attitude so as not to upset the guests. At such moments, any surprise from loved ones is perceived as doubly pleasant, so relatives and friends try to once again cheer up the newlyweds.
A wedding dessert prepared as an addition to the main gift is one of these little things. Most often, this surprise is made from sweets that the bride and groom are partial to, or from beautifully decorated sweets.
If you do everything carefully and with soul, then with minimal financial costs you can surprise everyone present at the celebration.
Typically, such a mini-gift is made in accordance with the wedding style chosen by the bride and groom. The presented dessert takes its place of honor on the table with sweets or gifts and emphasizes the overall theme of the event. That is why you need to wait until the newlyweds send an invitation, and only then start making a gift dessert. This is done in order not to make a mistake with the style, while remaining aware of the couple’s plans.
A sweet addition to the main gift will delight the bride and groom not only at the banquet itself, but also for a long time after it. Most newlyweds strive to keep the maximum number of “trophies” from their wedding that will not let them forget pleasant moments. An originally designed dessert often fits into the interior of a family nest, and takes pride of place next to other trinkets.
Such a gift is given when congratulating the newlyweds, and it is advisable to connect the words with the theme. To prevent the newlyweds from seeing the surprise ahead of time, it can be removed in advance to the kitchen of the establishment, having agreed with the administration. Some people prefer another option - they ask friends to bring a gift at the appointed time.
Interesting! Read about what to give for a bachelorette party. And here is information on how to calculate the weight of a wedding cake.
Video tutorial on creating a bouquet of candies
A wedding composition made with the help of candies is a great way to make the holiday more interesting and stand out. If this item is used as decoration for the hall at a celebration or the guest decides to surprise the newlyweds with an unusual gift, then ordering the decoration from a confectionery shop is the easiest way out. However, it is much more interesting to create an attribute with your own hands. The main thing is that it is in harmony with the overall style and reflects the theme of the celebration. For a visual example, here is a video that describes in detail the process of creating a sweet candy bouquet.
Leading
If you are planning to give a ship made of candy for your wedding, it is better to choose your congratulations in advance. You can compose a text yourself, simply wishing the newlyweds something from the heart. Alexei
To create a wedding ship from candies with your own hands you will need.
- penoplex (Styrex) for the base - sold in construction stores, a little like foam plastic, but denser;
- corrugated paper and organza for decorating the deck;
- fabric or floral mesh for sails;
- rope, thin colored lace, decorative mesh or satin ribbons to decorate the side;
- any decorative elements - miniature anchors, steering wheels, lifebuoys, sailor figures, etc.;
- wooden skewers, toothpicks and safety pins for fastening parts;
- golden beads of two sizes and thin wire for decorative racks;
- tools - scissors, pencil, paper, ruler, glue gun, sandpaper.
To begin with, a template is drawn on a white sheet - a rectangle measuring about 21x14 cm and a triangle adjacent to it along the wide part, about 13 cm high. Half-ellipses are adjacent to its sides so that the transition from the deck to the bow is smooth. The size of the sides may vary depending on the desired result.
The finished template is traced on polystyrene foam and the workpiece is cut out; for this it is better to use a regular kitchen knife with teeth.
If the edges are uneven, this is not a problem, they will be corrected later. Small pieces are cut diagonally from the top to the bottom as the ship tapers towards the bottom.
Start from the stern, moving towards the bow. Then another part for the aft part is cut out in the form of a 10x14 cm rectangle; straight cuts are made along the long part, on one side at a smaller angle than on the other. This is the captain's bridge. The last part is cut out according to the template of the bow of the ship, with the narrow part being about 2 cm thick, and then a smooth narrowing is made, and the wide part is about 7 mm.
All three elements are sanded with sandpaper and glued together. If desired, the resulting base can be covered with corrugated paper and braid , as in the photo below, but usually the penoplex is completely hidden under the decor.

The deck is decorated with organza and roses made of corrugated paper, inside of which you can place sweets. They can be placed in an abstract order along the deck itself, secured with pins.
The side of the ship is decorated with any desired details. It can be painted with acrylic in the manner of wooden boards, covered with corrugated paper or organza. On one side there is a figurine of an anchor. You can also place round candies on the side of the ship, like cannon barrels.
The next step is to make sails from floral mesh. Usually they make two or three masts, and in the lower part the sail coincides in width with the ship, and at the top it narrows slightly. Using a sewing machine, you can attach thin satin ribbons to the mesh, and also sew the workpieces in three places horizontally. This will give the impression that the sails are being pulled by the wind. Wooden skewers are threaded through the middle, and the resulting masts are secured to the base.
One skewer is also attached to the continuation of the bow. After this, a decorative cord or braid is tied around it and all the masts. Toothpicks are stuck along the perimeter of the captain's bridge, then they are additionally secured with glue.
Large golden beads are glued to the upper part, and small ones are strung on wire and secured in such a way that the thread sags slightly between the resulting posts. The result is a decorative fence. If desired, you can make a steering wheel from foam plastic and toothpicks and further decorate the ship to your taste.
This gift is suitable for a classic wedding that does not have any theme. The idea of a ship can be linked to the journey of a family ship on the waves of love. As for stylized weddings, a sailing dessert will suit a nautical or pirate celebration.
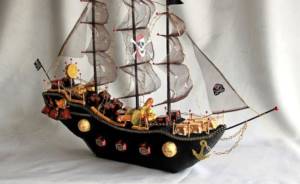
DIY sailboat from a bottle
To make a sailboat with your own hands you will need:
- Plastic bottle;
- Skewers;
- Colored paper;
- Threads;
- Nail;
- Scissors;
- Awl;
- Glue gun.
Step-by-step master class on making for beginners.
- To prevent the bottle from rolling, cut a hole in a small box and place the bottle in it.
- Use an awl to make three holes in the bottle.
- We insert wooden skewers into the holes and secure them with a glue gun. Two skewers should be straight, and one should be inclined, it is located on the bow of the sailboat. The skewers will hold the masts.
- At the bottom of the bottle, in the middle, screw in a screw or nail. This is the back deck of the ship.
- Draw sail templates on paper. Then we cut them out and transfer them to colored cardboard or paper.
- We put on the sails for the match.
- We pull the rope. These will be thick threads.
- Your DIY bottle boat is ready!
Words of congratulations
The resulting original gift requires a solemn speech, otherwise it will no longer look so grandiose. If there are problems with oratory, it is better to write the text on the card in advance and read it out during the congratulations. In prose it might look like this:
“Dear (names of the newlyweds)! We sincerely congratulate you on your wedding day and present you with this ship, made with love with our own hands. Sail on it sweetly and smoothly on the sea of love to your personal island of family happiness. Ignore the cries of envious seagulls, but always be attentive to the weather in the house - try to avoid storms and storms. Don't forget to take turns at the helm and stay focused on understanding and caring. Happy holiday to you!”
Interesting!
Useful video: master class
Below is a tutorial on how to make a wedding candy ship using thin polystyrene foam. You will need to cut several identical blanks. Corrugated paper is used for decoration, and the sails are made of organza and braid.
If you have the opportunity to please your loved ones on their wedding day, then you should definitely take advantage of it. Making a wedding ship out of candy is not as difficult as it seems at first glance, and it’s even easier to order such a masterpiece from a master. The resulting gift will leave a pleasant impression not only in the hearts of the bride and groom, but also in the memory.
Anastasia Belozerova
Wedding planner
Previous article
For lovers of luxury - a bachelor party in a restaurant: ideas with photos
Next article
How to give money in an original way
6. For example, make such a cake out of money for the newlyweds (or the hero of the day). You need a large number of identical bills, carefully roll them into tubes, secure them with paper clips or narrow ribbons, fold them into a multi-tiered cake and decorate them festively to your taste (or, even better, in accordance with the preferences of the recipient).
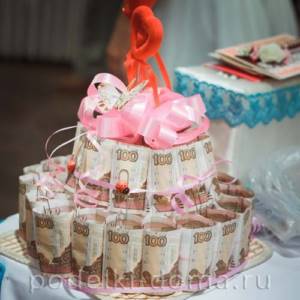
7. You can give the birthday boy not just money, but a bank account. Sign and decorate the jar :).
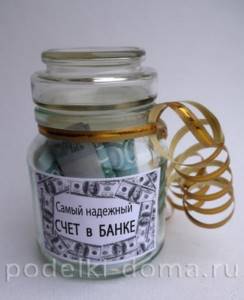
Or design the jar as in this video:
8. For those who want to “rakes in money with a shovel,” we give away the appropriate tool:
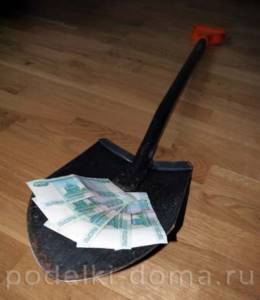
9. Another option for a gift with the wish “that money will be like dirt” (or garbage) - give a new dustpan with a broom, on which bills are glued. They need to be glued so that the money remains intact after peeling off, but also does not fly off ahead of time; for this, office double-sided tape is best suited.

10. An option for a cash gift is to wrap bills in a roll of toilet paper and wish that there would always be the same amount of them


