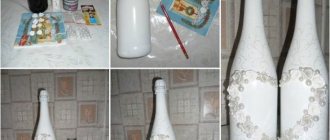
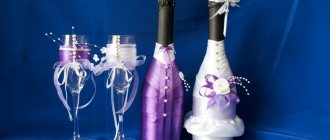
Usually, preparing for a wedding turns out to be very exciting and hectic. A lot of problems fall on the shoulders of future spouses, from invitations to accommodation of guests. But if you take a creative approach to preparing for the wedding ceremony, you can also get tremendous pleasure from it. For example, you can hand decorate your wedding glasses.
Currently, you can decorate glasses by hand in various ways. Techniques such as painting or applique will help with this. But most often, brides (and in some cases, grooms) choose a method such as decoupage.
Stylish decoupage of dishes
Dishes are a fertile material for this. Decoupage literally translates from French as “cutting.”
In fact, this is the basic decoupage technique:
- Cutting
- Pasting;
- Drawing a pattern;
- Edging design;
- Varnish coating.
You can decorate dishes using the decoupage technique, either new or “revive” old ones. The easiest way to decorate the interior is decoupage of plates. The plates will not be used for their intended purpose, but will serve a decorative function. For example, to decorate your photos beautifully, you don’t have to use photo frames, but you can try placing them on decorative plates using the decoupage technique. There are 2 decoupage techniques: direct and reverse.
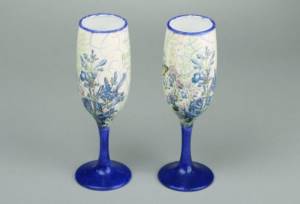
Before you start decoupaging the glass, you need to check it for cracks.
We present a master class on the direct method of decoupaging a plate using photographs:
- Preparation of the surface of the plate: degrease the surface with an alcohol-containing composition, coat with a primer;
- Dry and cool the plate;
- Clean the surface with fine-grained sandpaper;
- Next, the photograph is cut out along the contour of the picture or according to the size of the bottom of the plate (it is important to use the thinnest paper; rice paper is most often used, which easily takes the shape of any surface);
- The photograph is pasted onto the surface of the plate, using a brush the pattern is smoothed from the center to the edges, and air bubbles are expelled;
- Dry the product, possibly using a hair dryer;
- If folds have formed during the drying process, they need to be sanded with sandpaper;
- The background of the plate is created using oil pastels: the pastel is applied with a finger and rubbed thoroughly; you can use several colors to obtain beautiful shades or stains;
- Using a sponge, the edges of the plate are worked out: the paint is applied in a thin layer with light tangential movements;
- Drying the product;
- The last stage is applying varnish, for this it is better to use a sponge and apply several layers, each layer should be sanded with sandpaper and dried thoroughly;
- If the plate will be hung on the wall, a loop should be glued to the back side.
Thus, you can decorate old or new plates, you can create a whole panel from plates of various sizes and shapes - this will create an original and unique interior.
Using the decoupage technique, you can decorate almost any dishware: plastic, glass, clay, any type of enamel, metal and wood, even a glass stand is suitable.
Do-it-yourself frosting of glasses
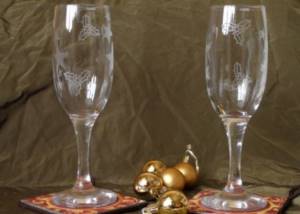
If you don’t know how to decorate glasses for the New Year with your own hands at home, then we suggest you turn your attention to this idea with a photo. This work involves matting wine glasses with a special engraving paste. The design effect is simply unsurpassed!
To work you will need:
- wineglass;
- alcohol;
- cotton pad;
- ready-made contour stickers;
- gloves;
- small sponge;
- scissors;
- wide transparent tape;
- matte thin tape;
- Idea Vetro engraving paste.
Manufacturing process:
- To begin with, before directly decorating the glass vessel, we will have to, as always, degrease the surface of the wine glass with an alcohol solution.
- Now we decide on the future pattern on the glass surface. Cut out the required sticker and place it face up on the prepared file.
- We attach a wide strip of tape on top so that it completely covers the image element. We carefully smooth it, and then, together with the finished sticker, tear it off from the file.
- We attach our resulting template to the glass, thoroughly ironing the surface of the sticker to avoid the appearance of bubbles and unevenness.
- After this, we need to remove the wide tape, leaving only the colored sticker on the glass, and cover the edges of the picture with strips of matte tape so that there are no gaps around. We do this in order to protect the surface of the wine glass from unwanted contact with engraving paste.
- The next step of our creative work is to matte the design on the glass. We take the engraving paste and, wearing gloves, apply it with a small piece of washcloth onto the sticker design itself, without going beyond the protective matte tape.
- We wait 15 minutes and wash off the remaining applied product with water. Our DIY decoration for the New Year 2021 is ready! Such beauty will amaze everyone at the holiday, be sure of it.
Video: frosting glass at home
Decoupage can
Lately, “antique” dishes and interior items, or new uses for truly antique items, have become very popular. An old leaky can can be transformed and turned into an original vase, a candlestick lamp, or decorate a country house.
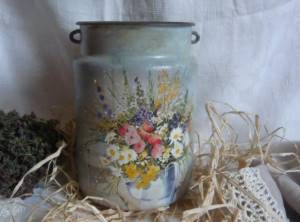
A can made using the decoupage technique is not only a practical item, but also an excellent decorative element.
Technology:
- First of all, the old surface needs to be coated with anti-rust agent, then with acrylic paint;
- Cut out an image, a picture, and stick them on the surface;
- Dilute oil paint of the selected color with a special medium with a drying effect;
- Dry thoroughly;
- Cover the can;
- Several layers of varnish or wax.
Provence, vintage, eco-style are suitable for decorating a can, samovar, or old frying pan, so you should choose suitable motifs. You can use napkins from various collections. Flowers, pastoral, birds, children or angels are the most suitable themes.
Home made artificial snow
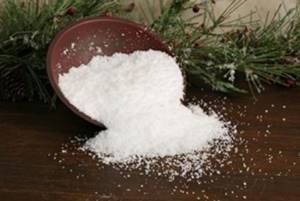
You certainly liked our useful master class on decorating glasses with artificial snow?! And as soon as you decided to take this creative step on your own, you were faced with the problem of the lack of this material. Of course, you can purchase it in the store, as noted above, but in order to save money, it is possible to make such a snow miracle with your own hands for the New Year 2021 to decorate something. If you want to know how, then quickly delve into the information we provide.
To work you will need:
- corn starch - 2 packs;
- shaving foam;
- flavored extracts optional;
- glitter or mica for best effect.
Manufacturing process:
- Pour the prepared cornstarch into a deep container and add a little shaving foam to it. Mix all the ingredients thoroughly with a spoon so that the mass acquires all those natural qualities that are inherent in real snow - looseness, flowability and pleasant frostiness - in our case, coolness.
- To achieve shimmer, it is recommended to enrich the artificial mixture with some glitter or mica. So, the snow made by yourself will shimmer in the light of mechanical garlands, which looks very excellent.
- At the end of your work, in order to give the artificial snow some expressiveness, add a few drops of some extract, for example, mint, to the general mixture; believe me, everything will be much nicer, more aromatic and interesting. So for the New Year 2020, you can not only decorate glasses in a winter style, but also create a wonderful mood for the entire environment in your home, because with such wonderful material you can literally decorate and express literally the entire interior down to the smallest detail.
Video: how to make artificial snow with your own hands - 3 ways
Wedding decoupage of a glass or glass cup with rice paper
When attending a wedding, you remember that this is the most important, most exciting, most anticipated holiday in the life of any girl. On this day, you want everything to be the best, the most original and memorable. Festive decoration of dishes, wedding signs, invitations, etc. can be made unique for a wedding celebration using decoupage.
Unusually designed glasses for newlyweds will remain a long lasting memory, and can be used as memorable gifts for guests.
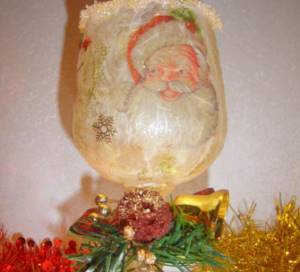
Rice paper is good for decoupaging a glass in a New Year's style
The easiest way to decoupage wine glasses and glasses is to use rice paper.
Stages of work:
- The preparation is the same as described above.
- Wrap the glass in rice paper, leaving the top edge free (for comfortable use).
- The protruding paper must be torn off.
- The paper should be carefully wetted with a brush and glued to the surface, and the folds should be smoothed out so that no air remains.
- Apply decoupage glue to damp paper and dry.
- Cut out a drawing from napkins or special paper, which is sold in craft stores, and sprinkle it with hairspray in several layers. This will help you easily apply the motif to paper.
- Paste the drawing and let it dry.
- Cover with a special glassy varnish.
Next you need to give free rein to your imagination. You can stick on rhinestones, pearls, bows or flowers, silk ribbons, or use a special crystal paste consisting of many small balls.
Glasses covered in snow
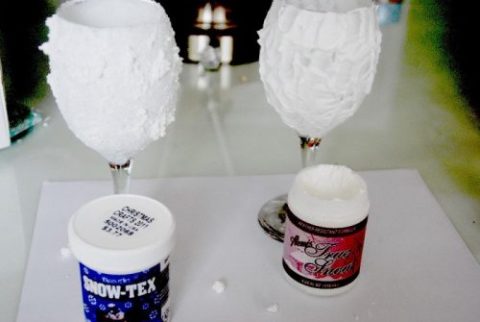
Have you ever decorated your glasses with artificial snow?! If yes, then, for sure, you have already made sure that this beauty is indescribable, and if you haven’t even tried to contemplate this wonderful creation at home, then let’s boldly take on the experiment. For the New Year 2021, we invite you to decorate not only your existing wine glasses, but also glasses, shot glasses and other table drinking vessels with your own hands in a fairly short time.
To work you will need:
- a jar of artificial snow;
- glue;
- glasses;
- glitter;
- brush;
- alcohol to degrease the vessel.
The process of creating New Year's decor:
- Having placed all the glasses you like on the table in front of you, carefully degrease them with an alcohol solution. This will allow us to get rid of unnecessary marks and stains on the vessel, and will also give the future material applied to the glass surface tenacity and strength.
- We take a convenient brush and use it to apply a thin layer of glue along the entire outer circumference of the wine glass and immediately sprinkle our product with artificial snow and shimmering sparkles, previously purchased at a specialized store.
- We should remove the excess of this available material with the same brush, but after fixing our festive decoration. If you have an uncontrollable desire to add something of your own to the decoration of the glass, then go ahead! Your possibilities are endless, as you know. You can easily attach small snowflakes, beads, rhinestones, sequins and other decorative elements chosen to your taste to such vessels with your own hands. In any case, by the New Year you will have wonderful wine glasses that you just can’t take your eyes off.
Decoupage wine glasses and wine glasses using a napkin
Modern trends in design involve the creation of original interior items that emphasize individuality. To decorate glasses, instead of rice paper, you can use multi-layer napkins. In this case, the napkin can be the background and the design itself.
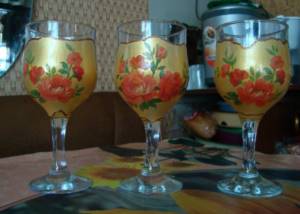
After decoupaging the glasses using napkins, a layer of acrylic varnish should be applied to its surface to protect it from various damages.
The decoupage technique is the same, but there are differences:
- The pattern on the napkin must be separated from other layers;
- Glue with glue, not water.
In the same way, you can decorate cups, bottles of wine or champagne, which can be given to guests or given away as prizes. Instead of rice paper, you can use fabrics: light organza, chiffon, the finest silk or lace.
Tools
In addition to the materials listed above, to decoupage glass glasses you will need:
- Brushes: flat, with artificial bristles - for applying glue, thin round - for painting, thick round - for joints.
- Foam sponges. Convenient for applying primer, varnish, final leveling of paper and removing excess water.
- Scissors. Convenient to use manicure or medical instruments.
- Multifora (file).
After all materials and tools have been prepared, you can begin to work.
New Year's decoupage of a clay jug
The New Year is coming soon, so preparations for the holiday are underway. Housewives are thinking about how to festively decorate the house, how to set the table in an original way, what unusual gifts will delight and surprise loved ones.
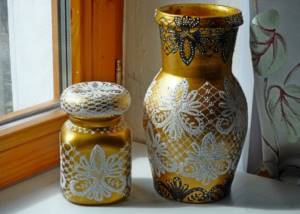
A clay jug decorated using the decoupage technique in a New Year's style is well suited as a table decoration for the New Year
We use an old clay jug as a New Year's vase for coniferous branches:
- Degrease the surface; if there are any rough spots or chips, sand it with sandpaper and apply several layers of primer.
- Let's start painting: paint is applied several times. To obtain beautiful shimmers, you can use multi-colored gel pastes.
- We paste the prepared pictures and stencils of a suitable theme onto the surface and carefully smooth them out.
- You can draw individual details with acrylic paints or apply curls, snowflakes, personalized letters or monograms - then the gift becomes individual.
- We coat the surface with varnish 3 times.
- We glue beads along the edge of the neck of the jug and, in any order, rhinestones, beads or sparkles.
- Dry the finished jug for at least 24 hours.
- Insert spruce or pine branches into the jug.
- Decorate the branches with Christmas tree decorations, or you can use real tangerines, caramel apples, candies, or New Year's cookies or gingerbread.
If the jug is not full of holes, pour water into it - this way the coniferous bouquet will delight the eye with its bright color and aroma for a long time
We design the wine glasses ourselves
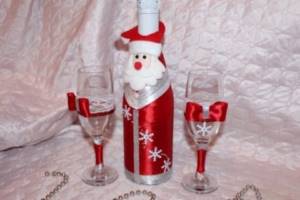
To ensure that your glasses on the festive table do not differ strikingly in their appearance from the rest of the elegant tableware, you should definitely take some time in advance, choosing the appropriate methods for creating a decorative “costume” for them. This can be either applying decoration using stained glass and acrylic paints, or using stucco molding from polymer clay. Patterns created with your own hands from satin ribbons, openwork inserts, silk fabrics, decorative shiny mesh, chiffon, brocade, tulle will also look quite original, and as a chic addition - beads, rhinestones, sequins, ready-made plastic snowflakes, bows, rain, tinsel , serpentine, gold and silver confetti, sparkles, glitter, creative author's compositions created for the New Year 2021 from miniature cones, spruce branches, floral berries, branches, wires, plant leaves, flowers, etc.
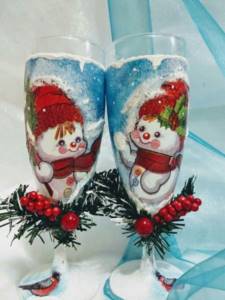
As an affordable and uncomplicated option, you can use regular nail polish with mica, mother-of-pearl, and all sorts of tempting shimmers and sparkles. From the entire unlimited range of colors, it is possible to choose something so captivating and unsurpassed that will properly reflect your ideas and desires, convey the mood and jubilation of the upcoming celebration. And if your child gets involved in creative work, then invite him to create something from colored paper, foil, cardboard, candy wrappers, shavings from colored pencils, dried citrus peels, cotton wool, cotton pads and much more that comes your way sight.
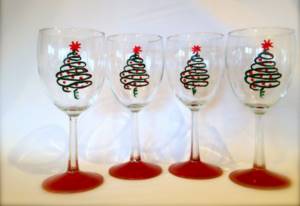
For those with a sweet tooth, there is also an idea for the most beautiful decoration of glasses with colored sugar and powder, icing, chocolate drips with nut, coconut, waffle, and candy toppings, which are used with great success in the confectionery industry. In general, for decorating wine glasses for the New Year 2021, as you can see, dear friends, the possibilities are enormous, as long as your imagination doesn’t let you down. But in order not to stress too much, we decided to help you by providing the best methods of transformation in our useful and informative article. Plunge into the world of art with us and create with your own hands many original masterpieces that will pleasantly surprise all your family and friends at the party. Now let's look through our selection of photo ideas to enrich your personal imagination.
If you put your skillful hands to these glass containers and work a little, they will immediately turn from ordinary wine glasses into indescribable splendor. With this twist, your holiday will exceed everyone's expectations!
Video: one of the easy ways to decorate glasses with contour paints
Gift idea: decoupage beer mugs
An excellent gift for a loved one can be a decoupage of a beer glass in white in a background decorated with your own hands.
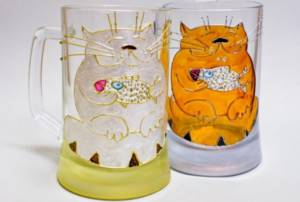
To decoupage a beer mug, you need to choose thematic images, for example, with fish or hops
The decoupage technique is the same as when decorating a glass goblet or mug, but the theme must be appropriate:
- For a fan - a photo or symbol of his favorite sports team;
- For a fan or musician - a mug with the name or poster of your favorite band or album, or you can simply decorate it with notes, treble clefs or pictures of musical instruments;
- For fisherman and hunters - a mug with a suitable picture and a wish for a good bite; you can stick on a fishing line in the shape of a fish or animal;
- Or you can decorate the mug with his own photo or a photo of his beloved girl.
Tips for Beginners
Do-it-yourself decoupage of wedding glasses is not such a difficult task. Even those who have never done hand-made before now come up with original creations. We recommend using the following tips when decorating wedding glasses.
Tip #1 : Cleanliness is the main secret to success!
Take your time to glue the ribbons and beads to the glasses. The first thing to do is degrease the work surface. To do this, you should first wash the glasses, dry them and wipe the outside with alcohol.

