Exclusive DIY stickers for champagne, cognac, vodka, wine
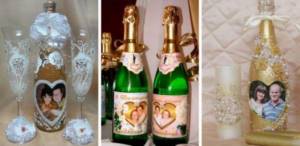
Wedding bottle stickers containing appropriate symbols, the names of the newlyweds, their photographs, and original congratulations addressed personally to the bride and groom help demonstrate the exclusivity of the approach to holding the event.
The development of online services allows you to independently select, edit or completely develop a label layout at your own request. This approach is especially relevant when holding a color wedding, thematic table decoration in one of the fashionable styles and adds a touch of intimacy to a classic ceremony.
With a photo of the newlyweds and text
Colorful stickers for a specific event and bases of a certain shape are presented on the Internet in a huge assortment and are available for free download. For a banquet on the occasion of a wedding, sets for champagne (sparkling) wines are the most popular.
Various types of such designs can be arranged according to the degree of complexity of obtaining the final result (the number of editing operations of the original template).
The easiest way to decorate a bottle of drink in accordance with the wedding theme is to find it on the website, print it on a color printer and stick on the finished label you like. An example is the resource templeit.net (https://www.templeit.net/shablon_etiketka.php?section=9&p=1)
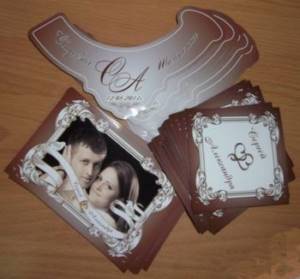
Stickers containing photographs of the bride, groom, their parents and relatives, witnesses and friends help fill mass-produced bottles with personal content and “revive” them. For such inserts, free spaces are left on the blank field, often with ready-made frames, where you need to paste a photo adjusted to size.
You can get acquainted with such templates, ready for inserting the necessary additions on the topic (downloaded in a 1: 1 scale for good image clarity), for example, on the website tutsvadba.ru (https://tutsvadba.ru/shab/shab_shamp)
The team of wedding event organizers does not always have advanced users working on professional resources.
For those who want to create a truly exclusive design with dates, personal inscriptions, composition of patterns and symbols in the required color scheme, there are online programs in which the necessary options are available.
This approach is the most practical, because photographs will be taken long before the ceremonial moment of uncorking the drink, and this moment needs to be played up both by the inscription on the label and in the speeches of the toastmaster.
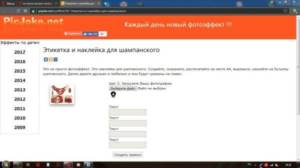
You can try your hand at a service such as effectfree.ru (https://www.effectfree.ru/photoeffects/1267.html).
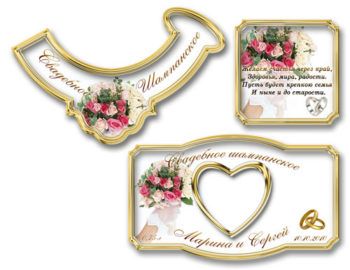
With inscriptions of the wedding date and the names of the newlyweds - where to download templates for free
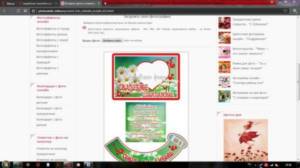
By organizing a celebration in a certain style (Provence, country, boho, retro, coral wedding, rustic, Hawaiian motifs), you can enhance the effect of decorating the festive table with bottles of champagne with labels made in complete harmony with the theme. An example of a sticker for a daisy wedding was taken from the site photoramki-online.ru . Above the template there is a “select file” button, with which you insert the desired image from your own computer into the white field in the frame.
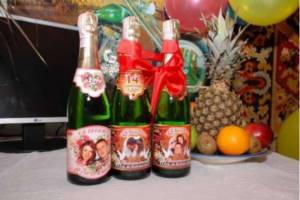
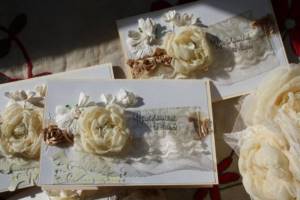
The finished look of a sticker on a bottle of champagne (except for photographs) is given by inscriptions with wishes, the intertwined initials of the bride and groom, and the wedding date. Such decor on the bottle makes it a completely individual part of the celebration for a young couple and becomes a gift rarity.
If the newlyweds are purposefully and prudently looking to the future, then they can make the same stickers for the upcoming anniversaries of their life together, indicating the corresponding dates (from 1 year to the diamond wedding) and introduce the tradition of displaying an exclusive bottle of champagne on the table, decorated as on the day of their wedding .
To do this, on a suitable website you simply need to fill in the corresponding program windows with the selected letters and numbers. It will be enough to save the created templates for subsequent printing of the selected options.
You should approach studying the functionality of programs that allow you to create your own original stickers for wedding bottles more thoroughly than just inserting a photo.
Many of them make it possible to edit source images (Photoshop), improve the quality of old photographs, and apply various effects that fit into the style of the celebration. The site menu includes a section explaining how the program works, which will be easy to understand.
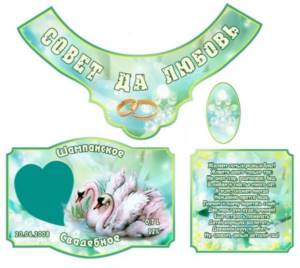
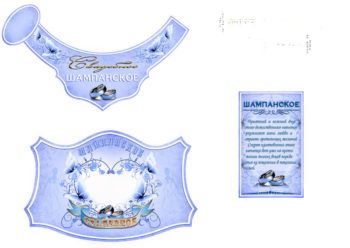
With hearts, rings, swans - templates for downloading
Traditionally, the main images of the young couple on the sticker are complemented by images that have symbolic meaning for such a celebration. Simple and understandable classics for all guests are the following figures:
- hearts;
- wedding rings;
- swans (as a united pair or rushing towards each other);
- doves.
They can be inserted separately, woven into an ornament, or made part of lace or an entire plot. These symbols naturally become the center of compositions, including angels (fairies), intertwined flowers or simple lace patterns.
You can find ready-made templates with any selected symbols available for free download.
The kit includes 3 components:
Symbols can be depicted with photographic precision or stylized (marked) in the form of an outline, pattern, or abrupt lines.
The effect of respectability is achieved by gold embossing, and the feeling of tenderness and airiness of what is happening is achieved by blurry pastel colors in a thin outline.
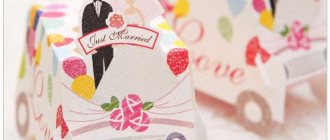
Homemade invitations
Materials:
- sheets of paper and cardboard;
- lace;
- satin ribbons;
- scissors;
- glue;
- hole puncher;
- lighter.
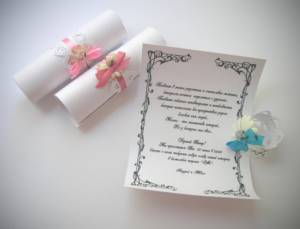
First you need to decide what size the invitations will be and print the text on paper. Any color can be used. Usually white or pastel colors are used. But to make colorful invitations, you can use bright cardboard or ribbons. To cut text from paper, it is better to use special curly scissors. Use a hole punch to make a hole to attach the bow.
Related article: Options for decoupage of an old suitcase: some interesting ideas
The envelope can also be made directly from paper. To do this, cut out a shape using the measured template, taking into account that the side edges need to be folded, they should protrude. The next step is to decorate the blank for the envelope with lace ribbons. To do this, you need to secure it with glue on the inside of the lace. Then fold the edges and attach them to the back to form an envelope. You need to make a hole in the top of the envelope, insert the invitation and secure it with a ribbon bow.

The final touch is to make a large bow in the center of the envelope. To do this, you need to bend two pieces of wide tape, secure them with a thin tape and process the edges with a lighter, and then glue the resulting product to the envelope.
Decoupage of glasses, vases and champagne bottles (2 videos)
Glass design options (39 photos)
How to decorate a wedding bottle - step-by-step instructions
Making labels for bottles of wedding champagne for a wedding according to a developed template, even if you don’t have office equipment for printing at home, is not very difficult. A master class on this design includes the following steps:
- The edited templates are printed in the required quantity on self-adhesive paper (this will not harm the printer - there is a protective film there). It is also permissible to use ordinary paper, but then you cannot use a water-based adhesive (for example, PVA), but it is better to take “Moment” type products. If a printing order is made at a printing service center, then all you need to do is bring the templates on a flash drive. It is better to assign the number of copies with a reserve - what will not be used can be kept as a keepsake or distributed as souvenirs to loved ones.
- Preparing the base. Factory stickers are removed completely, with the exception of foil. It is better to pre-moisten them with warm, not very hot water to soften the glue. If marks remain, the stripes can be easily removed with cotton wool and nail polish remover. After this, the glass is wiped with a dry cloth, removing moisture and greasy film.
- Pasting. The procedure requires special care and precision. You need to apply the paper strip the first time to avoid wrinkles and tears in the material. The glue is applied in a thin layer (literally traces), since the glass does not absorb it. The label along the edge should fit snugly and not float on the thick layer of the composition until it dries. The elements of the kit are placed according to the following scheme:
After the glue has completely dried, wrap ribbons over the paper set, apply a layer of glitter, and paint the free part of the glass surface.
When labeling sets of different designs (for newlyweds, parents, for the birth of the first child, for 1st anniversary, souvenir sets), you need to prepare each such series separately so as not to confuse the individual details.
In this video you will be taught how to make a bottle sticker in Photoshop yourself:
It is better to pack gift (souvenir) copies in colored paper so that they can be transported and stored without damaging them.
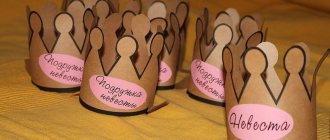
The highest class of this theme at a wedding will be the opportunity for any guest to create a sticker and personally decorate a bottle or glass right during the celebration, giving out self-adhesive cool stickers. Such unique souvenirs will be a real gift for both the newlyweds and the invitees themselves.
Preparation
First of all, you need to choose a drawing. Just find similar stencils on the Internet and print them. For people who are just trying themselves in this field of art and decor, something simpler will do: rings, patterns, lines or flowers.
Stencils are made not only from paper, but also from parchment. Therefore, the next stage is the choice of material. To reuse the same design over and over again, you can use plastic or laminated paper so that it can be easily washed after finishing the work. To transfer the image you will need a pen and carbon paper.
Next, cut out the design using scissors. Before you start cutting, you need to secure the edges or thin parts of the stencil so that it does not tear while transferring the decor to the surface. After this, you need to place the design over the place of application and apply the image with careful movements of a brush or sponge with paint. Once the job is completed, you need to remove the stencil before the paint dries.
Related article: Give me a heart: souvenirs and gifts in the form of hearts
Champagne label for wedding anniversary. Texts for labels
May the sun always illuminate you, And may the years continue endlessly, May neither old age nor illness ever knock on your door!
*** We, young spouses, wish you happiness and goodness. Let the road be bright, Let the family be friendly. Be sensitive, tender, affectionate, Do not forget your first meetings. And those rings that you picked up, be able to save them to the end. We wish you a beautiful life, your marriage without marriage should be
We wish you happiness beyond measure, Health, peace, joy. May the family be strong, both now and into old age.
Bottle stickers for weddings
The custom of giving bottles of champagne for weddings arose not long ago, but has become widespread. Beautiful decoration has come into fashion only recently, but has become so popular that a huge selection of ideas and styles has appeared on the Internet. One of the most common and relatively simple ones is bottle stickers for weddings. They can be ordered from any printing house, even the smallest one. To do this, you only need to have photographs of the newlyweds. And a specialist will suggest implementation options. This service is not that expensive. But how nice it is to make a gift with your own hands!
Websites for creating stickers have developed many templates for any occasion. They already include a ready-made background with decorations in the form of curls and flowers on the necklace, an inscription on the main label and a congratulations text on the back label. All these components can be changed at the request of the manufacturer. It would seem that everything is simple. But it is worth considering some details.
- Think over the general appearance of the bottle.
- Prepare photographs.
- Print.
- Mixing styles.
Glass decoration
Don’t forget about the glasses, which will be in front of the eyes of not only the newlyweds, but also all the other guests. To decorate cutlery, you will need a minimum of materials.
Related article: DIY burlap flower - a stylish solution for interior decoration
To decorate glasses with stencils, you need:
- take masking tape, which will become a stencil or basis for the drawing;
- glue it onto the glass;
- using rhinestones, lace and sparkles, which are attached using universal glue, repeat the stencil design;
- wait until everything is dry and remove the tape.
The result is an elegant glass that is suitable for a wedding in the style of classics, romance or Provence.
For decoration, you can use various images: a regular simple design, flowers, newlyweds’ rings or something else.
Glasses can be decorated not only with stencils, but also with decoupage, painting or appliqué. It all depends on taste and personal preference.
bottle decoration
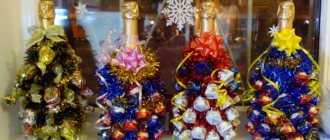
The design depends on the occasion. It is customary to give newlyweds two bottles of champagne at their wedding. One is opened for the first anniversary, and the second for the birth of a child. Therefore, it is worth considering the general type of gift. One bottle with a photo of the bride and groom, and the other with a picture of a child, look very beautiful both in execution and in meaning. In this case, the color of the stickers themselves can be any. Unless the newlyweds chose a specific color for the banquet decoration. Sometimes not only the main color, but also the style of the wedding can be reflected in stickers. It could be seagulls or yachts in the image if the theme of the celebration is maritime. A winter wedding can be accompanied by snowflakes or Christmas tree branches on the necklace and labels. The Provence style will help express lavender. The Greek style, which has become very popular, is emphasized by laurel wreaths.
Each wedding anniversary has its own symbol. The background of the label should be as symbolic as possible in itself. This can be done by using a fabric texture for a chintz anniversary. Accordingly, for a pink (amber), lace, or turquoise anniversary, you can use a background that will make a lot of things clear. Also, decorative elements on labels can carry meaning.
The text should be carefully thought out and made individual for each back label. It directly depends on the occasion of the celebration. These could be good wishes or a brief description of the meaning of a particular anniversary. Or maybe a cool inscription with the composition of the drink. For example, 10% luck, 30% happiness, 20% unbridled passion, 40% love.
All of these steps can be done online on one of many sites for free.
When the label design is ready, all you have to do is upload a photo of the bride and groom. Choosing photos is not as simple as it might seem. I want the newlyweds to like it. In addition, it must be of appropriate quality so that it looks good on the bottle. And, of course, no extraneous hands or elbows should be visible on it. Sometimes it is easier to conduct a photo shoot for this purpose than to find a suitable one from the available ones. The image of the culprits is usually placed on a small collieret and on a larger label. Some sites have links to Photoshop tutorials. This is very convenient for those who are unfamiliar with its functions. After watching it, even a teapot will understand how to make the background transparent, how to combine two separate photographs, and so on. And after studying, you can create the entire design yourself.
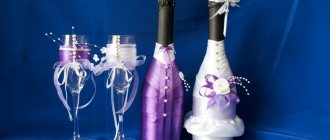
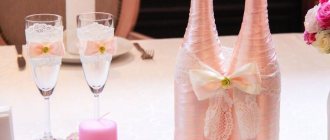
DIY bottles for a wedding - use ribbons
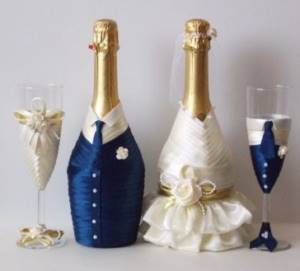
So there are at least two bottles of champagne. Making it exclusive is not at all difficult, the main thing is to prepare well. To begin with, get rid of unnecessary labels, only carefully so as not to scratch the glass. Then you can start decorating. One of the most popular methods for decorating champagne is using satin ribbons. This method is simple and affordable, but the result is a bottle that looks gorgeous.
Ribbons are needed to wrap vessels with sparkling wine, and also as an additional decoration. The satin ribbon should be the optimal size and color.
ADVICE. It is better to process the edges of the tape (carefully burn it) so that it does not diverge.
Decorating champagne with satin ribbons master class The method is simple and universal; satin ribbons can be selected to your liking. Materials:
- tape – 2.5-3.5 m;
- gold brocade ribbon – 1.5 m;
- instant glue;
- champagne with gold foil;
- scissors.
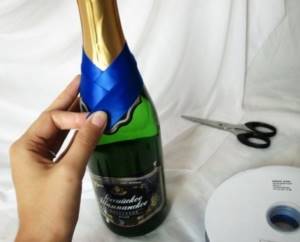
How to decorate a bottle with ribbons master class

1. Let's get started! First you need to measure out enough tape for the first layer.

2. Cut the tape and use glue to mark the points.
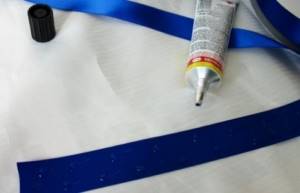
3. Wrap a satin ribbon around the vessel, pulling it tightly. Do the same with the other cut, which will be larger as the bottle expands. Make the third and fourth layers in the same way.
4. Now it’s the turn of the brocade ribbon. Two layers are enough.
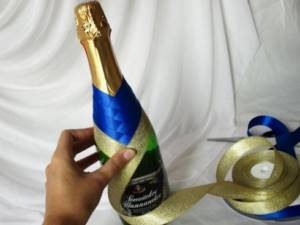
5. Glue the gold ribbon to the bottom of the bottle so that the seam is at the back. And also cut 7-8 ribbons of the same length of the chosen color, glue them in the same way so that the seam is at the back.
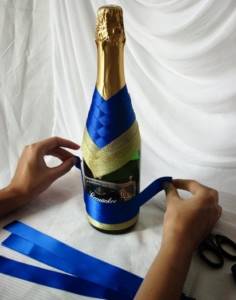
6. You can remove a sloppy seam using another tape.
7. Cover empty spaces with gold tape.
8. Carefully trim off any protruding corners.
9. For additional decoration, you can use beads, lace, bows - whatever you like, the main thing is not to overdo it.
10. DIY wedding champagne is ready!