Recently, it has become fashionable to do something with your own hands for a wedding, for example, accessories or decorative elements. And we are talking about both the banquet and the on-site registration, which has become so popular among newlyweds. You can make all sorts of little things for it, in particular, a cushion for rings, or something more global, for example, an arch.
Do you think this is unrealistic? In vain! The Svadebka.ws portal has selected several interesting master classes with step-by-step instructions with which you can make an original wedding arch with your own hands.
How to make a wedding arch: two options
An arch for outdoor painting can be made in a “simple” and “complex” way:
- A simple option: rent a base for an arch or find a suitable frame, for example, a wooden gazebo or tree, and decorate the base with any decorative materials: fresh or artificial flowers, fabric, ribbons, etc.
- A difficult option: make an arch frame from wooden beams or iron rods, and then decorate the resulting base. Moreover, you can make the frame of any shape: from a standard horseshoe to a circle or heart, because there are many different types of wedding arches, differing in their shapes and sizes.

DIY wedding decor ideas
On the eve of the holiday, you want to think through everything to the smallest detail. And in this search for something new and creative, it is very easy to get confused and complicate everything. But in fact, everything extremely simple may be the best option. Here are some simple but cute wedding decor ideas that are easy to implement regardless of location or budget.

1. Arches
Arches for a wedding ceremony can be not only pompous art objects from Hollywood films. A simple structure made of branches and flowers can look much more soulful. Such an arch can be made just an hour before the ceremony, and it will turn out no worse, and maybe even better, than that of professional decorators.

Not very symmetrical and a little crooked? But nature also does not tolerate straight lines and angles; it is characterized by smoothness and slight negligence!
2. Fabric
Curtains and draperies can also be played out in your own way. Decorate a gazebo, gallery or the same arch with light fabric. Warm shades of beige or caramel will harmonize with the overall style and softly shade it. Tiebacks can be made from viburnum branches, dried flowers and ribbons. If the ceremony is taking place indoors, decorate the tulle on the window with a garland - this is a simple and very inexpensive way to transform the most ordinary window.
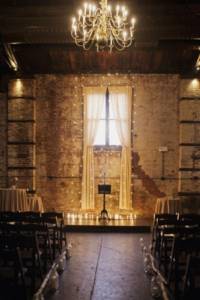
3. Doors
Doors, oddly enough, can also be used in wedding decor.
Place a few old, slightly shabby doors, add empty picture frames. Not only can you take stunning vintage photos against this backdrop, but you can also say your wedding vows. Besides, it will be symbolic. After all, when you get married, you open a new door in your own life.
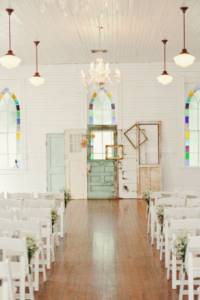
The same textured doors can be used to complement the already familiar arch for the ceremony.

4. Cheat sheet?
Saying your vows at a wedding is perhaps the most touching moment. Both the bride and groom are incredibly worried, their voices are trembling. Make yourself a cheat sheet! Yes, yes, a huge sheet with the words of an oath will not only tell you the cherished words at an exciting moment. This is also a wonderful decorative technique. Well, wedding photos against the backdrop of lines about love - what could be better?

5. Trees
Trees are another quite obvious, but for some reason undeservedly forgotten decorative item. If you choose an outdoor ceremony, it can be held right next to a spreading tree decorated with lamps made from glass bottles.
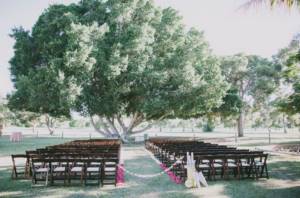
By the way, it will also turn out quite symbolically - a tree has always meant family and unity.
6. Floristry
Many decorating ideas involve flowers and plants. But complex (and expensive) compositions from florists can be easily replaced with homemade ones.
Hang bottles on the same tree and decorate these improvised vases with buds of your favorite flowers.
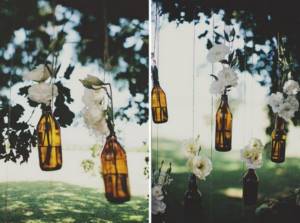
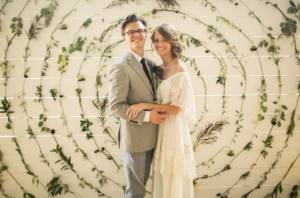
A stunning backdrop for a wedding ceremony (and a photo shoot, by the way, too) can be achieved thanks to an ordinary light wall. Attach flowers or branches in a certain order - draw a heart, circles or a spiral. Definitely no one had anything like this at a wedding, and bringing this idea to life was as easy as shelling pears.
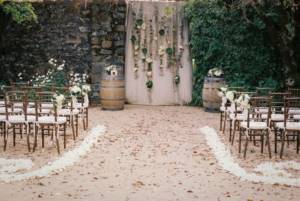
Garlands of flowers can complement a table, decorate rows of chairs, or “dress up” an ordinary curtain.
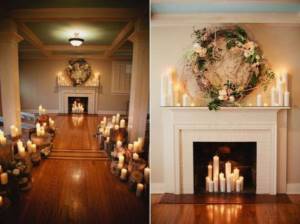
A wreath is another type of floral decoration. For many centuries, wreaths have symbolized infinity, love and fidelity. The most ordinary wreath of branches and flowers is such a simple and understandable symbol, and also a decorative item.
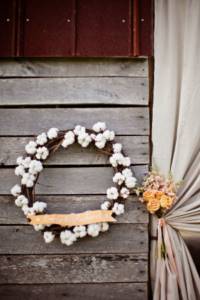
If you want something more unusual, winter, make a wreath of branches without leaves, and the “buds” will be pieces of cotton.
A simple wreath, or vice versa, a very voluminous and luxurious one, in any case, will bring together all the details and create a unique romantic image of the wedding celebration.
7. Light
You can and should play with lighting at a wedding. And it doesn’t matter at all whether it’s artificial light or sunlight. In any case, most of the unique atmosphere at a wedding is created thanks to the light. These could be the already mentioned garlands on the curtains, a huge chandelier made of garlands, or cute and cozy jars with pill-shaped candles inside.
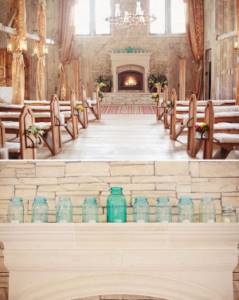
8. View and background
Impressive medieval castles or almost fairytale-like little houses - any building you like can become the backdrop for a wedding ceremony.
Well, what could be more natural and soulful than a panorama of a forest or mountain peaks. Organize the ceremony in a picturesque corner of nature - on a deserted sea beach with simple benches for guests, on the shore of a fabulous lake or near your favorite cliff...

The main thing is that the chosen place is a part of your soul and reflects your feelings and emotions. Then the ceremony will definitely turn out to be touching and tender.
Photo source: Pinterest
Milk and cookies - an idea for a candy bar
Ready-made invitation designs from Paper Dream
Hippie style wedding
Decoration and decor for a wedding in a nautical style - anchor
Wedding in English (Vika and Roma)
How to choose a team of specialists for your wedding? Meet Daria Miguel!
Living willow arch
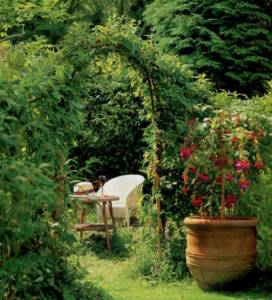
By creating a living arch from willow, you can temporarily feel like a real magician and wizard. It’s simply amazing how quickly miracles happen before your eyes and a fragile, fragile structure at first turns into a beautiful living arch. At the same time, it is surprisingly easy to do. At the end of winter, a frame is installed, in early spring, freshly cut willow twigs are planted around it, and then all you can do is watch and wait for the wonderful transformations. The arch shown in the photo on the right was planted a year before the photo was taken.
WHAT YOU'LL NEED
Materials for an arch approximately 2.15 mm high and approximately 900 mm wide, with a 2 meter hedge on each side.
- 8 larch trunks 2 m long, 60-70 mm in diameter, sanded and pointed at one end (vertical posts)
- 4 beech rods 4 m long and 15-20 mm in diameter (arch)
- 8 beech rods 3 m long and 15-20 mm in diameter (woven horizontal crossbars)
- 36 willow cuttings approximately 180 mm long
- 1 kg galvanized nails 75×3.75 mm
- Small roll of soft 1mm galvanized wire
Tools
- Pencil and flexible tape measure
- Sledgehammer
- Long nose pliers
- Ladder
- nail puller
- Long-handled loppers or secateurs
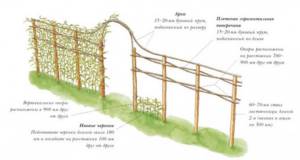
GENERAL VIEW OF THE ARCH
HOW TO MAKE A LIVING ARCH FROM WILLOW
Mark the position of the eight support posts. The span of the arch itself is 900 mm, and the distance between the supports should be about 700-900 mm. Using a sledgehammer, drive larch posts into the ground to a depth of 300 mm and adjust their tops by eye so that they are at the same height.
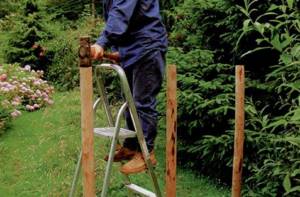
In order to make an arch, take two of the four-meter rods, place their thin ends up against the pillars limiting the span of the arch, and secure with wire. Gradually bend the rods, bringing them together in an arc above the middle of the arch span. Secure the ends of the rods together using three wire loops.
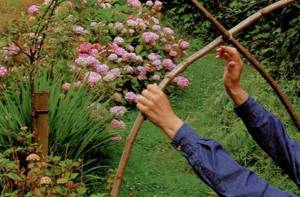
On each side of the arch, nail the remaining two rods to the tops of three adjacent support pillars, leading their thin ends towards the arch. Bend the free thin ends of the rods over the arc of the arch and attach with wire loops.
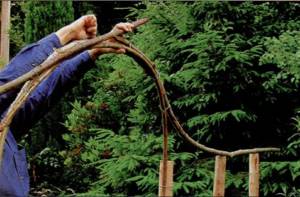
Braid eight 3-meter rods around the support posts, thereby creating two horizontal rails on the fence on each side of the arch. Nail the rods to the posts and trim the ends using a lopper. The ends of the rods should be flush with the support posts.
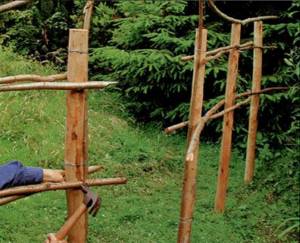
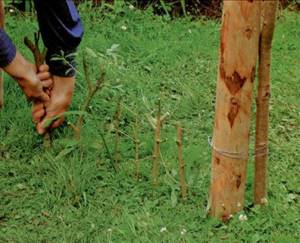
Trim the bottom end of each willow cutting to help them take root. Stick the cuttings into the ground at a distance of 100 mm from each other. As the willow grows, weave the growing ends of the bush around the horizontal rails of the fence and the twigs that make up the arc of the arch.
DESIGN OPTIONS
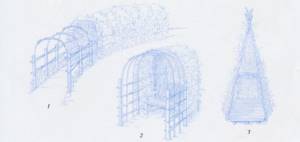
(1) A gallery of arches, from which you can make an unusual living corridor or colonnade. (2) The arched structure forms a cozy gazebo with a bench made of green wood. (3) You can make a hut from a live willow in which children will play with pleasure.


