The tradition of using a wedding chest
According to many young couples, the best wedding gift is money. With them, a newly-made family can purchase what they need for their future life together. Leaving envelopes and bills on the tray is inconvenient and unsafe, as they may fall out or get lost. It is also inconvenient to store them in the groom’s pockets, because he often participates in competitions and dances with the bride.
There is a belief that transferring money directly into the hands of newlyweds is not good. This may lead to financial difficulties in the future. Therefore, it is better to immediately put them in the box.
The wedding money chest is an elegantly decorated box with a hinged lid that can be locked. There is a special hole on the top or side where guests put bills and envelopes. The finished product can be ordered from a specialized wedding accessories store or from craftsmen who create exclusive chests that match the style of the celebration. You can make an accessory with your own hands.
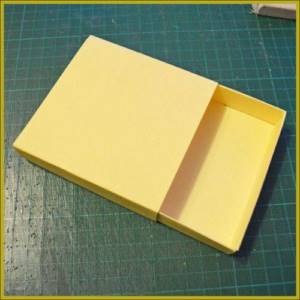
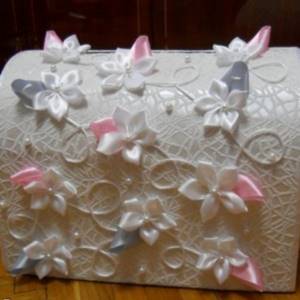
Photo of a money box for a wedding
Nowadays, money is one of the most common gifts and, it would seem, there is nothing simpler than. But sometimes you really want to add something unusual to such an ordinary gift. And this is not at all difficult to do; all you need is the desire and the simplest materials. So, we suggest you make a money box with your own hands, following our master class.
Money box scrapbooking – master class
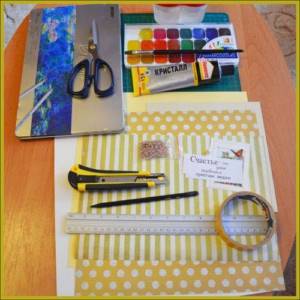
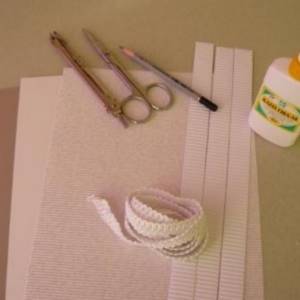
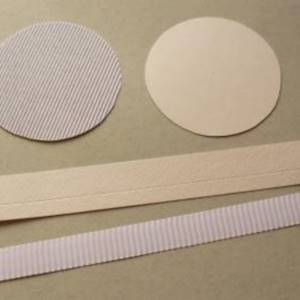
Required tools and materials:
- 2 types of scrap paper (backgrounds for it can be found on the Internet and printed or bought ready-made);
- white and colored cardboard;
- watercolor paper;
- pencils and watercolors;
- brush, pencil, stationery knife, metal ruler, scissors;
- an inscription or picture (you can also print them yourself);
- glue (preferably “moment-crystal”);
- double-sided tape (you can limit yourself to glue);
- decorations (beads, half-beads, buttons, pendants - whatever you see fit);
- ribbon.
Performance:
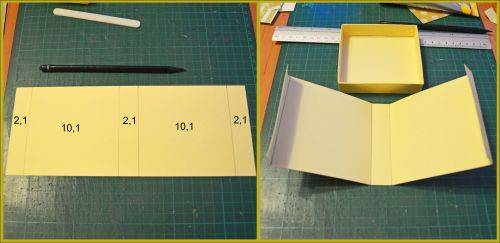
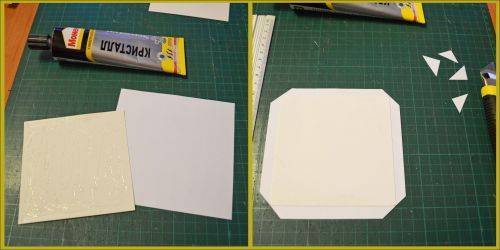
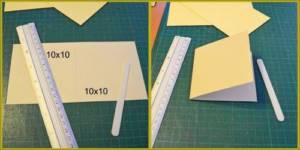
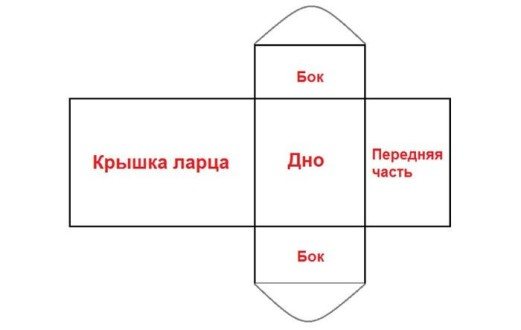
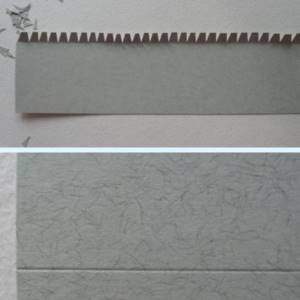
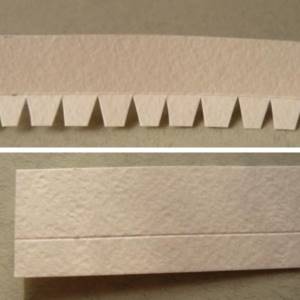
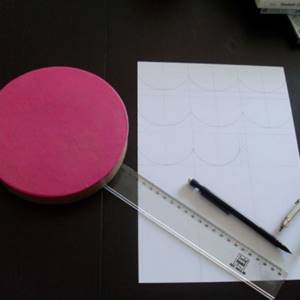
- First, using a ruler and a stationery knife, you need to cut cardboard and paper. The dimensions of paper and cardboard, as well as the principle of distribution of colored and white cardboard, are shown in detail in the photo.
- Next, we take the largest square (18x18 cm) and line it. The next step is to do the creasing (mark the places of the folds) - in addition to a special stick, many objects are suitable for this (a non-writing pen, a plastic card, and even the handle of a simple teaspoon). I used an ice cream stick. The principle of ruling and scoring is shown in the photo.
- The next step is to make cuts and trim off the excess.
- And finally, we coat the necessary parts with glue and fold our main box.
So, all the most difficult things are left behind, but it’s too early to stop, because only half the way has been completed.
It's time to make the second part of our box, and for this we will line and crease the largest rectangle of cardboard. This must be done as shown in the photo.
This is the kind of box we should get. Now it's time to start decorating.
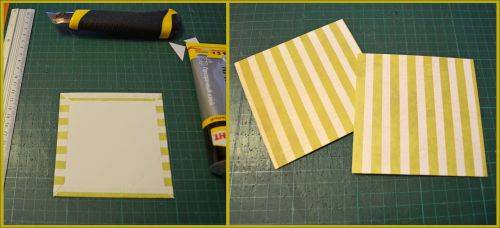
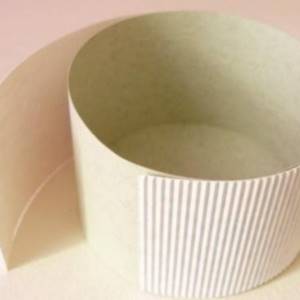
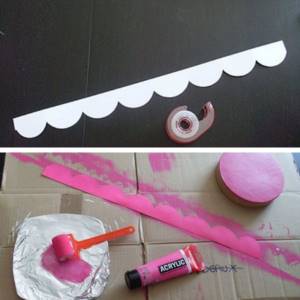
We glue narrow strips of paper (1x9 cm) onto strips of cardboard (1.5x9.5). The next step is to glue these double borders onto the box (2 each for the inside and outside), and also sew on a bead that will serve as a handle.

Now take 2 11x11 cardboard squares and two 13x13 paper squares.

We coat the cardboard square with glue, glue it to the wrong side of the paper and cut off the corners.
We fold the excess paper and glue it to the cardboard. We do the same with the second pair and get two neat squares.
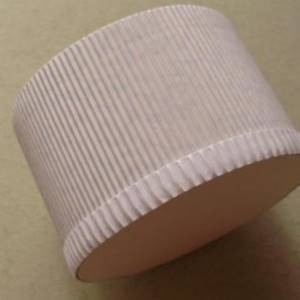
We glue our dense squares to the outside of the box so that an equal amount of cardboard protrudes along the edges.
It's time to decorate our creation:
We crease a 10x20 cm cardboard rectangle and fold it in half - this will be a card for wishes.
Now you need to glue the ribbon and the top layer of paper - a 9x9 square.

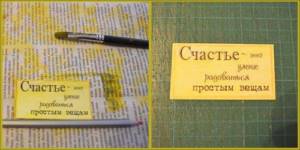
We paint the inscription with a thin layer of watercolor paint, outline it along the edge with a pencil and glue it to a cardboard rectangle 0.5 cm larger than the inscription itself.
Flowers are great for decoration and you don’t have to buy them - you can make them yourself. Let's draw a few large flowers and a few smaller flowers on the wrong side of the watercolor paper, and then cut them out.
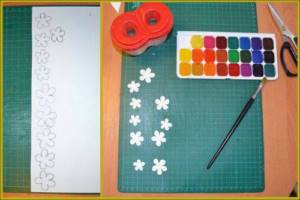
We wet our flowers with a damp brush. Immediately after this, add color to taste (saturation depends on your desire), and then we give shape to the petals - twist them around a pencil or (as in my case) the shaft of a brush.
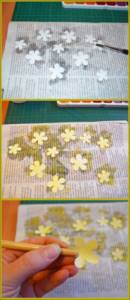
Let's add clarity and volume to our flowers - lightly outline the petals and draw veins, and then glue them in pairs and stick a rhinestone or half-bead in the middle.

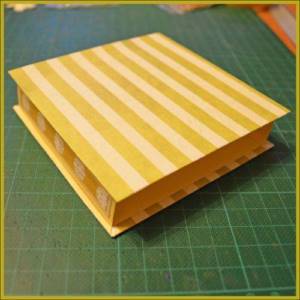
And here’s the finale: we attach all the decorative elements to the postcard, and glue the postcard itself to the box.
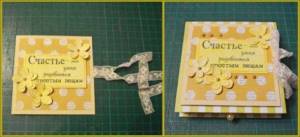
Our box may well become a package not only for money, but also for other small gifts, and later it will not get lost, becoming a place to store useful and pleasant little things.
Each wedding guest gives a gift to the newlyweds. Currently, the most popular gift is money. With them, newlyweds will be able to buy exactly what they need most. To ensure that not a single bill gets lost, it is proposed to make a money box (chest) for the wedding with your own hands. This material will discuss exactly this.
Product selection criteria
Various materials are used to make a wedding bank: thick cardboard, plywood, wood. Fabric, decorative paper, artificial and fresh flowers, rhinestones, ribbons, and beads are used for decoration. You can consult with the bride in advance, and she will help you decide on the style of the accessory in accordance with the wedding concept.
But the main thing is that the money box looks elegant and is as comfortable as possible. When purchasing a product, you need to pay attention to the following criteria:
- Size. When choosing the size for a wedding bank, you need to consider the number of invited guests. So, if about 50 people come to the celebration, it is enough to purchase a medium-sized box (about 20 cm in height). With a larger number of guests, preference is given to a more voluminous product.
- Form. Nowadays, a variety of forms allows you to choose a wedding attribute for storing money to your liking. This could be a classic box, an old-style chest, or a cardboard cake with several tiers, made in the same design as the edible one.
- Style. A chest for storing money at a wedding can be made in any design and color. The main thing is that this attribute is combined with the wedding decoration of the hall and fits harmoniously into the festive interior.
- Safety. It is worth taking care of the reliability of the box. A big plus is the ability to lock it. When there is a large crowd of people at a wedding event, it is not always possible to keep track of the safety of funds.
An accessory made of thin cardboard may not withstand constant use during the celebration. Each of the guests will definitely want to touch the original wedding attribute and make their contribution in the form of a cash envelope. Therefore, it is better to give preference to denser materials.
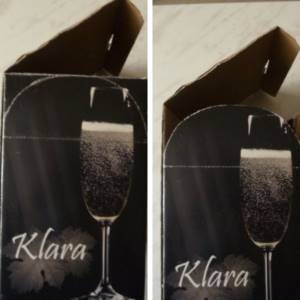
Chest diagram
Once the desired shape of the future wedding box has been chosen and all the materials have been prepared, you need to move on to the next stage - finding a pattern. It can be easily found on the Internet on specialized sites. Here are presented both diagrams of standard rectangular wedding accessories, as well as very unexpected and interesting options.
To save time, you can purchase a ready-made box from the material you like or simply use a regular small shoe box. By making a slot for banknotes and decorating it with ribbons, flowers and rhinestones, you can get a very attractive family bank for a wedding.
How to do it yourself
Beautiful DIY wedding money boxes should be in harmony with the overall style of the celebration. Any available items are suitable for their manufacture, for example, packaging boxes for household appliances. The main thing is to give free rein to your imagination, inspiration and have some free time.
Simple box
An excellent base option for a wedding bank is a regular box. For example, from under shoes that had previously been lying around. The main thing is that in the end, envelopes for money can fit there without any problems.
Materials you will need to create a wedding box:
- box with removable lid;
- acrylic primer;
- acrylic based paint;
- masking tape;
- stationery knife;
- sandpaper;
- silicone glue or PVA;
- pencil and ruler;
- decorative materials for decoration.
The box must first be prepared:
- Cover all corner joints with masking tape.
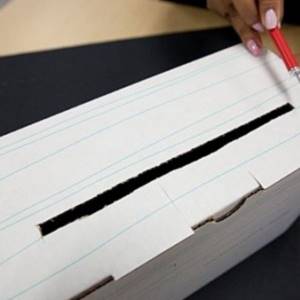
- Cut a hole measuring 3 by 15 cm in the center of the lid.
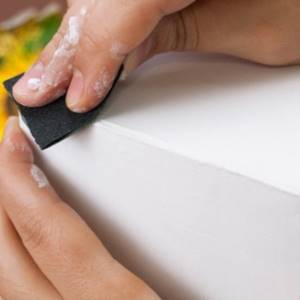
- Cover the entire base and lid of the box with acrylic primer.
- After the primer has dried, go over the entire box with sandpaper to level the surface and prepare it for subsequent paint. The last two steps must be repeated several times until the joints at the corners are level with the surface of the box.
- The next step is to coat the box with acrylic-based paint, which should match the color scheme with the wedding interior.
- After the paint has dried, you can begin decorating the box with decorative elements. The lace should be carefully glued along the bottom edge of the base so that traces of glue are not visible.
- Then glue the lace along the edge of the box lid and carefully tie a ribbon on top, which can be secured with glue. The money cutout area also needs to be taped.
The glue can be replaced with double-sided tape.
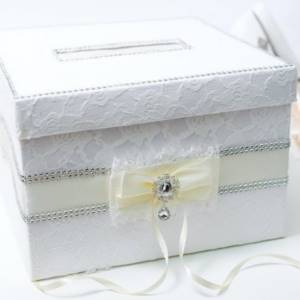
The wedding money box is ready. Additionally, it can be decorated with various beads, rhinestones or paper butterflies. Decorations made from living plants or dried flowers will add an original touch.
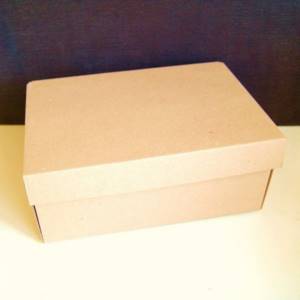
Choose a regular shoe box in light colors
We strengthen all bends with masking tape
We cut a hole for envelopes and bills according to the design
Prime and leave to dry

Sand with sandpaper Apply the required number of layers of acrylic paint
Decorate with beads, lace, bows
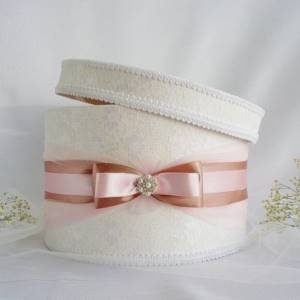
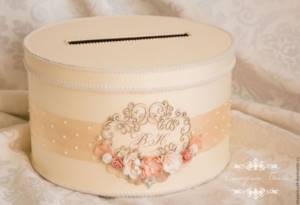
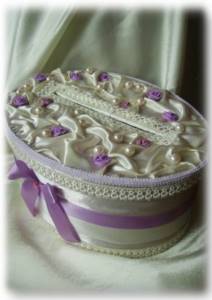
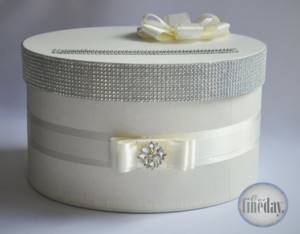
Casket
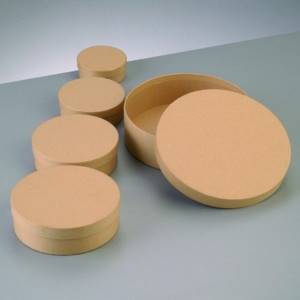
A neat and elegant box for collecting money for a wedding with your own hands, made from a round box (for example, from Raffaello), will look festive at a wedding celebration. In addition, in the future it can be used as a place to store jewelry.
To create a box you will need:
- round box;
- thick paper;
- Ruler and pencil;
- stationery knife and clips;
- PVA;
- scissors;
- padding polyester;
- textile;
- small fabric flowers, which can be purchased in craft departments.
When all materials are ready for work, you can begin the process:
- We measure the circumference of the box and its height. We put these parameters on the fabric and cut them out.
- We cover the entire outer surface of the box with a cloth using PVA.
- Glue a suitable circle of fabric to the bottom from the outside of the accessory.
- We measure the inner bottom, cut off the same piece of fabric and glue it again.
- Cut out a rectangle of thin cardboard or thick paper equal to the inner surface of the box.
- We cover it with fabric and seal the inside of the box with this side.
- Now it's the lid's turn. Since it has high sides, it is necessary to cut off a little more than half the height.
- We seal the top of the lid with padding polyester and cover it with fabric.
Additionally, you can cut out a piece of cardboard, cover it with fabric and seal the side of the lid with it. All that remains is to decorate the box with beautiful decorative elements. It can be lace, beads or fabric flowers.
We prepare thick and corrugated cardboard, as well as other necessary materials
Cut out pieces of cardboard of the required diameter for the base
We make notches in the side part for fixation. Glue the side strip and the double bottom together.
We decorate the base with corrugated cardboard. Glue the third part of the bottom on the outside.
We mask the joint with corrugated cardboard
Cut out the parts for the lid 5 mm larger than the main part
We make notches on the side panel of the lid. Glue the lid together, decorate it, and cut a hole for envelopes.
Decorating the box
Box
Making a decorative chest with your own hands is not at all difficult. This colorful decoration will be an excellent gift for newlyweds. You can use the accessory after the wedding, to store small items or as a piggy bank.
When making a chest you will need:
- any box with a hinged lid;
- scissors, stationery knife;
- glue;
- ruler, pencil;
- beautiful wrapping paper or fabric;
- braid;
- decorative decorations.
Manufacturing stages:
- Make grooves on the inside of the box lid at a distance of 1.5 cm so that in the future it can take on a semicircular shape. Cut a hole in the center for envelopes of the desired shape.
- Draw lines in the form of arches on the sides of the box. Step back about 15 cm from the top of the arch and draw a solid line along three sides of the accessory. Cut off the excess cardboard and form the second part of the lid.
- Connect the two parts of the lid into one with paper tape. To make it rise freely, you need to make a small cut in the corner of the box.
- Now all that remains is to cover the chest with decorative paper or fabric.
- Satin ribbons will look great as decoration. They can create beautiful symmetrical patterns throughout the chest.
- Decorate the slot in the box with tape, which should be carefully glued around the entire perimeter of the hole.
The edges of the box can be decorated with braid or lace, which will complete the composition. To prevent the chest from looking too crowded with decorative elements, it is enough to choose 2-3 materials in the same style to decorate it. No longer required.
Choosing a box with a hinged lid

We outline the fold lines for the arched cover, bend
Draw and cut out an arch
We strengthen the parts with tape
Cut a hole of the required size on the lid
We cover the box with material or paper from the inside and outside
We decorate according to design
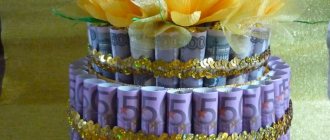
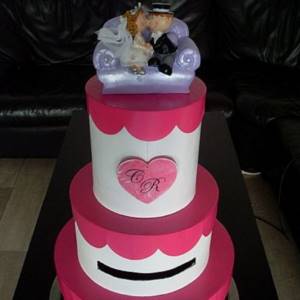
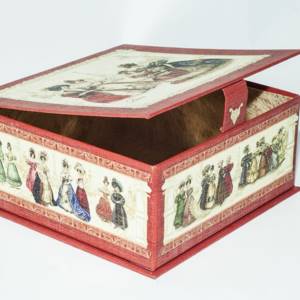
Cake
What wedding is complete without a birthday cake. This is one of the main attributes that complete the wedding ceremony. Therefore, you can surprise your guests with an original chest in the form of a cardboard cake for money.
To make a chest in the form of a multi-tiered cake, you will need round or square boxes of different sizes. You can make them yourself from cut cardboard or thick paper. To create the base of the future cake, you need to glue the boxes together, starting from largest to smallest.
Once the base is ready and it is in a stable position, you can begin processing it with decorative paper. All box joints should be carefully covered with decorative elements. These can be ribbons, beads or braid. A hole is made in the topmost box for envelopes and decorated with braid or ribbon. You can decorate the base according to your taste or taking into account the wishes of the newlyweds.
We select round boxes of different sizes
In the middle box, remove the bottom and cut a hole
We paint all the boxes in the desired color
We paint the lids and draw curly edges
Cut out and paint the curly edges
We complete all the details and decorate
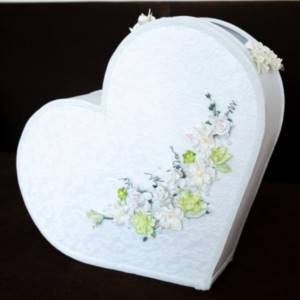
Heart shaped
A heart-shaped cardboard wedding money box will be a memorable gift for newlyweds. Such a romantic gift, as a symbol of eternal love, will be able to decorate the bride’s dressing table for many years to come, where she will store her jewelry or any other small items.
To make a box yourself, you will need the following materials:
- thick cardboard;
- scissors;
- glue;
- decorative paper;
- elements for decoration.
Let's start creating the box:
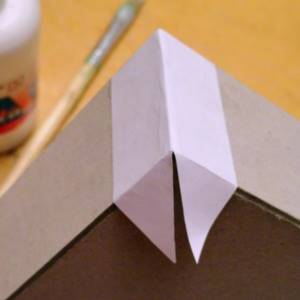
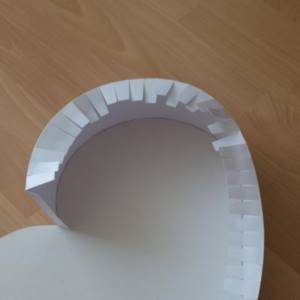
- First you need to create a blank for the future box. To do this, cut out two hearts from cardboard. One heart should be 1 cm larger than the other. This will be the base for the lid of the box.
- Next, we cut out two long strips of cardboard that will become the side parts of the base and lid. These strips must be cut with a small margin, on which notches are then made for gluing to the base.
- The side parts are glued to the bases in the shape of hearts, then the joints are glued together, the excess parts must be cut off.
- The final stage is decoration. We cover the inner and outer parts with decorative paper so that there are no noticeable joints or traces of glue.
We decorate the upper part of the product as desired. Openwork or satin ribbons look harmonious on the sides. To add originality, you can decorate the box with small photographs of the newlyweds.
Cut out heart-shaped pieces from cardboard
Using rectangular parts with notches we form the side strips
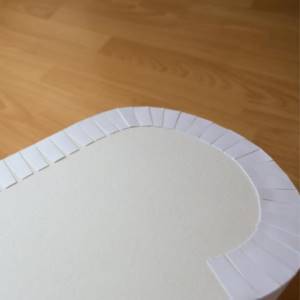
We connect and glue all the parts
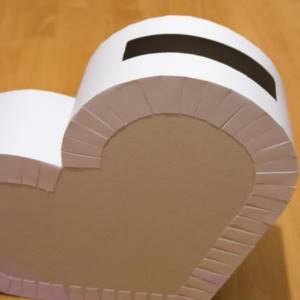
Making a hole in the side
We trim and decorate
Treasury box
As a base, you can take any box you like from shoes, dishes, equipment, or sweets. The size is selected depending on the number of guests. It should be noted that many people give money in envelopes, sometimes handmade, which are much larger than a regular postcard. All this should go inside easily.
To prevent the hole for money from looking too big and ugly, you can cover it on both sides with lace.
If the box is too small, but you like its shape, you can increase its size, for example, in height, using thick cardboard. It will not be noticeable behind the decorations. If the box is too large, then you can make it smaller by cutting off the corners and changing the shape. As a last resort, use it as a material and simply cut out the parts according to the template.
The treasury from the box can be covered with corrugated paper, fabric, or painted. To give volume and soft relief, you can lay padding polyester between the box and the fabric. It is not the stretched fabric that looks interesting, but the glued, wrinkled one. To do this, grease the sides of the box with glue, do not pull the fabric tightly, and use your hands to chaotically create a pattern with tucks as in the photo:
This way you can not design the entire box, but, for example, only the sides or the roof.
Further decoration as desired. These can be photographs of the newlyweds, ribbons, bows, flowers, lace, half beads, rhinestones. Design example:
Related article: DIY leather necklace
Such a treasury can be opening from the top or bottom. This is especially important if it will later be used to store memorabilia from the wedding.
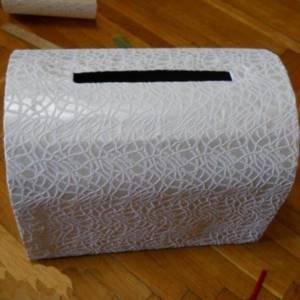
Decor options
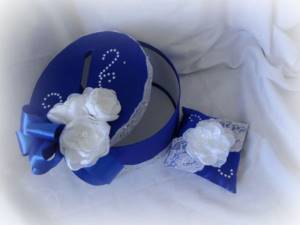
Before decorating the box, you need to decide on its style and color. Sometimes two chests are made: pink and blue, and guests collect money for the “son” or “daughter” of the newlyweds. Various materials can be used for decoration:
- small accessories in the form of rhinestones, pearl beads or sequins;
- satin ribbons, lace, braid;
- natural decorations in the form of dried flowers, twigs, leaves and berries;
- textile buds and bows;
- decoupage technique.
The classic color of the accessory is white. Such a money box at a wedding looks elegant and harmonizes with the bride’s dress. However, if the celebration is decorated in a certain shade, for example, turquoise or red, then the chest should be decorated with these colors.
Contrasting colors of the base and decorative elements look advantageous. For example, when part of the box is made in a milky or white tone, and is decorated with red ribbons and other decor of this shade.
A chest for money for a wedding is an interesting accessory that is designed to become a repository for the first treasury of a young family. If it is made with high quality, it will serve the spouses for many years to come. A beautiful box will never be out of place. And the fact that you can do it yourself, turning your own fantasies into reality, is especially nice.
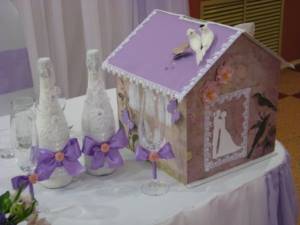
Treasury-house
This design symbolizes the united life of the young, perhaps the desire to acquire a new day. The treasury turns out to be beautiful, unusual and will delight you with its appearance for a very long time.
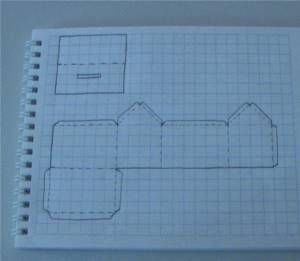
You can come up with a pattern yourself or take a ready-made one. The lid is hinged. You can glue it at one end to the wall. The house is decorated with windows and doors made of colored paper, ribbons, and fabric. Photos of the newlyweds are also suitable for decoration. The material for making the house can be cardboard, whatman paper or plywood. If whatman paper is used as the base, then it needs to be reinforced with finishing material, for example, covered with thick wallpaper.
Related article: A selection of beautiful openwork jackets knitted and crocheted (From Sabrina)

![How much money to give to newlyweds for a wedding in [year]?](https://svadba-ossetia.ru/wp-content/uploads/skolko-podarit-na-svadbu-deneg-molodozhenam-v-year-godu-330x140.jpg)