Wedding gifts
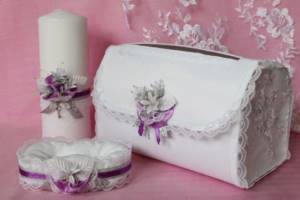
- Types of wedding treasury
- What to pack and where to put money at a wedding?
- How to make a money box with your own hands: ideas for decorating a wedding treasury
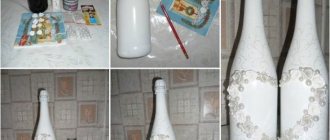
- How to arrange a wedding gift in the form of a jar of money?
A beautifully decorated treasury for money has become a common attribute of this solemn day in the life of the young. You should not immediately blame the bride and groom for commercialism: in fact, such a treasury is not established for the purpose of extracting money from the invitees under a plausible pretext. The symbolism of such a cash treasury lies in displaying the benevolent intentions of relatives, friends, and colleagues who came to the celebration.
As a rule, very large bills are not placed in the treasury - traditionally these are coins, although, of course, paper money of various denominations is often found in the wedding bank. Coins are considered particles of positive energy that attract wealth and prosperity into the home of a young family, and guests share these particles with pleasure and joy with the bride and groom. It is recommended to create and decorate a wedding treasury with soul and imagination: a beautiful and original treasury attracts the attention of guests, and collecting money at a wedding will make it a pleasant moment of a common celebration, and will subsequently become an effective and useful addition to the home interior.
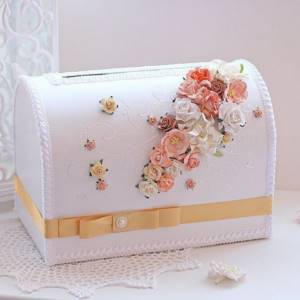
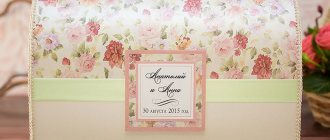
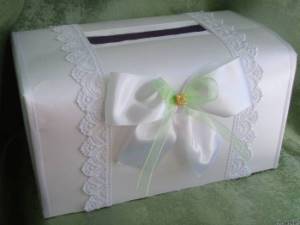
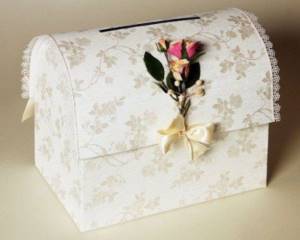
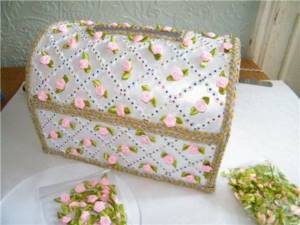
Photo of a treasury for money for a wedding, made by yourself
Purpose of the chest
Nowadays it is customary to give money to newlyweds for their wedding. For the convenience of collecting donated financial amounts, beautiful boxes or special chests are used. They are unique symbols of the future financial well-being of a young family.
With the funds collected, the newlyweds can independently purchase for themselves what they think is necessary for their family life. Also, such a gift is very convenient because guests do not need to rack their brains over the question of what to present to the newlyweds for their wedding celebration.
According to an old belief, it is forbidden to give money to the newlyweds at a wedding. This may cause them financial trouble or bring them into some kind of trouble. Therefore, a special chest is useful for collecting money.
Current wedding ideas
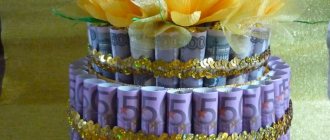
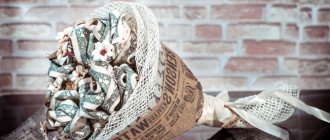
To create a miracle cake, you need 2 or 3 boxes of different diameters (depending on the desired number of tiers).
Detailed master class on making a “delicious” money cake:
- Using double-sided tape, small boxes are attached to large ones. The result is a tall and stable structure.
- The edges of each box are covered with white paper to make decorating easier.
- There is a slot on the top cover of the box for gifts.
- The cake can be painted with acrylic paints or initially covered with colored or gift paper.
- The edges of the tiers can be covered with lace or satin ribbon, beads or pearls.
- The money hole also needs to be decorated. Its design is carried out with the same material that was used for the edges.
The chest for collecting money for the newlyweds is ready.
The casket in the shape of a house looks fresh and fascinating. The form itself hints to guests that all donated funds will be used to purchase new housing. Creating a house will not be difficult. You will need a regular box. The roof of the house is made of a thick sheet of cardboard, which is folded in half. The entire structure is painted in one color. The house can be painted to look like a brick or use leftover wallpaper. The windows can be decorated with beautiful lace.
Video ideas for wedding houses for gifts
https://youtube.com/watch?v=-7RrskGYIgc
Where to begin?
To make a chest with your own hands, you will need your own imagination and some free time. Such an attribute must be done carefully and with love, as it will become the central element of the celebration and will symbolize the future treasury of the newlyweds. By putting your whole soul and good intentions into its production, you can attract financial well-being to the family.
Before you start making a money chest, you need to determine:
- The shape of the future wedding chest: square, rectangular, barrel-shaped, heart-shaped, etc.
- Product color and size.
- What materials will be needed to make this holiday attribute with your own hands?
- Related decor.
Choice of color and shape
A wedding chest can have any color design, from snow-white to black. It all depends on the wishes and preferences of the heroes of the occasion. However, if this accessory is made for a specific purpose, it is necessary to choose the right color:
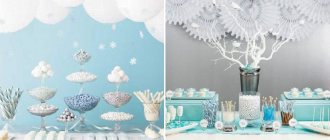
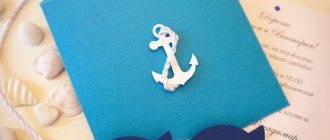
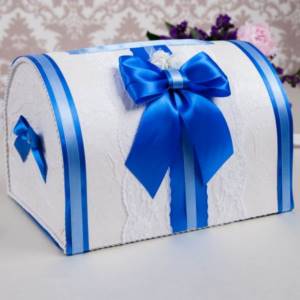
- If the chest is used to collect money for a future son, this accessory should be made in blue or light blue.
- If you are collecting funds for your future daughter, you should give preference to shades of pink.
- If the money box is intended to raise funds for a honeymoon, it should be bright and colorful.
- If this attribute simply acts as a family bank, it is made in white or another neutral color.
For my future son
For the future daughter
In addition, depending on the purpose of collecting money, a certain shape of the chest for the wedding is chosen:
- For future children - in the form of a stroller or cradle.
- For travel - in the form of a car, plane or map.
- For a house, car, etc. - in an appropriate form illustrating the desired object.
Wedding chest in vintage style
If the base was painted with white paint, then you can use the decoupage technique for decoration:
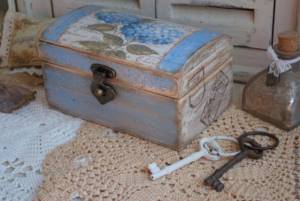
- Print out wedding-themed pictures and carefully cut them out along the outline.
- Apply PVA glue to the areas on the chest where the pictures should be located, attach the image there and carefully smooth it with a brush.
In this way you can cover the entire box or individual sections of it. In the latter case, additional decor would be appropriate. For example, you can make spectacular decoupage in vintage style:
- Print out a joint photo of your future spouses or two separate ones with each of them. It is best to stylize the photograph in advance as antique.
- Cut the photo into an oval shape.
- Glue to the front edge or sides.
- Make a frame of white pearls or clear crystals around the photo.
- Attach a neat bow to the bottom or top.
- On the empty areas of the box you can paste clippings from old newspapers, sheet music or books with romantic poems and quotes.
- As additional decor, you can use lace, satin ribbons in pastel shades, ready-made beads, and feathers.
- Using silver or gold glitter (contour paints), depending on the design style, make a thematic inscription: the names or initials of the newlyweds, the wedding date or something symbolic.
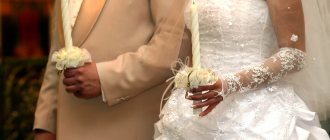
The lock for such a chest should be designed in the same style; the simplest thing is to simply paint it with silver or gold paint, stick a few beads or crystals on its front side.
By the way, the clasp of a chest for a wedding can be made magnetic, and on the outside this place can be marked with a beautiful bow, brooch, flower, etc.
Materials used
A wedding chest can be made from the following materials:
- Thick cardboard is the most commonly used material for making DIY wedding accessories. You can easily make wedding boxes from it. However, such material is short-lived, as it is highly susceptible to moisture and time.
- Tree. Wedding accessories made from this material are durable and reliable. They have an attractive and noble appearance, especially if you decorate the tree with artistic carvings. Such a money chest can last for decades. However, only a person who has special skills in working with wood can make it from this material with his own hands.
- Plastic. This material is characterized by many color schemes. Most often, to make a wedding accessory for fundraising, a ready-made plastic box is purchased and then decorated.
- Glass. Wedding boxes made from this material are quite beautiful, but fragile.
To decorate wedding chests, the following materials are needed:
- colored paper, thick foil, etc.;
- satin ribbons, tulle, braid and lace;
- gold and silver strong threads;
- drapery fabric;
- beads, stones, shells, rhinestones and sequins.
Additional materials you will need:
- scissors;
- needles with strong thread;
- stationery knife;
- a simple pencil;
- high-quality glue;
- transparent tape;
- ruler.
In addition, the whole process requires inspiration and a good mood.
It is worth paying attention that the appearance and durability of the wedding accessory for raising funds directly depends on the quality of the selected materials.
For example, high-quality glue will allow you to securely fasten the decoration to the box, thereby preserving it not only for the duration of the celebration, but also for a longer period.
Money box in the shape of a heart
If you have a ready-made heart-shaped box, use it. If not, we do it ourselves. The bottom and top part are cut out of cardboard in the shape of a heart. Then you need to cut out long strips. These are the side walls. The height of the box depends on the width of the stripes. Cut a hole on the top for money. Glue all the parts together and decorate the finished form.
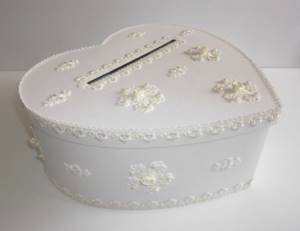
Example of a heart-shaped money box
Such money boxes are used not only at weddings. They can also be considered as gift boxes. They are made according to the same principle, only without holes for money. If you make beautiful wedding chests, then you can try selling them. Sales points ─ wedding salons. There are also special forums. The cost of the most primitive money box without any frills is approximately 600 rubles. A “cake” decorated with ribbons and rhinestones costs 1,650 rubles. You can make a trial batch of several different boxes and negotiate with the wedding salon to keep them for sale. Of course, it is unlikely that you will be able to earn a million, but it is quite possible to receive a good income.
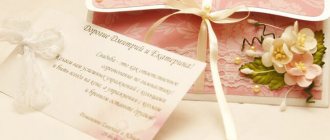
It is customary to give wedding gifts to a newlywed couple; this tradition dates back to ancient times. A popular gift is considered to be a certain amount of money so that the newly-made family can decide for itself what they need to buy. However, donated banknotes must be carefully folded so as not to lose anything. For such purposes, beautiful wedding chests were invented with a cut hole into which envelopes with money can easily be inserted. It is not at all necessary to purchase such a chest if you have minimal creative abilities.
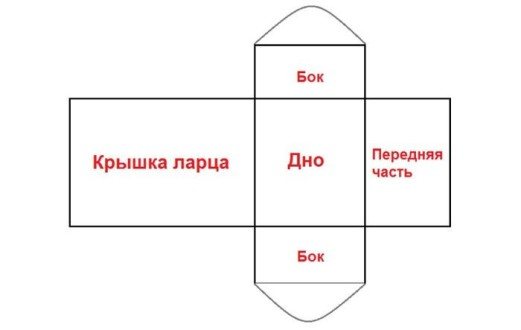
Chest diagram
Once the desired shape of the future wedding box has been chosen and all the materials have been prepared, you need to move on to the next stage - finding a pattern. It can be easily found on the Internet on specialized sites. Here are presented both diagrams of standard rectangular wedding accessories, as well as very unexpected and interesting options.
To save time, you can purchase a ready-made box from the material you like or simply use a regular small shoe box. By making a slot for banknotes and decorating it with ribbons, flowers and rhinestones, you can get a very attractive family bank for a wedding.
How to make a chest from a regular cardboard box
You can make an ATM out of a box with your own hands as follows:
- First you need to give the lid of the cardboard box a convex shape. To do this, longitudinal grooves are carefully drawn along its surface using a stationery knife. In this case, you must be careful not to cut through the lid, otherwise it will no longer be suitable for further use. Longitudinal grooves will allow the cardboard to bend and take on a semicircular shape.
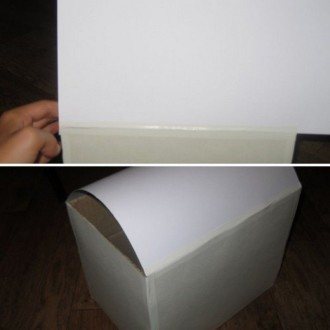
- Both ends of the semicircular lid are secured to the sides of the box using tape and additional cardboard. As a result, the box should take the shape of a chest.
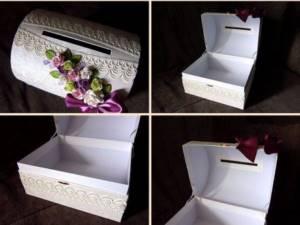
- Next, you need to close the side gaps of the box formed after bending the lid into an arc shape. To do this, cut out the necessary shapes from thick cardboard, the dimensions of which coincide with the dimensions of the resulting gaps. The cut cardboard is attached to the sides of the money chest using clear tape. The result is a composition in the shape of an arch. In addition to tape, you can use a stapler with paper clips to securely fasten the cardboard.
- The next stage is the easiest, but at the same time the most responsible. A cut 5–7 mm wide must be made in the middle of the concave lid. It is intended for cash, so its length should be sufficient for the bill to easily fit inside the box. It is best to calculate the cut in such a way that the envelope can pass through it freely.
- Now you can move on to the most enjoyable and creative stage - lining and decorating the wedding accessory.
- First you need to measure all the parameters of the box and the curved lid. Then, using the data obtained, you need to cut the required piece of fabric separately for the lid and separately for the bottom of the box.
- The lid is carefully covered with fabric, and then the rest of the cardboard chest is moved on. After this, it is necessary to cut the tissue at the location of the lumen for funds. You should not rush at this stage, since the appearance of the wedding chest will depend on the accuracy of execution.
- Next, check the cut on the lid. To do this, you need to take the envelope and try to put it inside. If this action is difficult, it is necessary to enlarge the incision.
- After a gap has been made for the money, the edges of the fabric are processed using a lit match so that the threads do not unravel and arrows do not appear. In this case, you should be careful not to inadvertently burn the entire cardboard structure.
- The last stage in making a chest for a wedding with your own hands is decorating it. Here you can fully express your imagination and creativity.
- To decorate a box for a wedding, you will need various materials: shiny threads, shells, ribbons, lace frills, rhinestones, small mirrors, sequins, etc. You can also use artificial precious and semi-precious stones for decoration. However, when performing this stage, you should be careful not to overdo it and not turn the box into a tasteless accessory, decorated with decorative elements that are incompatible with each other. Therefore, to decorate a chest with your own hands, it is advisable to choose no more than three elements, for example, lace braid, satin ribbons and decorative stones of compatible colors.
Small box for our wedding
In gift times, classic postal envelopes are increasingly being replaced by a gift box for a wedding with money. It is not difficult to make such packaging with your own hands. Cut out a piece from cardboard with dimensions of 18x20 cm in the middle along the rectangle, leaving two, leaving 2 cm grooves between them - this is how a book spine is formed. Next you need to collect a box of money. Before this, you need to cut out the size of the bottom part, corresponding to the parameters of the bill with small allowances. In addition, on the short sides the long sides are 4 cm long, and 2 cm are added on the sides. Then you need to make rectangular cuts 4 cm long along the sides. Fold the long ones, glue the sides of the pieces to the sides and cover them with an allowance of 2 cm. Cut out a rectangle corresponding to the cover from decorative paper and glue both parts together, placing ribbons from the string between them.
Decorate the bottom with the same paper, and glue it to the main element of the drawer. Decorate the outer side of the cover with a napkin, placing it in the middle. Then. Gather the lace from the spine, lay it out from half beads and decorate it with curls into a box.
https://youtube.com/watch?v=TBAv8eQgujs
Chest decoration
A homemade wedding box can be monochromatic or combine several colors that look harmonious with each other. Among the most popular design options: the bottom of the product is made monochromatic, and the top is bright, with various decorative elements.
You should start gluing the box from its sides, smoothly moving to the lid. To do this, you need to take high-quality glue that can reliably attach fabric, metal and plastic to a cardboard or fabric surface. Do not neglect the quality of the glue, since a part of the chest that is not securely attached can fall off at the most inopportune moment.
When decorating a chest, you can use the following tips:
- It is recommended to decorate the sides and joints on the chest with satin ribbons, the color of which matches the shade of the fabric for the lining.
- To decorate the chest, you can use ready-made options that are offered by wedding salons and handicraft stores.
- The lid of the jewelry box should not be too heavy, otherwise it will begin to sag inward.
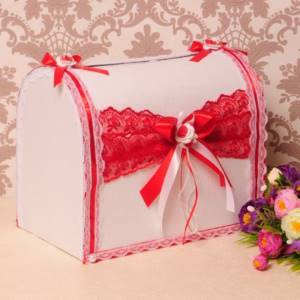
- A winning option would be to use contrasting colors and shades, for example, white fabric for lining the product and red ribbons for decoration.
- The sides of the box can be decorated with photographs of the happy newlyweds.
- For decoration, you can use original decorations: small tree branches, dried grass, flowers, leaves and berries. Thus, you will not only get an interesting composition, but also be able to surprise your guests with your skillful handicraft.
You can make a beautiful and original chest for money for a wedding with your own hands. To save your time and protect yourself from possible failure, you can make a wedding accessory from a cardboard shoe box and decorate it with blanks purchased from a specialized store. It will take no more than two days to produce and decorate such an attribute.
Comments (0)
Money box for a wedding: master class
The next box we offer is shaped like a two-tier wedding cake. To create the casket in question, you need to find a round box, for example, from a tea set or chocolates. If you don’t find the desired shape, then make a round layout from cardboard. Cut a hole in the lid of the lower tier, moving 3-4 cm from the edge, so that the cake inside is hollow. At the top part with a smaller diameter, make a slot for money. Combine both elements to form a cake shape. Then cover the box with decorative paper or wallpaper. Mask the joints with lace. Do the same with the top hole. Add beads, rhinestones, and small accessories to the decor. Flowers made from satin ribbons made using the kanzashi technique look original.