7
Prepared by: Yana Gornostaeva
02/09/2017 Cooking time: 3 hours 0 minutes
| Save | I cooked) | Estimate |
A DIY heart-shaped cake can not only decorate your holiday table, it will serve as an excellent gift for your loved one on Valentine's Day. Tasty and elegant - such a dessert is always relevant.
How to make a heart cake
To understand how to make a “Heart” cake, you need to choose the appropriate recipe and understand the cooking technology. The algorithm of actions will not be much different from making any other cake, but creating a special “heart” shape is a problem for many.
The progress of work begins with the need to prepare the ingredients. Their composition depends on the chosen recipe. The “Heart” cake can consist of sponge cakes, individual puff hearts, jelly, meringue, etc.
The most crucial moment is the creation of that very form. This can be achieved using 2 options:
- prepare a special “Heart” shape in advance;
- create a shape with your own hands.
The first option is ideal for those who are far from preparing desserts. All you need to do is make the batter and pour it into the mold.
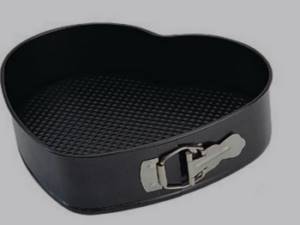
The second option for preparing dessert will require a little skill. First, you will need to purchase or make a tin heart-shaped mold yourself, and then use it to cut out the desired shape from a standard cake layer.

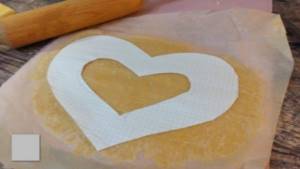
Heart cake stencil
Cooks often use a stencil for the “Heart” cake. It allows you to quickly and easily get the desired shape without spending money on buying a special baking dish.
What do you need to do to get a stencil? Everything is simple - take paper and draw or trace a heart. Then just cut it out. It is better to take thick paper. This will allow you to get a strong stencil that can be used more than once.

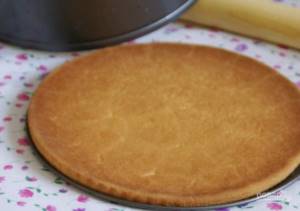
To get a heart-shaped cake, you need to roll out the dough and attach a stencil to it. Carefully cut out the shape using a knife.
In this case, you need to discard the batter.
You can grease the finished cake with cream, add fruit and decorate with sweets.
DIY heart cake for a girl, step by step
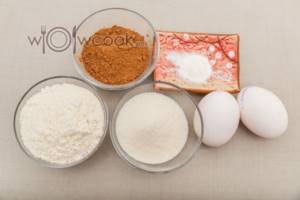
If you need to make a cake for a girl, then you should build on her preferences and desires. You need to start preparing dessert by preparing the ingredients. To prepare the biscuit dough, the cook will need:
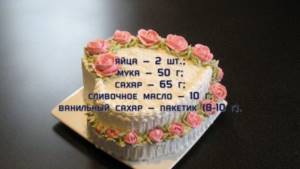
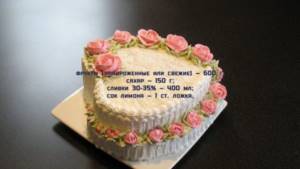
For the cream you need to take:
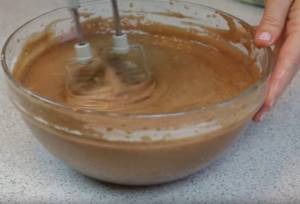
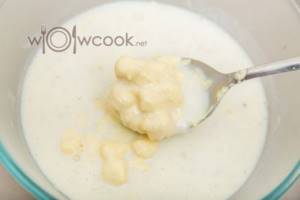
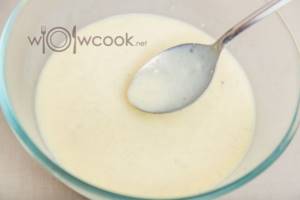
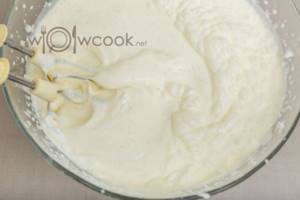
The first step is to make the dough according to the recipe.
It is better to cool the oil a little first. This way the dough will “accept” it faster.
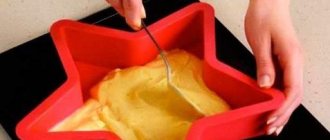
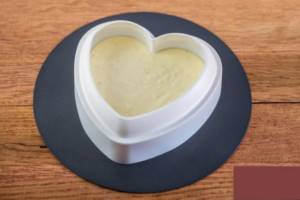
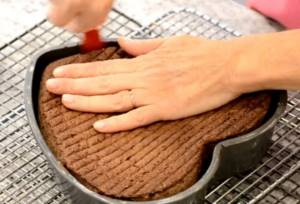
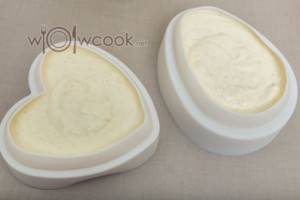
The second step is to pour the resulting mass into a heart-shaped mold. First you need to cover it with parchment paper. Place in a preheated oven at 180 degrees for about 20 minutes. You can check the readiness with a match by piercing the cake.
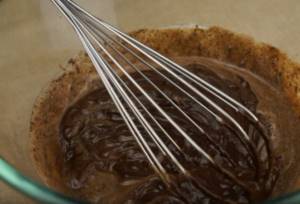
The third step is preparing the cream.
The fourth step is to assemble the cake: brush the cake with a syrup of water and sugar, apply cream to each cake, stacking them one on top of the other.
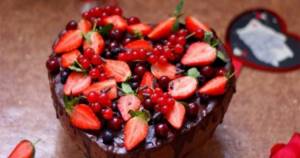
The fifth step is to decorate the dessert with fruits: strawberries, currants, bananas. You can also use mint leaves.
The video material will be very useful for novice cooks:
How to make a DIY heart-shaped cake
First of all, you need to bake the sponge cake. To do this, separate the yolks and whites. Beat the latter with a mixer into strong peaks with the addition of a pinch of salt and citric acid. Grind the yolks with sugar, add the sifted flour. Carefully fold the beaten whites into the yolks and pour the batter into the baking dish. Place it in the oven, heated to 180 degrees, bake the biscuit for half an hour.
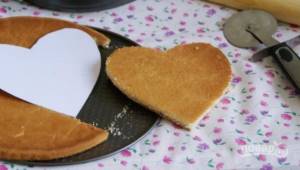
Cut out hearts of the size you need from paper. Using this stencil, cut out hearts from the cooled biscuit that will become the base of the cake. There should be three of these “heart” cakes.
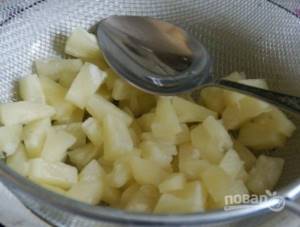
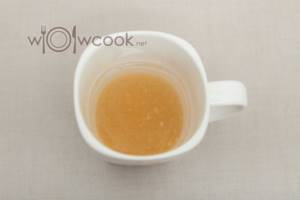
Open the jar of pineapples and drain them in a colander. The liquid that drains will be useful for soaking the cakes. Blend the pieces of canned pineapple into a puree using a blender.

Remove the butter from the refrigerator and let it sit until it becomes soft. Place it in a mixer bowl and whisk until the butter is white and fluffy.
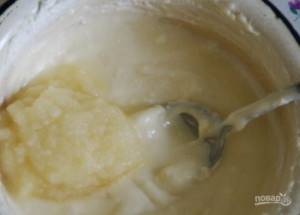
Transfer the whipped butter to a bowl. Add pineapple puree to it. Grind the cottage cheese through a sieve twice and add to the butter and pineapples. Mix the resulting cream thoroughly.
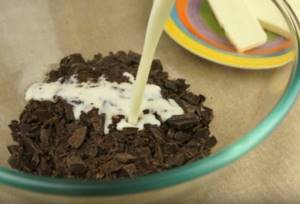
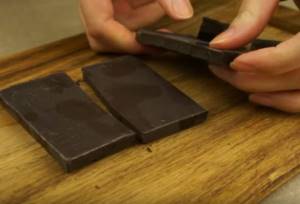
Now you need to assemble the cake. Place a spoonful of cream on each cake soaked in pineapple juice and smooth it out. Top with pineapple pieces, nuts, and broken dark chocolate.
Coat the finished cake on all sides with the remaining cream, to which you can add food coloring if desired. Decorate as you wish and place the cake in the refrigerator to set for a couple of hours.
Pictures of cake heart
The pictures “Heart Cake” will help you decide on the type of dessert and inspire you to work productively.
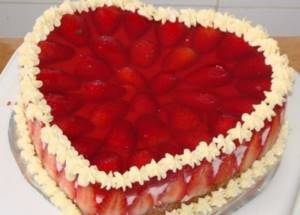
The first option is chocolate cake. Brown cake layers, chocolate mousse on top and inside the cake - everyone will love this dessert. A tribute to tradition - using strawberries on top. You can also lay it out in the shape of a heart.
The next option is a cake with fondant on top.
The heart-shaped jelly cake will also impress with both its taste and appearance.
The meringue cake will also be delicious.
Cake “Heart” made from puff pastry.
Cake for mom's heart, recipe with explanation and photo
You can confess your love to your mother with the help of a delicious cake. It is important to make it yourself, then it will be simply priceless.
You can make a “Heart” cake for mom using puff pastry crust. To do this you need to purchase:

And for the cream you need to take cream and sugar. You can also add fruit or even a little rum if you wish.
Making puff pastry. To do this, cut the butter and mix all the ingredients indicated in the recipe.
To ensure that the mass is uniform, it can be chopped with a knife.
Knead first with a mixer and then with your hands.
cover with cling film or a towel and leave in the refrigerator for half an hour. After this, divide the dough into as many parts as you plan to make cakes.
Then roll out each piece of dough using a rolling pin.
Using a stencil or tin mold, cut out a heart. Place it on a baking sheet lined with parchment paper and bake for 15 minutes.
In the meantime, make the cream:
- beat cream with sugar;
- put on low heat and bring to a thick consistency.
You can add chopped nuts to the cream.
When the cakes are ready, they need to be coated with cream.
Shape the cake into a heart shape and spread cream on top. Chopped strawberries can serve as decoration.

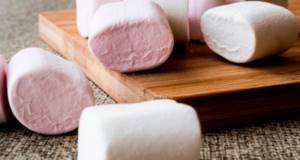
If mom loves marshmallows or marshmallows, then you can also use them.
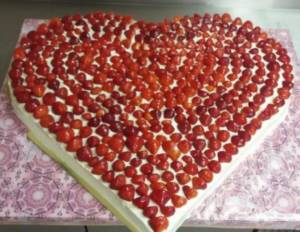
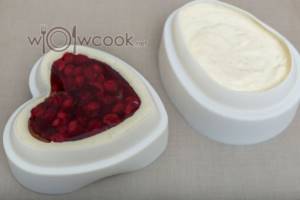
Berry cake “Heart”

Making such an original dessert is not difficult; even a novice housewife can cope with the job.
The baked goods turn out delicious and appetizing. A heart-shaped cake is something unusual and interesting. Among other delicacies, a heart-shaped cake will definitely not go unnoticed. Advice!
You can use fresh or frozen strawberries to make the cake. If only frozen berries are available, there is no need to defrost them first.
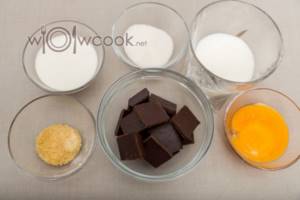
Ingredients:
For the test:
- sugar – 300 g;
- cocoa – 100 g;
- flour – 300 g;
- eggs – 8 pcs.;
- baking powder – 10 g.
For cream:
- sugar – 200 g;
- cream – 600 ml;
- cocoa – 100 g.
For the glaze:
- chocolate – 230 g;
- milk – 100 ml.
For filling:
- kiwi – 2 pcs.;
- strawberries – 150 g.
For decoration:
- strawberries – 150 g.
Preparation:
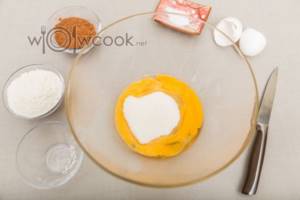
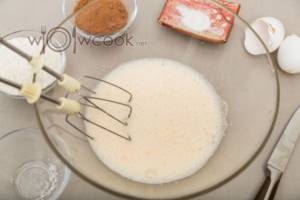
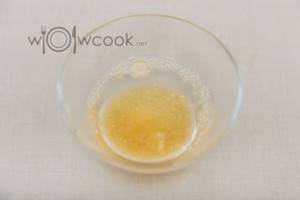
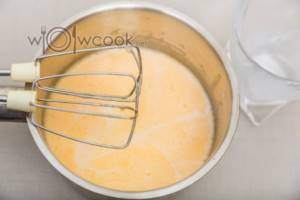
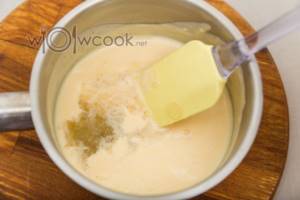
- To prepare the cake at home, preheat the oven to 200 degrees. In the meantime, let's start preparing the dough. To do this, combine sugar with eggs, beat until white foam.
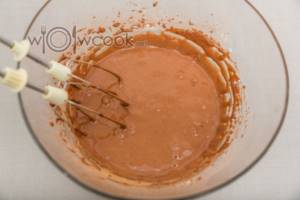
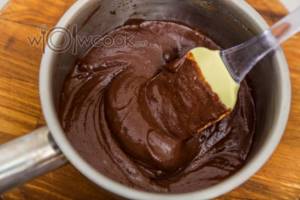
- Pour the sifted flour into the egg mixture. Mix everything with a spoon. We also add cocoa here. As a result, we obtain a homogeneous chocolate consistency.
- Add baking powder to the remaining ingredients. Mix everything.
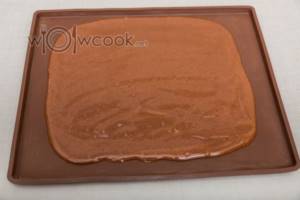
- Prepare a baking dish and pour the dough into it.
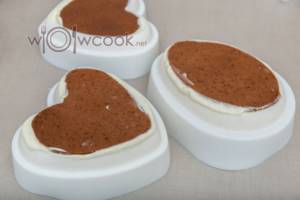
- Bake the biscuit for 35 minutes. Remove the finished cake from the oven. Once the biscuit has cooled, cut it into 3 parts.
- Let's start preparing the cream. It is made from cream and sugar. Beat all ingredients well. Then add cocoa and mix everything with a spoon.
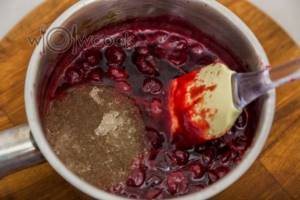
- Peel the kiwi and cut into thin slices. We wash the strawberries, remove the stems, and cut them into small pieces.

- Let's start assembling the cake. Place the cake on a plate, grease it with cream, place kiwi slices on top, and cover with a layer of cream.
- We lay out the second cake layer, coat it with cream, place strawberries, apply a little more cream. Lay out the third cake layer.
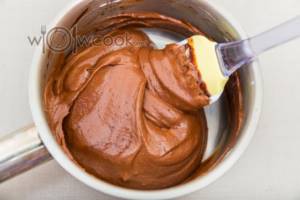
- Making chocolate glaze. To do this, break the chocolate into cubes and throw it into a bowl. Add the milk and place the container with the contents in the microwave. We are waiting for the chocolate to melt.
- Drizzle the dessert with glaze and decorate with berries. Place the baked goods in the refrigerator for several hours.
The video will make the cooking process more interesting and entertaining. Even a young housewife will be able to prepare a culinary masterpiece in her own kitchen and treat all household members to an amazing delicacy.
Heart birthday cake recipe
It is impossible to imagine a celebration without a festive dessert. A jelly birthday cake “Heart” will be a pleasant surprise and can even act as a full-fledged gift.
To prepare it, the cook will need:

Step-by-step process for creating a sweet masterpiece:
- You need to bake a biscuit.
- Make a sour cream layer. To do this, you first need to dilute the gelatin in warm water. Combine it with sour cream, you can add pieces of fruit.
- Pour the jelly and sour cream mixture on top of the biscuit layer into the mold. Place in the refrigerator for 1 hour.
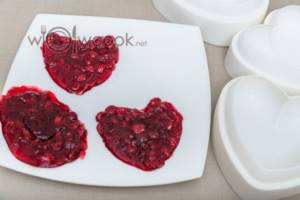
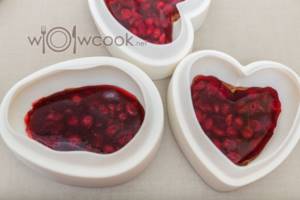
- Make a fruit-jelly layer. To prepare it, you need to dilute the berry jelly again in warm water (it should be red). Let it cool and pour it into the mold in a small stream.
- Carefully place berries or fruits.
Chefs do not recommend combining jelly and kiwi, because the latter does not allow the jelly to fully harden.
Now the cake should go back into the refrigerator.
You can decorate the dessert with the words “Happy Birthday” or festive toppers.
You can also include cottage cheese in the recipe, as the author of the video did:
Cake with heart “Basket of Love”
A “basket of love” can be easily created using buttercream. First you need to cover the base with cream until a smooth surface is formed. Then, using a regular pastry tip, apply longitudinal and transverse cream lines layer by layer on the sides using a regular pastry tip. When the basket is ready, decorate the top of the cake with flowers in different colors of buttercream to highlight the contrast between the basket and the bouquet. This confectionery product is suitable for congratulating relatives on their individual holidays, for example, mother’s birthday.
Valentine's Day heart cake, recipe
A cake for Valentine's Day “Heart” made of meringue will be the best gift. With its help, you can not only express your feelings, but also show off your culinary talents.
First, the lover will need to visit the store and buy:

The culinary process consists of the following successive stages:
- Prepare the meringue: beat the egg whites until foamy, then add the sugar and beat for another 6 minutes.
- Pour the meringue into the mold so that it forms a heart shell and the middle is empty.
- Place in the oven for 2 hours at 90 degrees. After turning off the mode, leave the pan in the oven for another hour.
- Beat cream cheese and cream separately.
- Melt the chocolate and mix it with cheese and cream.
- Carefully remove the heart from the parchment paper and place on a plate.
- Pour the mixture into the middle of the heart and smooth it out.
- Place the cake in the refrigerator for 2 hours.
- Decorate the dessert with fruits, mint sprigs, etc.
The main problem in this case will be the preparation of the meringue layer. The following video will show you how to do this correctly:
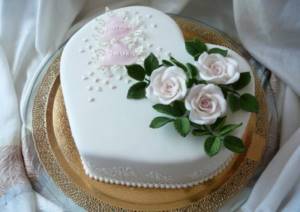
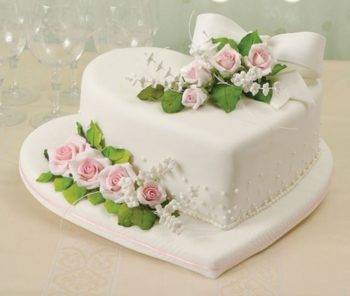
Wedding cake heart, step by step recipe
Choosing a wedding cake is no less important than choosing a dress or suit for the newlyweds. Often this choice is made in favor of the “Heart” wedding cake - a spectacular and delicious dessert.
How to start preparing it? The first step is preparing the sponge cakes. For this you will need:

They need to be baked for 40 minutes at 180 degrees.
The second step is preparing the cream. It will consist of:

The butter needs to be warmed to room temperature and beat with a mixer. Add vanilla sugar and continue beating.
Add condensed milk in a thin stream to the cream (all this time the mixer is whipping the mass). After adding the last ingredient, you need to beat for another 5 minutes.
The third step is shaping the cake. To do this, put the cut cakes together to form a heart. Grease each layer with cream.
If there is no special baking dish in the shape of a heart, then the cakes should be cut as shown in the figure:
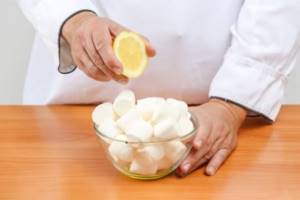
The fourth stage is working with mastic. You can buy it ready-made at a candy store, or you can make it yourself from marshmallows.
To do this, you need to buy 100 grams of marshmallows and place it in a container that can be heated in the microwave.
Add a little lemon juice or citric acid.
Set the power to maximum and melt the marshmallows.
Add sugar and “knead” the mastic with your hands, like dough. Sprinkle it with powdered sugar, wrap it in cling film and put it in the refrigerator for half an hour.
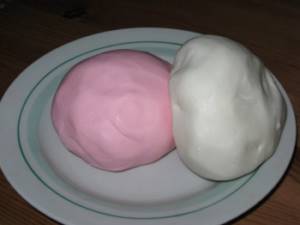
Don't roll out the mastic too thin. The ideal layer thickness is 3 - 4 mm. The working surface must first be sprinkled with powdered sugar or starch. You can also use a silicone mat.
Here's how to cover a wedding cake with fondant:
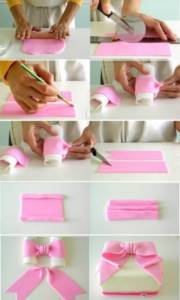
The sixth stage is decoration. You can use flowers and bows from the same mastic. A small master class on how to make them is presented below:
After a labor-intensive process, the result is a cake that is in no way inferior to a store-bought one. But in this case you can be sure of its quality.
Mastic cake design ideas
If time is running out and you need to come up with and develop a design for a two-tiered wedding cake, don’t panic. After all, you can always turn to ready-made ideas that will help you create a sweet that will delight all the guests at the celebration.
Figurines of swans or doves
The most popular and widespread option.
This is not surprising, because swans and white doves symbolize peace, love and fidelity. There is a legend that says that the swan is the most faithful bird. After all, if he falls in love, then his affection will last a lifetime. If his betrothed dies, he will soon face death. In order to make a swan figurine, confectioners use snow-white mastic
Please note that this decoration will not be so expensive, because it does not even need to be painted, and this is already a significant savings in money. Typically, artisans place swans on top of the cake, facing each other or with their beaks slightly touching
At a wedding, swan figurines go to the bride and groom. A cake in this style can be made either completely white, which will speak of special solemnity and celebration, or with bright accents. For example, you can add a black delicate veil on the sides or place a bright red rose next to the bird figures, which symbolizes passion and ardor.
Wedding rings
Next to them can be placed figurines of the bride and groom, Teddy bears or flowers. The cake can turn out either more festive and pretentious, or simpler and more lifelike. In any case, the rings should be painted gold. It wouldn't hurt to add sparkles.
Hearts
On the wedding day, two loving hearts unite into one.
It is the heart that is responsible for love and affection. Therefore, as an option, make it the main decoration of a wedding cake made of mastic. There may be several examples of how best to use this organ. If there are few guests, you can make a large heart-shaped cake. If there are enough guests, then turn to multi-tiered sweets, on top of which place the main attribute. In this case, do not forget that there must be two hearts.
Photos of newlyweds
An original way to decorate the main sweets at a wedding. Perfect for multi-tiered treats. Place joint photographs on each separate tier. At the top, as an original addition, you can place a heart horizontally, on which to depict a married couple.
However, this type of decoration has one drawback - how it will look after it is cut. Not everyone wants to even eat a sweet image with his participation.
Therefore, think over this moment in advance so that you are not surprised later. After all, everyone will eat a sweet delicacy with pleasure and hardly anyone will want to just admire it.
Mousse heart cake, recipe
The “Heart” mousse cake will surprise you with its appearance and taste characteristics.
This recipe can be divided into the following stages:
- preparing the cake;
- getting mousse;
- preparing the gelatin layer.
If you do everything correctly, the cross-section of the cake will look like this:

The following products will be useful to the cook:

The preparation of mousse “heart” cake takes place in several stages:

Now you need to form the cake: lay out the cake, mousse on it, and a jelly layer on top. Place the cake in the refrigerator overnight.

Cream heart cake, recipe
Another option for preparing a “heart” dessert is the “Heart” cream cake. For those who have ever made a cream-based cake, this recipe will be familiar.
The cakes can be made into sponge cakes. But the cream needs to be given more attention.
It will consist of:
The chocolate and butter will need to be melted. Add remaining ingredients. Place on low heat and bring the mixture to medium thickness.
Each layer needs to be lubricated with this cream. Using a piping bag, you can make beautiful cream flowers on the surface of the cake.
The dessert should be allowed to soak before serving.
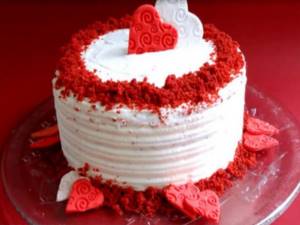
Red heart cake, recipe
Heart cakes are usually made red. This is a traditional design that will definitely be “on point”. Red velvet cake is the perfect choice in this case.
You will need the following ingredients:
Separately, you need to take red food coloring to get the desired shade.
For an active culinary process, you need to take two bowls. In one mix flour, baking powder, salt, vegetable oil and cocoa, and in the other - eggs and sugar, which need to be beaten.
Combine kefir and dye. Stir and add the egg mixture. And then the contents of the first bowl.
Pour the mixture into a heart-shaped mold and bake the cakes at 200 degrees. This will take approximately 20 minutes.
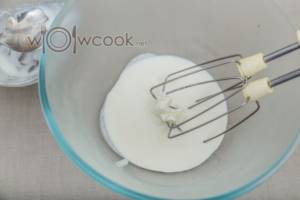
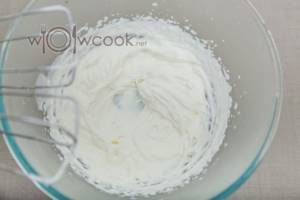
In the meantime, you can prepare the cream. To do this, whip cream and powdered sugar.
The cakes are greased with the resulting cream. You also need to coat the top and sides of the cake with it.
Two Hearts Cake Recipe
Those who love and know how to cook can make the main wedding dessert at home. It’s great if you capture the cooking process on video or in photographs. Then you can show a touching video just before serving the cake; your guests will surely love it.
By the way, before cooking you can watch a video tutorial on how to make this cake:
So, below is a list of required components. Their number can be changed proportionally depending on the number of guests. This recipe will yield a 9-kilogram cake. Of course, all products must be of the highest quality and fresh.
For the test:
- 2.5 kg flour;
- 900-1100 grams of sugar;
- 1 pack of margarine;
- 4 eggs;
- A little over a glass of cocoa;
- 70 grams of baking powder;
- 0.6 liters of milk;
- 130-160 grams of liquid honey.
For cream:
- 0.5 kg flour;
- 16 yolks;
- 1.3 kg sugar;
- 2.5 liters of milk;
- 1.3 kg butter;
- 40 grams of vanillin.
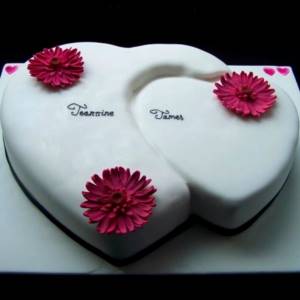
“Two Hearts” cake with mastic coating Chocolate and vanilla “Two Hearts” cake for a wedding
You also need to think about the decoration of the cake. Most often, they use ready-made mastic from the store or make it themselves according to any convenient recipe. In addition to mastic, you will also need:
- 25 grams of gelatin;
- 1400 grams of powdered sugar;
- 1 liter of heavy cream;
- Food coloring (color and saturation depends on individual preferences).
As you can see, the volume of food is quite large, so you need to take an appropriate container for cooking!
How to cook?
Start the cooking process with the cakes, following the instructions described below.
- Mix sugar, eggs, add margarine (already melted) and honey, gradually pour in milk;
- Place the resulting mixture in a steam bath and wait until it boils;
- Pour half the flour into a separate bowl, mix it with baking powder and cocoa;
- Combine the dry mixture with the hot liquid mass, mix gently;
- Make a well in the remaining flour and pour the chocolate mixture into it, mix with your hands to form an elastic dough;
- Divide the dough into 16 parts and form each into a ball;
- Roll the balls onto cakes and bake at 180 degrees for about 6-8 minutes;
- Immediately give the hot cake a heart shape according to the prepared template.

Cake “Two Hearts” in the form of two tiers
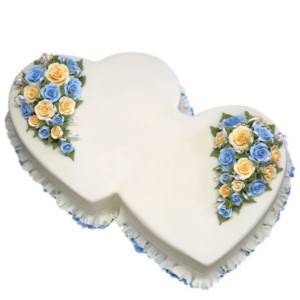
Cake “Two Hearts” with decoration made of artificial roses
Next, prepare the cream.
- Separate the yolks from the whites, add 0.5 kg of sugar, a liter of milk and vanillin, mix;
- Combine the remaining milk and sugar in a separate saucepan and place over low heat. When the liquid heats up, gradually pour the yolk-milk mixture into it, remembering to stir;
- Bring the mixture to a boil; by then it should be quite thick;
- Cool the cream slightly, add melted butter and stir;
- Beat the cooled cream using a whisk or blender.
Now assemble and decorate the cake. More precisely, at first there will be two cakes, each of which consists of 8 heart cakes. You need to combine them together by cutting off the extra piece from one on the right side and the other on the left side. To make the dessert tender and rich, do not skimp on the cream. If you did everything correctly, there will definitely be enough for all the cakes.
Before decorating the cake with whipped cream and powdered sugar, let the cake sit for at least half an hour. And the rest is a matter of your imagination!
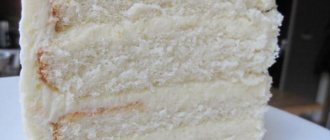
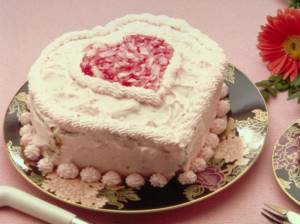
White heart cake, recipe
The delicious white “Heart” cake is in no way inferior to its red sweet “comrade”. For variety, you can make sour cream cakes and cream from mascarpone cheese.
The list of baking products is as follows:

To bake cakes, you need to prepare a “Heart” mold or use a stencil. The algorithm of actions will be as follows:

It’s much easier to prepare the cream: you first need to beat sour cream and sugar, and then add cheese to them.
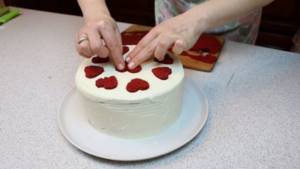
Cut the cake in half and spread with cream, including the top of the cake. You can decorate it with patterns of whipped cream and a marmalade heart.
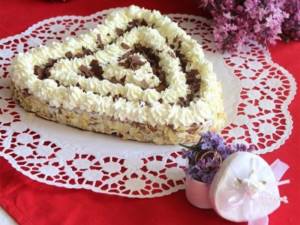
Layered heart cake, recipe
A cake made from layered hearts is also called “Lazy Napoleon”. This is because it cooks very quickly, without baking at all.
Cooking needs to be prepared:
The cooking process is surprising in its simplicity:
- beat eggs and sugar for cream;
- and then in the same order as indicated in the recipe, add the remaining ingredients;
- each new product is separated from the other by thoroughly beating with a whisk or mixer;
- Cook the resulting cream over low heat until thickened;
- Place puff hearts - cookies into the mold (dividing into several layers);
- grease each layer with cream;
- Also carefully coat the cake with cream on top;
- refrigerate for 4 hours.
Just 15 minutes (not counting the soaking time) and the delicious cake is ready.
The following video will tell you more:
Recipe for mousse cake with mirror glaze
Biscuit layer.
You can prepare the sponge cake according to your own recipe, but it is advisable to use chocolate dough with the addition of chocolate or cocoa powder - such dough, like chocolate cream, will harmonize well with sweet and sour cherries.
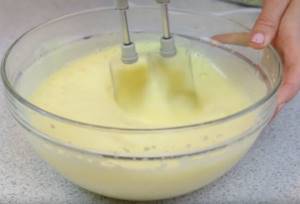
1.1. Break the eggs into a deep dough container and add granulated sugar.
1.2. Beat until foamy at high speed.
1.3. Sift flour, cocoa powder and baking powder through a sieve. Add a pinch of salt (it emphasizes the taste of chocolate).
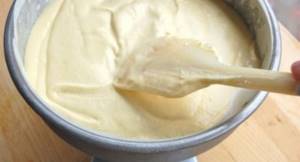
1.4. Mix gently using a spatula or mixer. The dough turns out liquid and has a consistency similar to sour cream.
1.5. Spoon the dough onto a silicone baking mat or into a mold. Bake in an oven preheated to 180 degrees for about 7-15 minutes, the time depends on the thickness of the layer. It is important that the biscuit does not dry out or burn; you need to monitor its condition. It is better to immediately determine the size of the cake so that there is less dough leftover.
1.6. We check for readiness by piercing it with a wooden skewer: if there are no traces of batter left on it, the sponge cake is ready. Let it cool a little. Apply the shape and cut out with a knife. The biscuit needs to be a little smaller. I made a lot of dough.
1.7. Transfer the cooled biscuit to a board or flat plate, wrap it in cling film and put it in the refrigerator.
Preparing cherry compote.
Compote is a type of layer for a mousse cake made from pureed or cut into pieces berries or fruits with the addition of sugar and gelling components: gelatin, pectin. Cherry compote will give the dessert a pleasant sourness and cherry aroma.
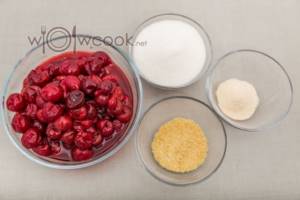
2.1. Soak gelatin in cold water. For powdered gelatin, the proportions with water are 1:6 (for 12 g of gelatin, 72 ml of water).

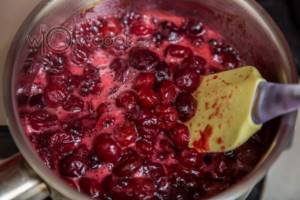
2.2. Place the pitted cherries and juice into a saucepan and heat to about 40 degrees.
2.3. Since cherries are high in acid, gelatin alone may not be enough (gelatin doesn't like anything sour and may not work). Therefore, an additional gelling component is used - pectin; it will help the layer to set better. There should not be a lot of pectin and gelatin, otherwise the layer may turn out rough and tough. The ideal compote should be tender and soft. Mix pectin with sugar.
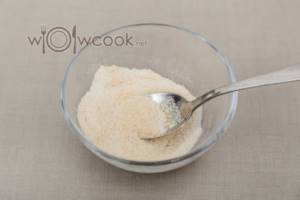
2.4. Slowly add the pectin and sugar in a “rain” and stir immediately to avoid any unpleasant clots.
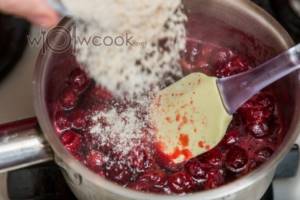
2.5. Bring to a boil and let simmer for 2-3 minutes over low heat, remembering to stir.
2.6. Remove from heat and cool slightly. Add gelatin and mix. In hot (but not boiling) cherry syrup, gelatin dissolves quickly.
2.7. Pour the compote into food-grade silicone molds. Let it harden completely, then put it in the freezer.
Chocolate cremeux is a delicious layer of mousse dessert, prepared with the addition of yolks and heavy cream.
3.1. Pour gelatin with cold water in a ratio of 1:6 (for 5 g of gelatin 30 ml of water) and leave to swell.
3.2. Separate 2 yolks from the whites and place them in a saucepan. Add 20 g of sugar to the yolks.
3.3. Heat the milk in the microwave or in a water bath to about 35-40 degrees. Lightly mix the yolks with sugar using a mixer and pour milk into them.
3.4. Beat with a mixer until foam forms and place on low heat.

3.5. Stir with a silicone spatula until the mixture thickens as in the step-by-step photo. It is very important that the egg mass does not boil, but warms up at a low temperature, then the cream will turn out tender and without lumps.
3.6. Remove the saucepan from the heat and add the swollen gelatin to the fairly warm mass. Stir until the grains dissolve.
3.7. Break the chocolate bar into small pieces and add it to the yolk-milk mixture.
3.8. Chocolate melts at 40 degrees. Stir until smooth and leave until completely cool.
3.9. Pour heavy cream into a cooled container with whisks (it’s better to keep them in the freezer for 15 minutes), carefully remove the thick residue from the walls of the package.
3.10. Whip the cream until thick and peaks form.
3.11. Add whipped cream to the chocolate mass (it must be at room temperature or slightly lower, otherwise the cream will float).
3.12. Gently mix the air mass. Chocolate cream is ready.
3.13. Remove the frozen compote from the molds.
3.14. Place a layer of cream in the mold.
3.15. Place the frozen compote tightly on top and put the silicone molds back into the freezer.
Prepare the base of the heart-shaped mousse cake - vanilla mousse.
There should be more of it than other ingredients. Vanilla mousse is a delicate creamy soufflé flavored with natural vanilla bean.
4.1. Soak gelatin in cold water (20 g gelatin in 120 ml water).
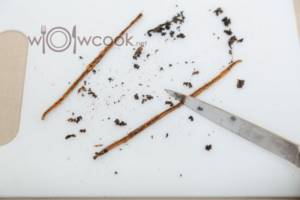
4.2. Cut the vanilla pod in half and scrape out the seeds with a knife.
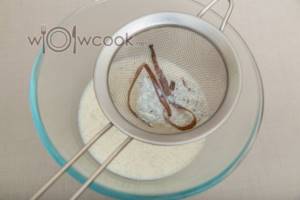
4.3. Pour milk into a saucepan and add vanilla pods and seeds.
4.4. Bring to a boil, then strain through a sieve. The remains of the pod should not end up in the dessert.
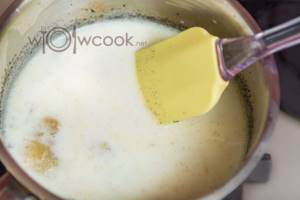
4.5. Pour the vanilla milk back into the saucepan and heat it up a little. When the milk becomes hot, but does not yet begin to boil, remove from heat and add the swollen gelatin. Stir until the gelatin grains dissolve and, if necessary, filter through a sieve again. Cool slightly (to about 35-40 degrees).
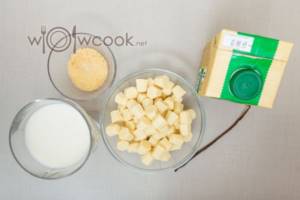
4.6. Add white chocolate; it immediately begins to melt.
4.7. Stir until smooth and set aside until completely cool (the mixture should be at room temperature).
4.8. Pour heavy cream into a pre-cooled whipping container.

4.9. Whip the cream to stiff peaks.
4.10. Continuously whisking, pour in the cool milk-chocolate mixture in a thin stream.
4.11. The consistency will resemble thick sour cream. If the mass turns out to be liquid, you can put it in the refrigerator for 15 minutes and then beat again (the gelatin will not have time to set).
4.12. Remove the cherry compote with chocolate cremeux from the molds.
4.13. Wipe the molds with a paper towel and pour vanilla mousse into them.
4.14. Place compote with cremeux tightly on top.
4.15. Let's remember about our biscuit, which is waiting its turn in the refrigerator. We put it on top. Place in the freezer overnight. The mousse must become rock-like so that the cake can be coated with mirror glaze.
Preparing mirror glaze for coating.
For a detailed description of the process of preparing mirror glaze, see here.
Cover the finished glaze tightly with cling film and put it in the refrigerator.
In the meantime, you can experiment with cake decoration.
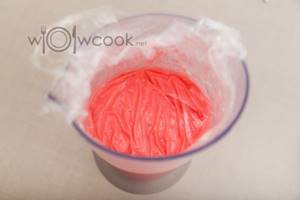
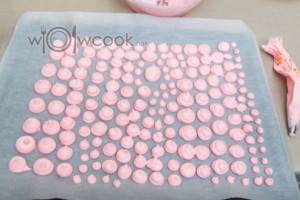
From the remaining 2 proteins you can make meringue by adding powdered sugar (0.5 cups), a pinch of citric acid and whipping everything together until stable peaks (French meringue). To make the whites whip better, you can place the container in a steam bath and beat right there (Italian meringue, the mass turns out smoother and shiny, the peaks are stiffer). You can add a little water-soluble dye to the mixture.
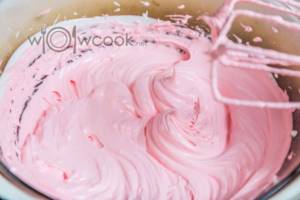
Then you should squeeze it out using a pastry bag onto a baking sheet covered with parchment and dry the meringue in the oven at a temperature of 80-90 degrees for about 1-1.5 hours. The two proteins make quite a lot of crispy delicacy, so you can also have dessert for tea while you wait for the mousse to harden.
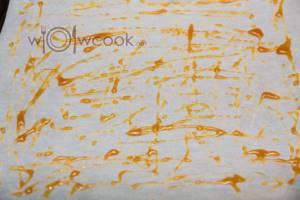
As an additional decoration, I have caramel in the photo. To prepare it you will need 1 tbsp. l. odes and 100 g of sugar. Place the ingredients in a saucepan and place on low heat. The caramel should not be stirred with a spoon, otherwise it will set into crystals. Periodically brush the sides of the pan with water using a silicone brush to prevent the sugar from burning. To ensure that the sugar crystals are evenly distributed and do not burn, the saucepan must be lifted and rotated clockwise, tilting slightly.
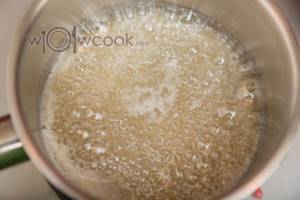
The mixture darkens and thickens. This caramel can be used: it is wound on ladles, forks, and other culinary utensils made of iron. Caramel hardens quickly, so you need to work with it very quickly. It is also very hot, you can easily get burned, be careful.
As an option, we apply drops on parchment. After 5 minutes they can be removed and used for decoration.
How to decorate a heart cake, ideas
If you really want to make a “heart” cake, but there is no suitable shape and you don’t want to try too hard to create perfect curves, then you can make a cake of a standard shape, but with a characteristic decor. To do this, it will be useful to learn how to decorate a cake with hearts.
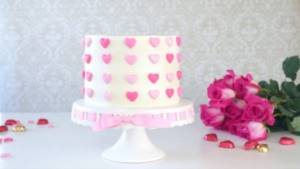
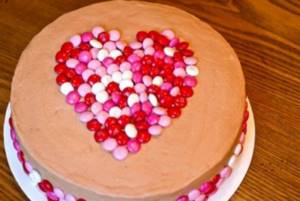
You can create a heart on the cake from multi-colored dragees or sweets:
Even a pancake cake can be coated with cream and decorated with hearts:
Hearts can also be made from cocoa or grated chocolate:
Gingerbread hearts can also decorate the cake:

A heart-shaped cake will not go unnoticed. He is direct proof of tender feelings. Only at first glance does it seem that its appearance is predetermined. In fact, such a dessert can be varied (both in appearance and in taste). This will allow you to choose the recipe that your other half will definitely like.
How to beautifully decorate and serve a “Heart” cake
It is, of course, up to you to choose how to decorate the homemade “Heart” cake. I usually top the cake with chocolate frosting and berries. Strawberries look especially beautiful on a cake of this shape.

To prepare the chocolate glaze, take 230 g of high-quality dark chocolate, break it into pieces and put it in a bowl. Add a little milk there and put it in the microwave to melt.

If you don't have a microwave, you can melt the chocolate in a water bath.
Then mix the chocolate, gradually adding milk. You will need about 4-5 spoons, but it depends on the chocolate. Therefore, add milk gradually, stirring the mixture constantly. The finish of the glaze should be smooth and shiny.

We finish decorating the “Heart” cake by decorating it with strawberries, which will make it look even more romantic.