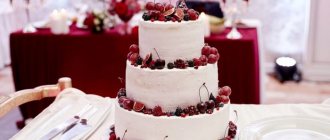
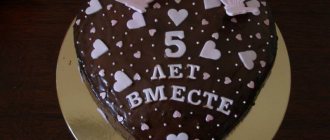
A wedding cake is more than just a treat and a wedding menu item. This is a kind of apogee of the entire holiday, the final touch, the final banquet. The wedding cake should be so big and beautiful that every guest would definitely want to try a piece of this culinary masterpiece.
The surest way to impress your guests is to choose a hand-painted cake. Now they are very popular; the variety of painting techniques gives almost unlimited scope for imagination.
Master confectioners use food paints, brushes, an airbrush, sugar mastic to create their “sweet paintings”...
Each cake is unique: both its recipe and design are discussed individually. Of course, this pleasure is not cheap, but it is worth it.
We have selected the most fantastic and beautiful painted cakes for your inspiration.
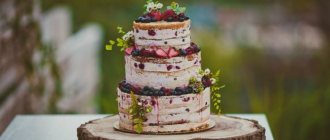
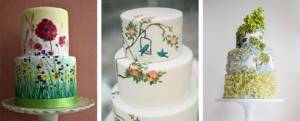
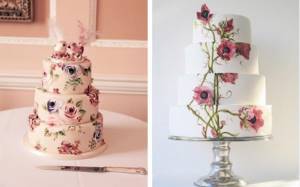
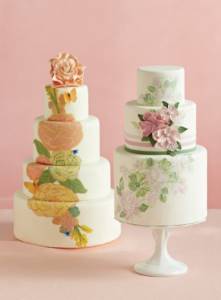
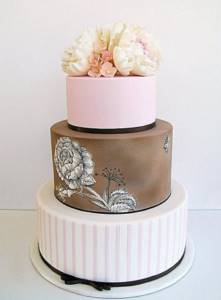
Natural motives
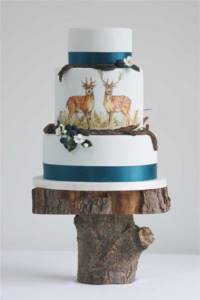
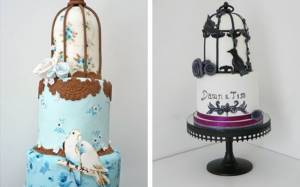
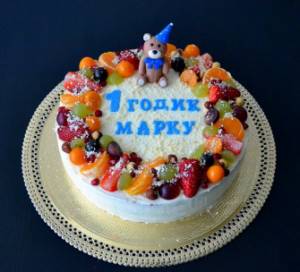
Nature has always inspired man, and confectionery masters often borrow themes for their creations from Mother Nature. Animals, birds, butterflies, trees, herbs and flowers - all this will serve as a wonderful decoration for a wedding cake.
| |
| |
| |
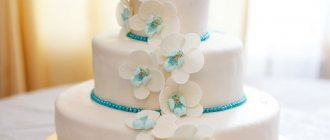
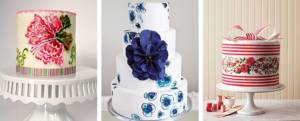
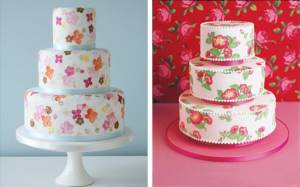
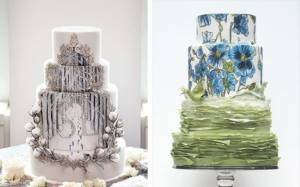
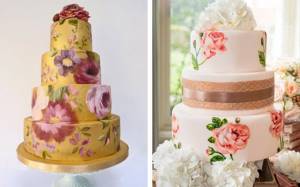
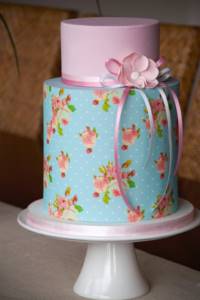
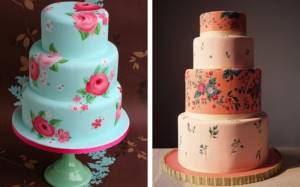
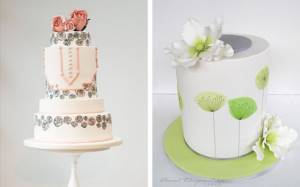
Floral print
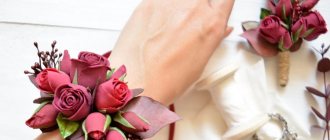
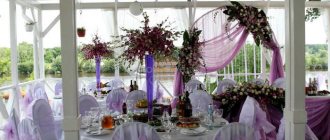
There are always a lot of flowers at a wedding, so why not decorate the cake with them? Large and small, flat and voluminous - choose flowers for the cake according to your taste and according to the decor of the celebration.
| |
| |
| |
| |
| |
| |
| |


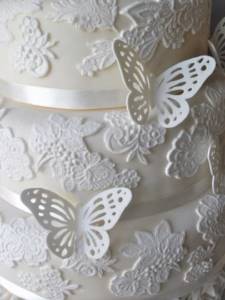
Royal icing
Another technique for making cake decor is using icing; this composition can be prepared with your own hands at home.
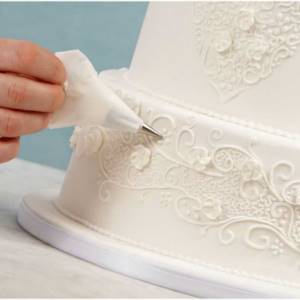
Materials of different consistency are used for drawing and making three-dimensional figures and elements, which can be of different colors and design themes.
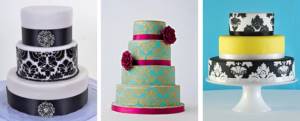
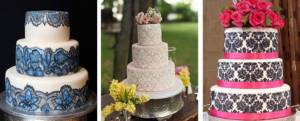
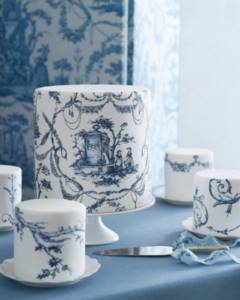
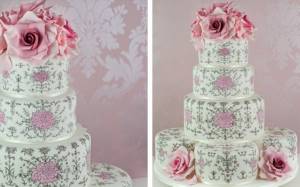
"Wallpaper" drawing
When the pattern on the cake resembles wallpaper or baroque tapestries, it looks very elegant. This cake will decorate a wedding in a palace or vintage style.
| |
| |
| |
| |
| |
| |
| |
| |
| |
|

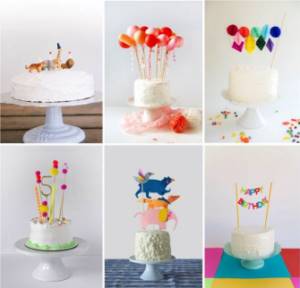
Children's cake decor
The most important task is creating a sweet table for children. Kids love desserts, but unattractive delicacies will not leave the proper holiday feeling. The choice of decor is made taking into account the age of young sweet tooths.
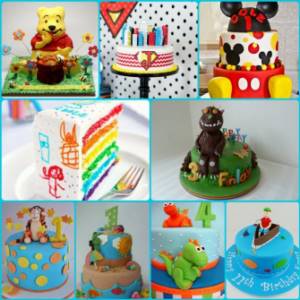
For the youngest (up to 3-5 years old) it is better to offer butter cream in combination with photo printing or fruit. Then it will be easy to make a beautiful cake decor with your own hands. Children do not always have stable taste preferences. They do not have clear ideas about the aesthetics of a truly children's cake.
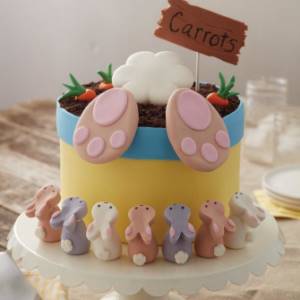
For middle-aged children (5-12 years old), mastic is an ideal option. The sculpted figurines of your favorite heroes will delight birthday boys and their guests. Such cakes always leave a storm of emotions in a child’s soul. The main thing is to think about your child’s preferences in advance.
Teenagers can be offered a coating of buttercream or mastic, complemented by a printed picture. The general style is chosen depending on the child’s preferences.
You can add food colors of the most unimaginable shades to the cream. Laconic or explosive design - it all depends on the character of the growing child.
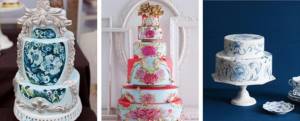
Painting on ceramics
Some patterns on cakes are reminiscent of painting on dishes: in your grandmother’s sideboard you can find antique sets painted in a similar way. Gzhel and Zhestovsky trays can also become a source of inspiration for the pastry chef.
| |
| |
| |
|

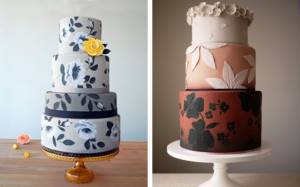
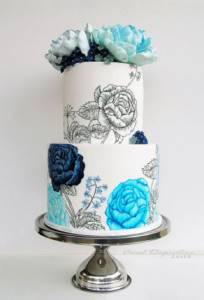
Artistic painting
Some cakes look like museum pieces because the artisans who worked on them are not just pastry chefs, they are real artists. It seems that the cake is painted with watercolors or oil paints, but in fact all this is edible, moreover, very tasty. A decorative technique reminiscent of stained glass is also common.
How to do watercolor painting on a cake
This article is a translation. The entire story is told from the perspective of pastry chef Erin Gardner.
Hand painted cakes can look truly amazing! But despite all this beauty, you may feel quite insecure if you try to paint your own cake. Especially if you have little idea of yourself as an artist!
Why not let the buttercream do all the work for you? Just a few colors of buttercream and a simple glazing technique will help you achieve a truly impressive result. You have every chance to feel like a real artist with a minimum of effort.
This article will show you how to make a cake with water lilies (inspired by Monet), but this technique can be used in a wide variety of painting styles. You can create beautiful transitions between colors and paint a cake in a nautical theme, or even capture a vibrant sunset.
Necessary materials:
- Frosted cake
- Metal scraper
- Small spatula for glazing
- Colored buttercream (white, blue, cyan, light green, dark green and pink)
- Pastry bags
- Thin brush
Step 1:
Fill piping bags with the types of cream you have. You don't need piping bag attachments. This will just make it easier for you to apply colors.
Decorating a round cake with a diameter of 15 cm can take one cup each of white, blue and cyan cream and 1/4 cup each of light green, dark green and pink cream.
Step 2:
First use piping bags filled with white, blue and light blue buttercream. Pipe horizontal lines and swirls along the entire side of the cake. The layers don't have to be in this exact order, it will just make it easier for you to achieve a specific design.
Step 3:
Use a metal scraper to blend the colors and smooth the frosting onto the side of the cake. Stop and clean the squeegee periodically to prevent the colors from becoming too cloudy.
Step 4:
As you smooth the cream over the side of the cake, leave a small ridge of cream sticking out above the side. To finish the top of the cake, fill the space between the overhanging sides with a small amount of cream. When working on the top of the cake, you can use one or all three colors. Work with a small frosting spatula, holding it horizontally and slightly at an angle. Smooth any excess cream sticking out over the sides towards the center of the cake. Work the top surface of the cake until it is completely level and smooth.
Step 5:
You may decide to end it here and leave everything as is, because the cake already looks beautiful. But if you are patient and add a few water lilies using a simple technique, the cake will look more complete!
Draw some short vertical stems using dark green buttercream. Blend the colors a little with a thin brush so that the painting on the cake looks more like watercolor.
Step 6:
Using light green cream, paint small water lily leaves on your stems. Round and blend strokes of buttercream using a thin brush. It is completely acceptable (and recommended) to use other colors during shading and mix them with the main color.
Step 7: Pipe small pink peas from the cream on top of the lily pads. Using a brush, draw lines extending upward from the squeezed pink pea to form the shape of a water lily. Again, you can use additional colors that will show through the main color.
This cake looks great without any additional decorations, but I couldn't resist decorating the top of the cake with a flower made from pink and white chocolate. You can also do something similar and decorate the cake with a sweet edible flower, or even fresh flowers.