Modern brides strive to add some zest to their image, finding a wide variety of original solutions that make them stand out from other girls. One of the modernizations of the wedding style is the kanzashi wedding bouquet, which is made by hand from satin ribbons and decorations. You can not only order such an attribute from a master, but also make it yourself, even if you have never mastered this technique, you just need to carefully follow the instructions.

Photo for inspiration
The bride's bouquet
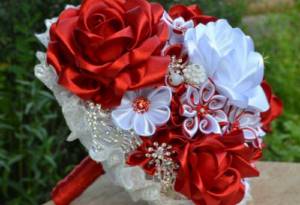
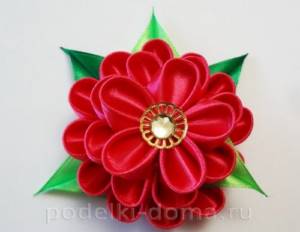
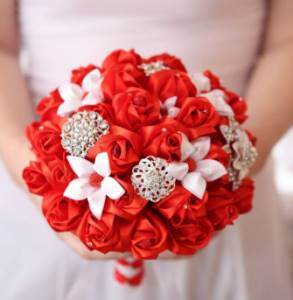
The first photo shows a beautiful wedding bouquet of red and white satin ribbons.
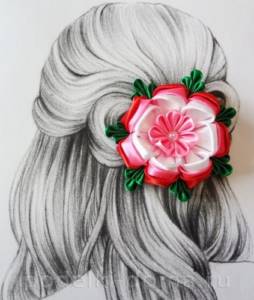
In the next photo, the bouquet is also a wedding bouquet, but it is made up of roses of only one color, as well as beautiful jewelry. Other photos show several bouquets of kanzashi, made up of multi-colored satin roses, ribbons, airy fabrics and jewelry. After studying our lesson, you will be able to make any of these bouquets. A bouquet of ribbons can accompany any of the celebrations or holidays of your family and loved ones. The beauty of such a bouquet of satin flowers is that you can keep it as a keepsake for as long as you wish. The greatest demand is for wedding bouquets, or kanzashi bridal bouquets.
This master class provides complete information on how to make a magnificent bouquet for the bride or a wedding bouquet from satin kanzashi roses with your own hands. This MK will clearly tell you about the necessary materials and techniques that are used for needlework. This kanzashi technique allows you to quickly and easily create dazzlingly beautiful flowers. First, let's prepare the following materials and tools:
- white satin ribbon two and a half cm wide, from which white roses are made (for one rose you will need 40 cm), and also decorate the base of the bouquet;
- burgundy satin ribbon for large roses (for one rose, take 3 meters);
- foam ball and cylinder;
- glue gun;
- lighter;
- brooches or other jewelry used to decorate wedding bouquets.
The kanzashi technique allows you to create different flowers. In our case, this technique is very simple, but allows you to create an incredibly beautiful wedding bouquet for the bride. We begin work on creating a bouquet by making white roses, each of which will require forty centimeters of satin ribbon. We fold it in half, satin side up, and start rolling the roses. As you twist, you need to use glue to secure the flower, and periodically turn the tape over, which will help you easily form rose petals with your own hands. We need forty-nine of these Kanzashi roses.

In the same way, you should make 31 large roses from a burgundy ribbon, and then decorate our chic wedding bouquet of ribbons. To do this, take a ball with a diameter of 15 cm and cut off one centimeter from either side. Now, using glue, place all the small white roses on the ball, starting from the base, and then finish filling the ball with burgundy roses. After this, there should be no gaps left on the ball. Having finished gluing the roses to the ball, we begin to connect it to the leg. To do this, we cut out a recess in the base of the ball, the diameter of which is equal to the diameter of the cylinder, then insert a pin into the cylinder. On the other side, insert a wooden stick into the cylinder, then glue the cylinder to the base of the ball from the side of the pin, and at the end we will cover it with satin ribbon.
Read
A lesson on creating beautiful bows from ribbons using the kanzashi technique
For the base of the kanzashi bouquet, we will make twenty-six white petals from ribbons ten cm long and glue them to the base of the bouquet. At the end of the work, place two beautiful kanzashi brooches on the glue, and the master class can be considered completed. We made a very beautiful wedding bouquet with our own hands. For this purpose, we used the kanzashi technique.
Materials for wedding decoration in kanzashi style
For any decoration we will definitely need:
- scissors of different sizes;
- universal glue, or better yet, a glue gun;
- threads to match the finished product;
- thin needle and pins;
- a candle or gas burner (some craftsmen use a hair curling iron);
- accessories;
- and, of course, all kinds of silk ribbons, most often using satin.
Editor's choice: Summer wedding hairstyles: examples and advice from stylists
It is necessary to carefully select the material for work. Soft ribbons with uneven tension will most likely ruin the entire product.
Learning to make a kanzashi ball
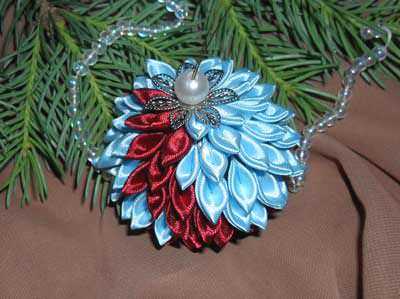
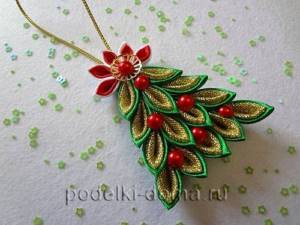
The next master class will teach you how to make a kanzashi ball, which can be used as a magnificent Christmas tree decoration. The kanzashi technique that is used for this is very simple and accessible to everyone who wants to master this handicraft. Our MK has step-by-step photos that very clearly show the stages of work for which we need the following materials:
- a ball with a diameter of five cm;
- satin ribbons of different colors;
- big pearl;
- loop wire;
- silicone glue.
Let's bend a piece of wire and insert the free ends inside the ball. Then we will make the petals for the kanzashi ball with our own hands. We cut out square pieces from the tape, which should be folded twice diagonally to get the desired kanzashi petal. Glue the first petals onto the ball. Six of them should be blue, and two should be red. Above the first row of leaves we need to place a metal device in the shape of a flower, which we will need for the bead. We must glue this pearl bead onto the surface of the iron flower. Then add the next row of eight leaves, and glue them in a checkerboard pattern with the first row. The third row will consist of sixteen, and the fourth of eight pieces. Continuing to work in this technique, you need to fill the entire kanzashi ball with petals. You can add other ribbon colors if you wish. When all the space on our ball is filled with satin petals, our kanzashi Christmas tree decoration can be considered complete. But in addition to the usual ball, you can make another original Christmas ball, which is shaped like an artichoke.
Master classes
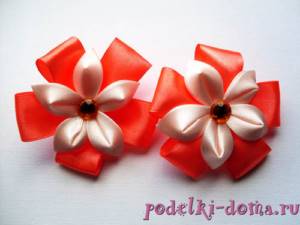
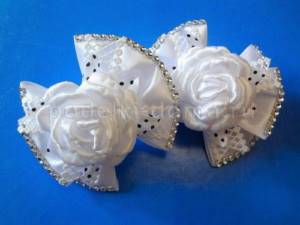
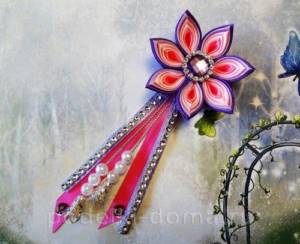
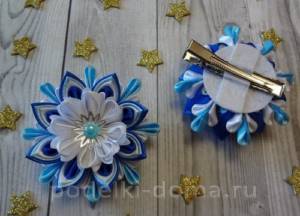
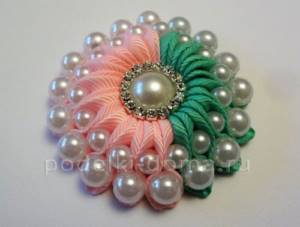
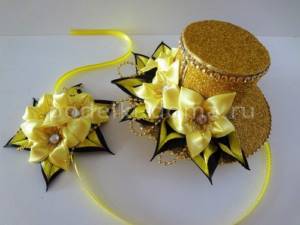
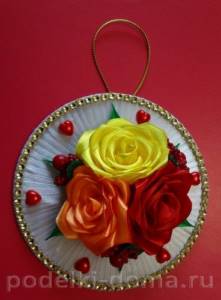
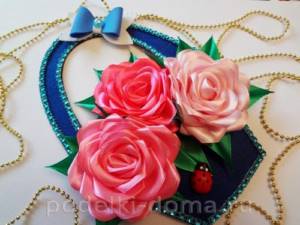
You can see many master classes with step-by-step photos on making jewelry in our “Kanzashi” section , mostly 2.5 cm ribbons are used, sometimes 5 cm wide. Here are some ideas (photos are clickable):
Bows, elastic bands and hairpins
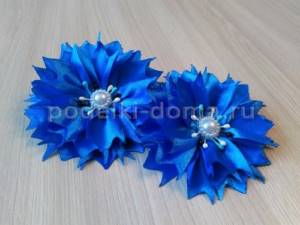
Simple flowers
Snow-white bows for school
Ribbon hairpins
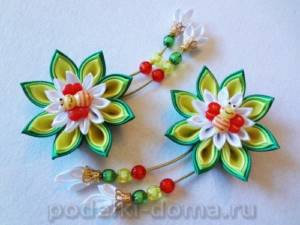
Pink and lilac hair clip
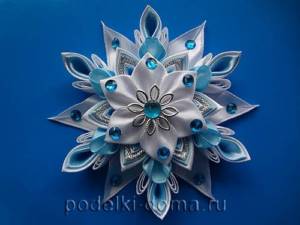
Snowflake clips
New Year's bows

New MK - marshmallows
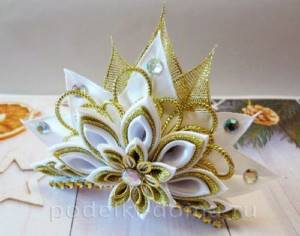
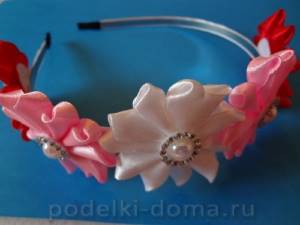
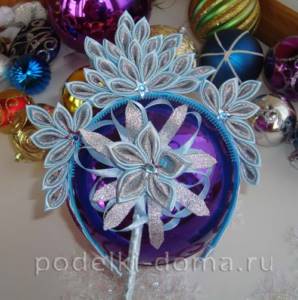
Headbands and tiaras
Diadem - master class
Ribbon headband
Ribbon crown
Crown and magic wand
hat
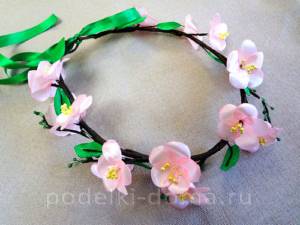
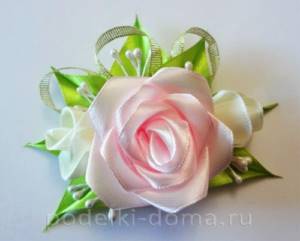
Flowers
Apple blossom (wreath)
Headband with snowdrops:
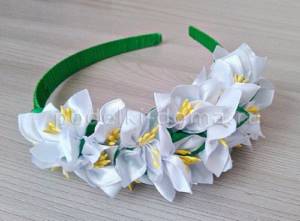
Wildflowers

Ribbon rose
Dahlia
Panel "Roses". Master Class
Basket with roses made of satin ribbons
fantasy flower
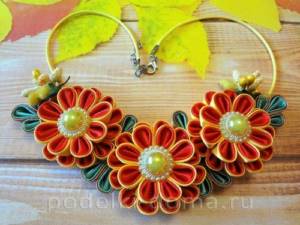
Autumn necklace
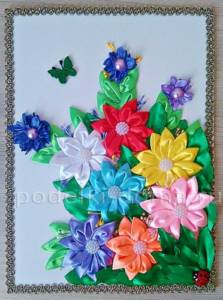
Panel with flowers
Cornflowers
New Year's MKs
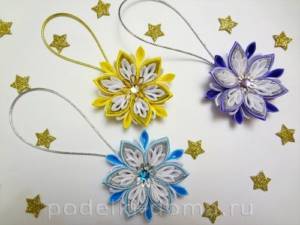
Snowflakes
Snowflake

Herringbone
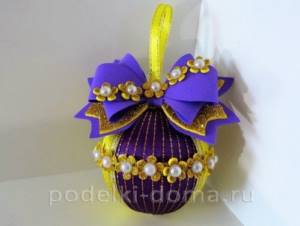
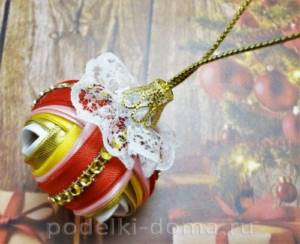
Christmas balls
,
Christmas decorations
Holiday MK
Order for February 23
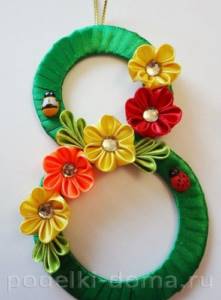
Gift for March 8
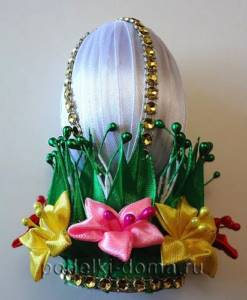
Easter Egg
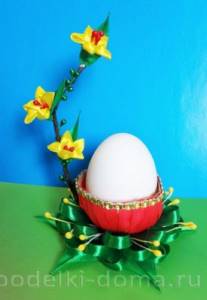
Egg stand
With snowdrops:

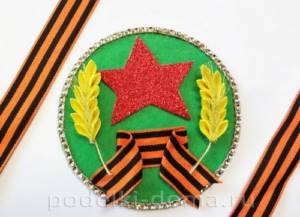
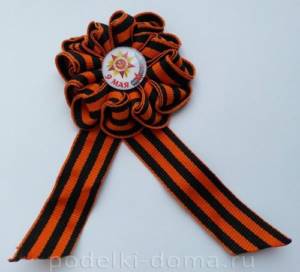
St. George Ribbon
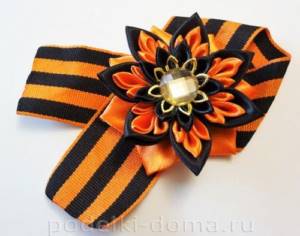
Ribbon brooch for May 9
Decoration for glasses and bottles
Even more master classes can be found in the “Kanzashi” section.
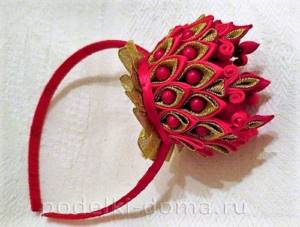
Learning to make a ball in the shape of an artichoke
The third master class will tell you how to make a New Year's ball from a satin ribbon in the artichoke style with your own hands. The Artichoke ball is very popular with children and adults, so it’s worth trying to make it. To make a decoration in the Artichoke style, we should have:
- blue and white satin ribbon, five cm wide;
- a foam ball with a diameter of six millimeters;
- scissors;
- pins.
Read
We make beautiful crowns and hats using the kanzashi technique
We cut out twenty-one squares from the blue ribbon, and twenty-four squares from the white ribbon. We pin one blue square in the corners of our artichoke ball. We fold the next blue square twice diagonally and pin it to the first one, aligning the center of the resulting triangle with the center of the square. Continuing to make the artichoke ball, we make three more of the same triangles, and fill the entire first blue satin square with them. Then we begin to make the same triangles from white tape, and fasten them with pins one cm lower than the blue squares. We make four white triangles and close all the blue squares.
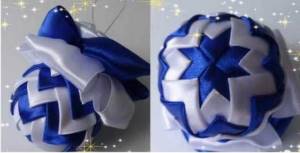
Next, we continue to fold the triangles from the white satin ribbon and pin them between the previous white triangles, that is, their vertex should be located between two other white vertices. Next, fill the artichoke ball with blue triangles, each of which should also be located between the previous white shapes. Having attached four blue triangles, we will continue and pin four more between them, as we did in the first row with white ribbons. We got the second row of kanzashi artichokes, which used eight blue triangles.
In the same order we must make the next three rows, alternating white and blue ribbons. When we pin the last four white triangles, we need to slightly bend their corners, and then carefully melt all the edges of the ribbons with fire from a lighter. After this, we begin to decorate the top of our artichoke ball. To do this, we make pieces of blue ribbon eight centimeters long, and then fold them in half, shiny side up, and gather the edge with a thread, seam first, needle first. We make four petals and collect them on one thread, getting a blue bow. Then we will make another similar white bow, and a third smaller white bow. Glue a large white bow to the top of the ball, and a large blue bow even higher. Above all we will place a small white bow, and then metal decorations in the shape of a flower, and a thread. At this point the work is finished, the artichoke using the kanzashi technique is ready, and we made it with our own hands.
Read
Hairbands with flowers in kanzashi style
History and origin
Kanzashi is a technique for making flowers from satin ribbons. Although kanzashi draws its roots from the past, it is still a new and unusual solution. Especially if you use the technique as a decoration for the bride’s bouquet.
For the first time, geishas took advantage of kanzashi, decorating their hair with bright and colorful flowers. Geishas possessed valuable secrets of the art of beauty, so we should also adopt Kanzashi products. The first kanzash were made of valuable materials - gold, silver, but then they were replaced by a budget analogue, that is, satin ribbon.
Kanzashi wedding flowers appeared not so long ago, but have already become the subject of attention of many brides and girls who are just preparing for an important event.
Learning to make Topiary or tree of happiness
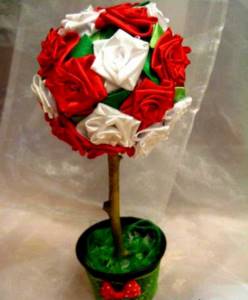
To make a Topiary tree of happiness with your own hands, you need to try a little and carefully study the master class, which contains step-by-step photos. To work you will need:
- red and pink satin ribbons, five cm wide;
- a plastic ball with a diameter of ten to fifteen cm;
- jute twine;
- aluminum wire two millimeters;
- elements of plastic grass; plastic leaves to decorate topiary;
- white beads;
- lighter;
- glue gun
We begin to make the tree of happiness Topiary by cutting satin ribbons into pieces thirty cm long, and we will make satin roses from these pieces. To do this, bend either end one centimeter to the wrong side, and then fold the tape in half lengthwise. The corner of the tape on the fold line must be bent down and begin twisting the segment. The ribbon should be twisted occasionally, which is essential for the formation of beautiful petals. In the process of making roses from satin, the tape needs to be glued periodically, after about two or three cm. When the tape is almost twisted, secure its end well with glue. Our topiary tree of happiness will require a total of forty roses.
The number of red and pink flowers will depend only on which Topiary you like best. Having made all the necessary roses, we proceed to the most important thing in our needlework. Let's take our pre-prepared plastic ball and punch a hole in it.
This is necessary in order to connect the trunk and the Topiary tree itself. Then we begin to form the Topiary, placing all the satin roses on the ball and securing them with a glue gun. When this stage of work is completed, find a wooden stick of the required diameter and length, and insert it into the hole of the ball.
The trunk will require a special decoration with jute twine placed on an adhesive base. In addition, we will decorate the trunk with wire curls, which we will also decorate with twine and glue. These beautiful curls must be connected to the trunk using the same twine as in the photo. You and I purchased plastic grass, which we will add to the Topiary when decorating. If you want, you can glue this grass to the roses, adding pearl beads. To complete the work, fill the pot with a mixture of alabaster and water, and place the Topiary there along with plastic leaves. Look at the photo, where you can clearly see what a beautiful decorative Topiary tree you can get if you do everything yourself.
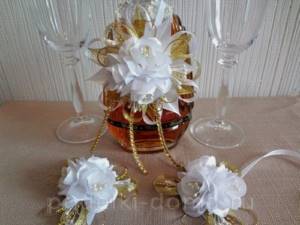
DIY wedding accessory
The first step is to create the base. To do this, the papier-mâché ball is carefully wrapped with threads of a certain color. Then a wooden stick is inserted into the base. For greater stability, it can be secured with glue. After complete drying, the flower stem is wrapped with satin ribbon. This is the basis of the bouquet.
The next step is to make the flowers. The easiest way is to create buds with pointed petals. To do this, a square with a side of five centimeters is cut out of satin and folded once. The corners of the resulting triangle are bent on both sides. Then the same action should be repeated.
The petal is fixed with tweezers. The excess piece of fabric is cut off with scissors. The cut must be burned with a lighter. Using thin tweezers, slightly move the edge of the petal so that the workpiece can stick together. For a wedding kanzashi bouquet you will need about 105 of these petals.
The blanks are fixed to the base using a glue gun. Craftswomen recommend gluing the petals in a circle, observing the following sequence: the first, second and third row of the composition consists of 20 petals, the fourth - 19 pieces of such blanks, the fifth row - 15 petals, the sixth - 9 petals, and the seventh row has only two petals. The result is a very effective composition. The final step is to decorate the kanzashi bouquet for the bride with lace, beads and feathers.