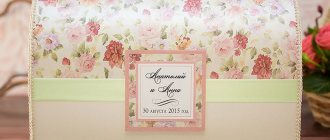
Without a doubt, money is a great wedding gift that you just can’t help but like. How to present banknotes so that the gift looks original, is different from others and is memorable for the newlyweds?
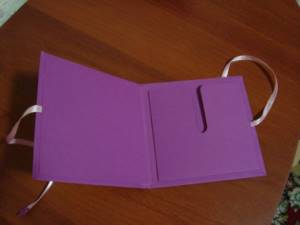
An original envelope for money can become a gift itself
Very simple. You need to make an envelope for money with your own hands. In this case, the traditional white envelope will miraculously turn into an independent gift, inside which another one will be stored - money.
Let's see what wedding envelopes you can make yourself.
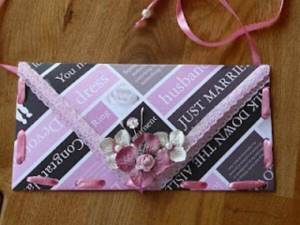
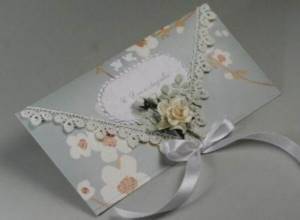
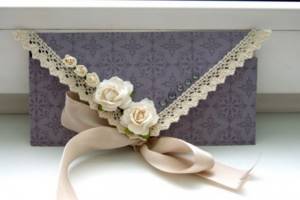
Gold lace envelope for wedding
This envelope is easy to make, and the “golden lace” will look elegant and brilliant, in the literal sense of the word.
“Golden lace” looks elegant and brilliant
In order to make a lace envelope, you will need:
– a ready-made white envelope without inscriptions,
– thin lace,
– a can of gold paint.

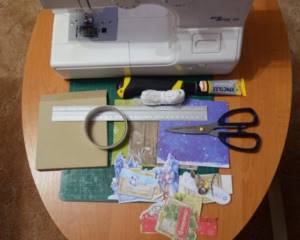
Tools and materials
Method No. 4
Another option for a gift envelope.
It can be made from multi-colored gift paper: 1. Fold the sheet in half crosswise.
2. Bend the top edge of the folded half of the sheet down so that the cut coincides with the bottom edge of the part.
3. Then fold the flap in half again as shown in the picture. Fold it back again, just marking the fold.
4. Now fold the bottom edge to the resulting fold once, then again.
5. Fold the top edge of the sheet down towards the point marked in the figure.
6. Fold in the bottom right and left corners.
7. Fold the right and left edges of the part to a width equal to the width of the folded triangles.
8. Mark the folds along the dotted lines as shown in the picture.
9. Unfold the folds so that you have a sheet of paper folded as shown in the figure.
10. Using the previously marked folds, bend the right and left sides of the lapel so that two triangles are formed along the bottom edge of the figure.
11. Fold the top edge of the flap along the existing fold.
12. Fold the right and left edges, laying out the lower triangles as shown in the figure.
13. Then tuck the bottom corners inward.
14. Mark the folds along the dotted lines marked in the figure.
15. Pull the edges of the lapels marked with dots and tuck the top corners inward, as shown in the picture. Smooth out all folds.
16. Now you can close the envelope by simply folding the top and tucking in the corner.
Ready:
How to make “golden lace” on a wedding envelope
1. Place the lace on the white envelope and try to prevent it from moving during dyeing.
2. Spray gold paint from a can onto the envelope with lace.
3. Wait until it dries completely.
4. Remove the lace.
5. Turn the envelope over with the white side up and do steps 1-3.
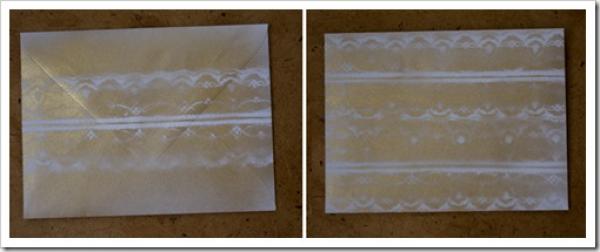
This is what the finished envelope looks like
The exquisite and original wedding envelope is ready! You can make such an envelope not only “gold”, but also “silver”. You just need to take a can of silver paint. Don't forget to put money in the wedding envelope.
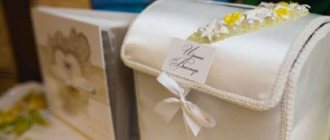
Creating an envelope
Don't know how to make an envelope out of paper with your own hands? Don't despair, because its shape doesn't have to be standard. Come up with your own design and original design. Some methods of creating envelopes are worth considering in more detail.

Decorating a vase: ideas and master classes on how to make a vase with your own hands (80+ photos)
DIY hats for newborns. Several types of knitted winter hats for every occasion in a baby’s life
How to crochet beautiful napkins: tips with video lessons and patterns
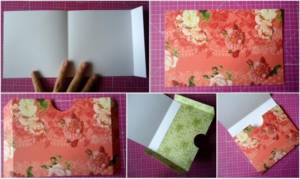
Making the simplest envelope for money for a wedding
We all once folded airplanes and boats out of paper. Let's remember our childhood and try to fold a simple wedding envelope from colored paper.
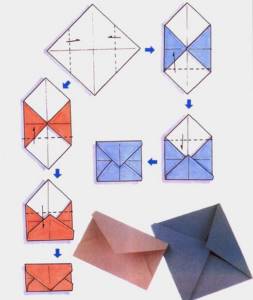
Using this pattern, you can fold two types of envelopes
Look carefully at the diagram. It shows very clearly how the red and blue envelopes are folded. Be sure to seal the edges of the envelopes and leave the top flaps free. You can create a lot of interesting options based on these very simple envelopes.
This envelope is easy to fold according to the diagram
Envelope decoration
The envelope is ready. Now you need to decorate it. Imagine and experiment. In addition, a child can suggest an idea for decorating an envelope. Let him express himself, let him paint the product according to his own taste and write beautiful words.
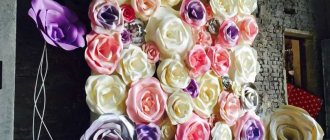
Decorate the front of the envelope with ribbons, beads, threads or lace. Bows and flowers will make the envelope look festive for special occasions, such as a wedding. Teach your child to twist the stripes and decorate the design using the quilling technique.
Envelopes made by yourself will become not only original, but also dear to your heart. Especially if your family members were involved in the creative process. Good luck!
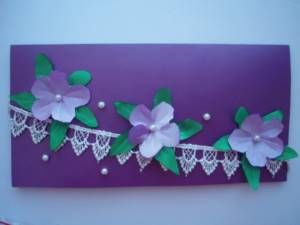
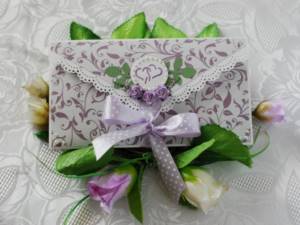
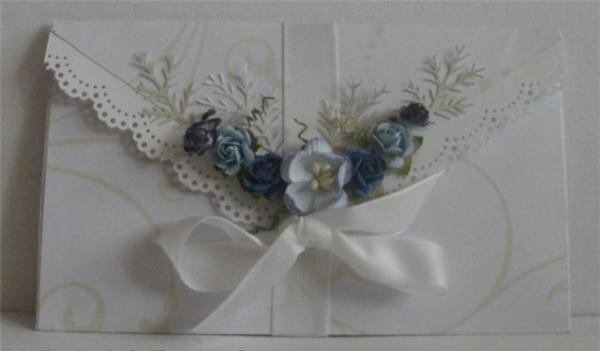
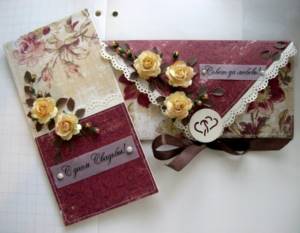
How to make a wedding envelope with a rose and lace
Let's try to create an envelope with a rose and lace, following the step-by-step instructions.
You will need:
- colored paper for the envelope,
– a little thin lace,
– leaves cut from colored paper,
– ready-made rose flower,
– thin satin ribbon, scissors, glue.
An original envelope with a rose and lace is created based on the diagram
What you will need
To create a traditional or decoratively intricate envelope, prepare a material that will serve as a base: a piece of wallpaper, loose cardboard, sheets of wrapping, colored or plain paper.
Multi-colored ribbons and lace, twine or straw, beads, rhinestones, buttons, sequins, artificial or embroidered flowers are used as decoration. In general, everything that is used for decoration.
You can decorate the envelope with drawings or applique of your own creation using paints, colored paper, felt-tip pens or pencils.
For tools, be sure to prepare a simple pencil, ruler, PVA glue and stationery scissors. In the workplace, remove all unnecessary things to make it comfortable for you and your child.
Install the necessary lighting and lay out the materials for work.
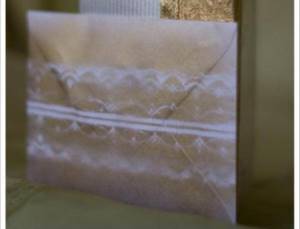
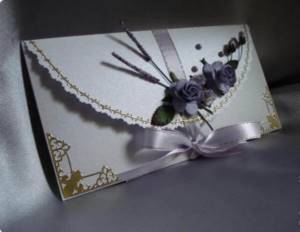
Making a lace wedding envelope: instructions
1. Glue the lace strip along the edge of the envelope flap using glue.
2. Cut out the leaves and glue them to the envelope.
3. Glue artificial flowers onto the leaves.
4. At the bottom of the envelope we attach a bow made of satin ribbon.
The wedding envelope with lace is ready.
Important: if you cannot glue the lace for some reason, you can replace the lace fabric made of fabric with a similar one, but only made of paper.
Envelope with paper lace
The envelope can be designed in this way
Envelope in the form of a postcard: option 1
This method of creating a wedding envelope is the simplest.
- Cut a rectangle measuring 21 cm by 17 cm from cardboard or thick paper.
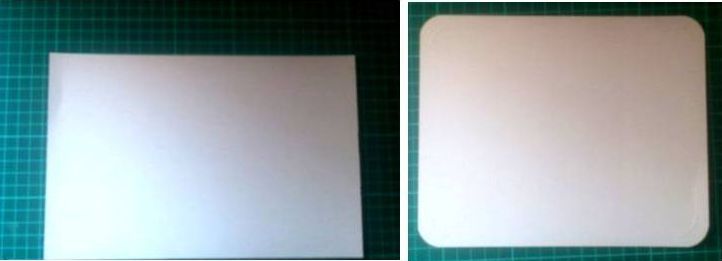
- Round the ends of the workpiece using a special hole punch, a simple figured ruler or other round object.
Editor's choice: Flowers for a summer wedding: classic or rustic
- Mark the bend location. To do this, measure 6 cm on each side and draw lines.
- Run sharp scissors along them and fold each edge towards the middle.
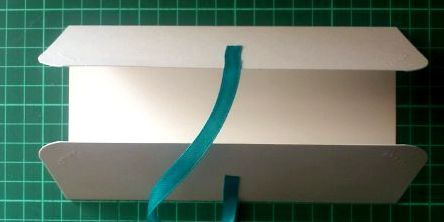
- Make two pieces of tape 15 cm long.
- Glue one piece to each side of the envelope.
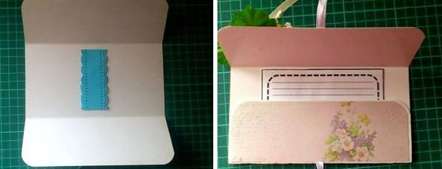
- From any beautiful paper, cut out rectangular templates, one measuring 16.6 cm by 8.6 cm, the other two – 16.6 cm by 5.6 cm.
- Paste the resulting blanks onto the future envelope.
- If the envelope is intended for money, then you should take care of a special fastening. Fold a piece of ribbon in thirds and secure it on the inside of the card with glue.
- If the envelope is used as an invitation, then you can simply put a postcard inside it, or you can glue a sheet of paper inside with an original inscription.
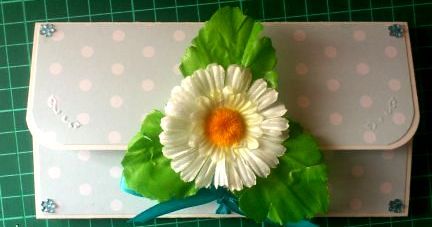
- Decorate the envelope in any way you like.
How to make an envelope collage
1. Glue lace to the middle of the envelope.
2. Glue leaves onto the lace in the upper left and lower right corners of the envelope. You can take ready-made leaves, or you can cut them yourself from fabric or paper.
3. Glue a strip of fabric onto the lace and leaves. The width of the strip should be such that the edge of the lace is visible.
4. On the left, under the leaves, we attach flowers.
5. Take a piece of paper with notes and tear off the edges with your hands. The edges of the piece should be uneven, and the piece itself should be wrinkled.
6. Glue the notes according to the photo.
7. Cut out a heart from white or red fabric and glue it onto the notes.
8. Sew on three buttons.
9. Fold a thin strip of paper into an accordion shape and glue it to the envelope over the heart and notes.
10. Glue rhinestones.
The wedding envelope collage is ready.
Such an envelope will not only securely store money for a gift, but will also become an excellent original present.
Traditional mailing envelope
To make a traditional letter envelope, prepare a white sheet of A4 paper. Place it on the surface directly in front of you.
Using a ruler, measure 72mm from the top right corner and 72mm from the bottom left corner. Draw lines from the given marks to the unused corners and cut off the resulting extreme parts in the form of triangles. The result is a rhombus. Connect its corners in the center of the figure, and fix the bends well.
Glue three parts together, and leave the fourth free. The envelope is ready. Using this principle, you can sew an envelope blanket for newborns with your own hands.
Step-by-step instructions with photos
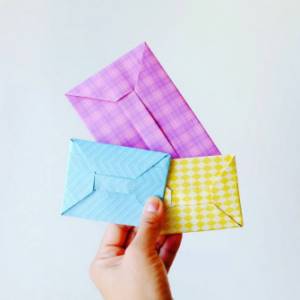
This master class will be extremely useful for you if you don’t like to worry about gifts and simply give money. But, you see, giving money in regular or even store-bought gift envelopes is very boring, so we suggest you make an original origami money envelope with your own hands.

Step 1: Fold the paper
Let's start with a rectangular piece of paper. We used patterned paper to make our origami money envelope look nice and thick. You can take any other paper of your choice, but remember that the final appearance of the craft depends on the quality of the paper.
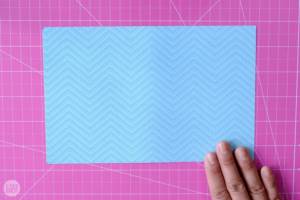
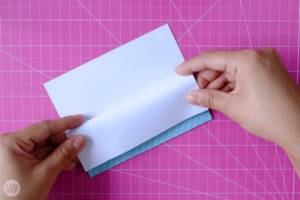
Fold the rectangle in half crosswise with the wrong side in the middle.
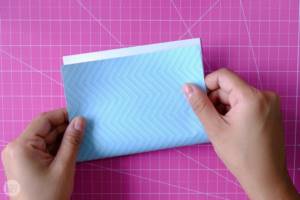
Fold the top flap towards the bottom edge. It should be folded into a quarter sheet.
Fold the same flap up, folding it towards the line of the last fold you made. Now the paper is folded 8 times.
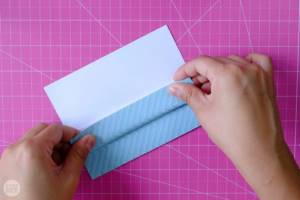
Open up the last step and fold the paper over to the 1/8 sheet fold you just made. The paper is folded 16 times.
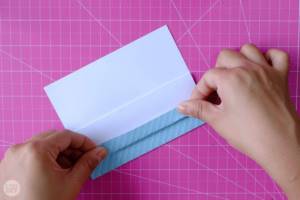
Fold the last fold over to create a pocket or flap. This fold will serve as a “belt” for the envelope, adding reliability and beauty to it.

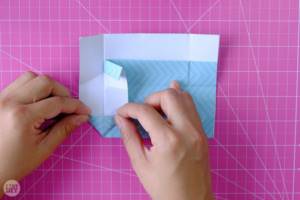
Step 2: Make the corners
Next we move on to the lower corners. Fold the lower right corner up to the waistband in the middle.
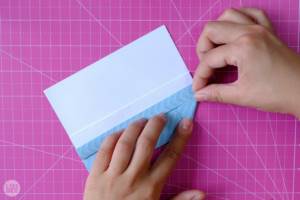
Fold the bottom left corner up in the same way.
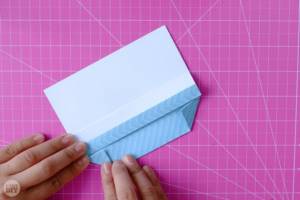
Turn over the sheet of paper. Fold one side along the folded corner line.
Repeat the same fold on the other side. Make sure your creases are ironed well.
Turn the sheet back over.
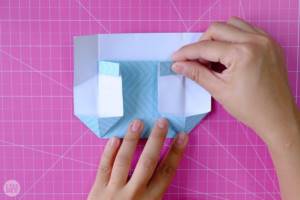
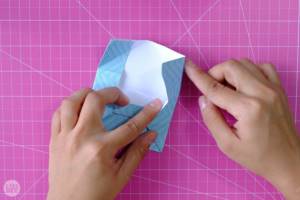
Step 3: Make the Top Folds
Next we will work with the top flap of the envelope.
Start folding from the fold at the top. To form it, fold the top flap down to the waistband line, and then fold it up along this line.
Iron the fold thoroughly and unfold the paper. Fold this fold again, but in a downward direction. Straighten the paper.
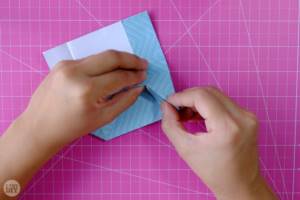
The next couple of folds are a little more difficult to make. Make small diagonal creases in small rectangular sections just above the center fold (see photo below).
Make a crease on the left from the top left to the bottom right.

Repeat the crease on the right, forming it from the top right to the bottom left.
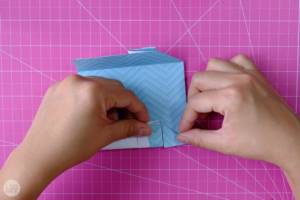
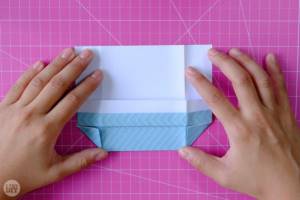
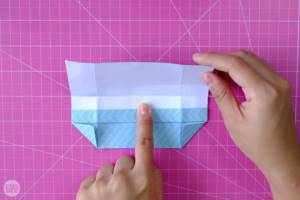
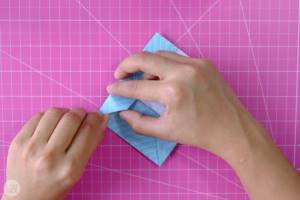
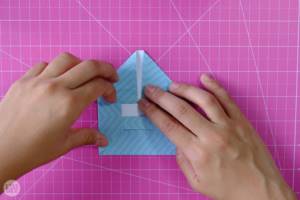
Step 4: Finish the Bottom
Okay, let's finish the envelope. Open the waistband and the last folds.
Fold the left side along the previously created folds, forming a triangle at the bottom and opening the flaps on one and the other side of the craft.
Repeat the same on the other side.
After forming the triangles, return the “belt” to its original place.
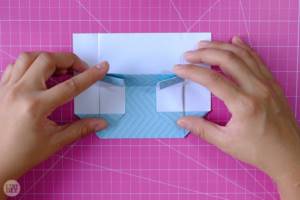
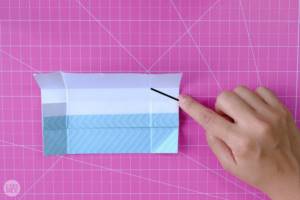
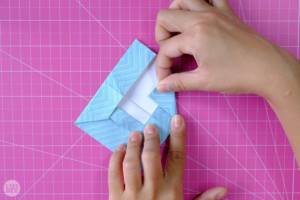
Slowly pull out the folds of the bottom triangle on the right side and straighten them.
Pull the angle behind the bottom fastener and place the triangular valve in place.
Repeat the same on the other side. Insert the valves very carefully and make sure that the “belt” is on top of the valves. Iron all folds thoroughly.
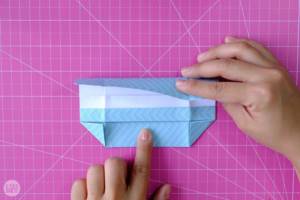
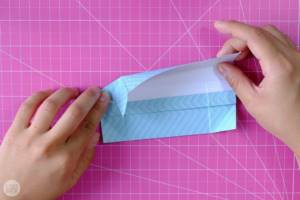
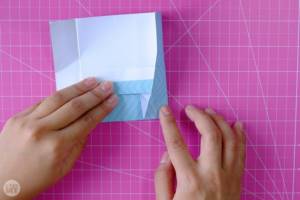
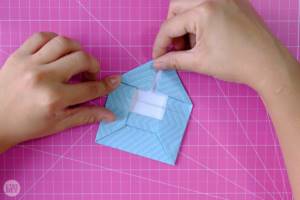
Step 5: Finish the Top
Next we will make a couple more folded “ears”. Fold the upper right corner to the first crease.
Repeat on the other side. Are you already starting to see your origami money envelope taking shape?
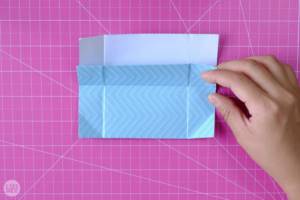
Open up the folds.
Fold the fold inward along the previously formed folds. You can now see how the miniature side folds came in handy.
Repeat the same on the other side.
Next, you just have to fold the top corner down and tuck it behind the “belt.”
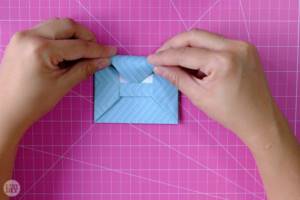
Your charming origami money envelope is ready! He's still broke, but it's never too late to fix that!
And now - surprise! We have found a video for you, from which you will also learn how to make a wedding origami money envelope with your own hands.
8962 Nika September 17, 2016
3