If a photographer at a wedding takes up to two to three thousand frames, then how many of them does he process? Actually, not that long. The main thing is to know a few secrets of batch processing and self-organization so that processing takes no more than three hours.
In this article, we will collect the most important life hacks for speeding up the process of processing a wedding series, so that you save your time, can take more shoots and, accordingly, earn more.
How to minimize processing time while still shooting?
1. Shoot under the same lighting conditions in one location. Don’t jump either towards the window or away from the window, into the shade or into the sun. If the wedding walk takes place during the day, take the newlyweds into the shade and take all the shots there. If you’re filming on a yacht, use hard light and don’t go into the cabin. If you shoot fairly level, you can immediately apply the same settings to all photos taken under the same lighting conditions. This will save you a lot of time.
2. Shoot in manual mode, so that later one preset fits well on all frames with the same settings. Even when shooting at aperture priority, the shutter speed will change depending on the exposure, so it will be problematic to apply the same exposure compensation settings.
3. Shoot immediately correctly in terms of color, light, white balance, ISO. Immediately think about framing, horizon line and debris in the frame. If you remove the green bag in which the champagne was brought to the yacht from the frame, this will make your life much easier during processing.
4. Don't click a million photos, take no more than 300-400 for the entire wedding day. You will no longer be able to process quickly and efficiently. And the couple doesn’t need a bunch of photos. They will still post and print the best 100. If not 20.

Photo processing in Photoshop Camera Raw
When talking about photo processing in Photoshop, it’s hard not to mention one of its components, especially since novice photographers today can shoot in raw format. ? Of course, this is a topic for a separate article, but here are a couple of points that beginners need to know about photo processing in Photoshop Camera Raw:
- Adobe Photoshop Camera Raw is the most famous plugin for Photoshop, without any exaggeration. It is developed and supported by Adobe. This is a kind of “developing” studio for digital photographs and it works with a special file format - raw. It stores a lot of settings, and this gives more room for maneuver in post-processing.
- The big brother of Camera Raw is, of course, Lightroom, I have a lot of articles about it. If you are a photographer, or are planning to become one, know that both camera raw and Adobe Lightroom provide approximately the same tools, and once you master one, you can easily figure out the second.
How can a wedding photographer organize himself in order to deliver all the photos on time?
5. Buy yourself a fast computer. For a photographer, it is important that the computer has a large amount of RAM (at least 8 gigs), an SSD and a monitor with an IPS matrix for adequate color reproduction.
6. Enter into the calendar not only the shooting, but also the time for processing it. If you shoot on Fridays and Saturdays, and you process from Monday to Thursday, then think three times before taking another shoot on Wednesday.
7. Use task managers. Of course, you can use a diary or put all tasks in the same Google calendar as filming. But special programs and applications not only remind you that it’s time to start processing, but also show progress on tasks and make it possible to work together with a retoucher.
8. Use task trackers. These programs allow you to track the time you spend selecting photos, primary processing and detailed retouching. If some stage is sluggish, it may be better to take courses to learn and optimize the time spent on processing in the future.

9. Turn off your mobile phones, social networks, and the Internet in general. If during shooting you still manage to take a break from the Internet, then during processing there is a great temptation to go to Instagram to post a new photo, or check the number of likes, or respond to direct messages, or go to your competitors’ pages. This is a black hole into which all time flows. Plug this hole and you'll be able to process it twice as fast.
10. Take breaks. Work for 40-50 minutes, and rest for 10 minutes: warm up, look out the window, go to the kitchen and make yourself some coffee, and finally have lunch. But don’t dive into your phone—it will definitely take more than ten minutes.
Film or digital?
The first question to consider before choosing a photographer is whether you want your photos on film or on a digital camera. They vary in terms of color, style and cost, and each type of shooting has its pros and cons.
Pros of digital photography:
- • A more popular option than film, most photographers shoot digital.
- • You can immediately see the result and, if necessary, retake some moment if the photo was unsuccessful.
- • Gives better results in low light conditions (at a banquet).
- • Cost: Shooting with film is generally more expensive, but the price largely depends on the photographer.
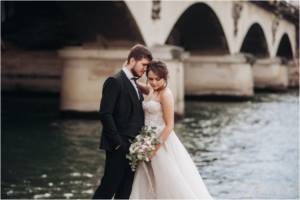
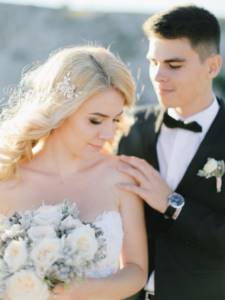
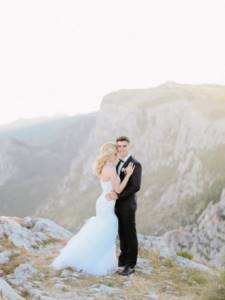
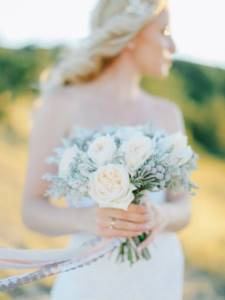
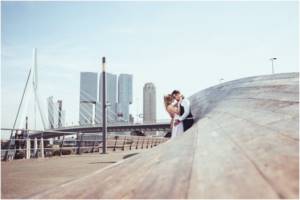
The main advantage of film photography is more natural color reproduction; Many people love film precisely for its unique light and airiness. Therefore, this type of shooting is ideal for fine art and classic style, for a photo shoot in sunny weather, if you want to get the most natural and gentle pictures.
View examples of wedding filming
Save Saved
Save Saved
Save Saved
How to speed up the process of selecting wedding photos?
11. First, all photos from flash drives need to be copied to your hard drive. Make sure the photos are copied and clean the flash drives. Otherwise, tomorrow you will come to the wedding with flash drives filled to capacity - and you will have to format them chaotically.
12. Use programs for cataloging and ranking photographs to view and select footage. If you first look through the entire series of 2000-3000 photos for marriage, and then to divide them into folders, and then for detailed retouching, you will need to scroll through them at least 3 times. To do all this in one viewing, use programs with a rating system (Adobe Bridge, Adobe Lightroom, etc.).
- Defective frames (shaky frames, blatant overexposure, missed focus, etc.) should be deleted immediately.
- Remove duplicates, choosing the most natural and emotional frame from the series.
- For example, mark portfolio shots for artistic processing and detailed retouching with five stars.
- For the rest of the pictures that will only need light and color correction, give four stars.
- Mark frames that you are unsure about with three stars.
- Mark shots by location and light conditions with appropriate colored markers (yellow near the window, green under the oak tree, etc.).
13. Select 3-5 best frames from those marked with five stars, immediately process them and send them to the newlyweds in a day or two, so that they can post beautiful frames of their wedding on their page on social networks. Efficiency is now highly valued, so be on trend and take care of your customers.

How to bring wedding photos to a single color?
14. Select and process (exposure correction, color correction, adding volume, cropping) one frame from a specific location with a certain lighting, and then apply these settings to all other photographs from a series of photographs marked with the same color marker. The following programs are suitable for this: Lightroom, CameraRaw, CaptureOne. Lightroom has presets that you can download or create yourself to quickly process a series. Name the presets so that they can be easily found later: banquet_flash, morning_sun_beach, registration_rain_shadow, and so on. These names will allow you to use these settings in the future by slightly adjusting the sliders.
15. Repeat the previous point for all locations. If in one location you have a couple of shooting points, without differences in light (bright sun, sun behind the clouds, shadow, sun again), then the number of these operations can be reduced to a minimum.
16. Scroll through all the photos and correct something if the preset doesn’t fit very well. Still, the shooting angle, perspective, point may change slightly, so small adjustments are often necessary.
17. Convert RAW file to JPEG. You can convert RAW files using Lightroom, CameraRaw, CaprureOne.

18. Open photographs in Adobe Photoshop that were intended for artistic processing and deep retouching. In Photoshop, we are already working on removing debris, retouching skin, adding sharpness, grain, glow, highlights and other effects.
19. Tint all photographs to give the series your own personal style. To do this, you can use your proprietary action - a set of settings that you usually set to get the desired picture.
20. Rename the photos so that they are called not DSC0009, DSC0010, DSC0011, but alena_alex001, alena_alex002, alena_alex003 and so on. This way the names of the photos will not be repeated on your disk, and the newlyweds will be pleased.

We arrange wedding photos
Author: Olga Maksimchuk (Princypessa). Publication date: October 24, 2021. Category: Photoshop tutorials collages.
Hi all!
In today's lesson you will learn how to delicately frame wedding photos .
In this lesson, I will show you two options for processing wedding photos - in one of them, the original photo will be used as the background, in the other, a texture from the Internet.
From the lesson you will learn how to use the Brush and Move tools, how to load and configure brushes, how to transform and scale objects, use layer styles, layer blending modes, the Gaussian Blur filter, learn how to create and edit smart objects and much more.

First way.
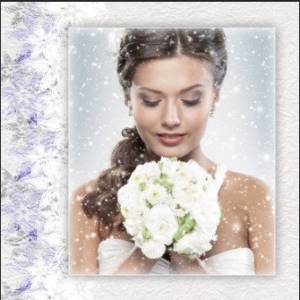
Open in Photoshop (Ctrl+O) the photo with the girl from the source folder.
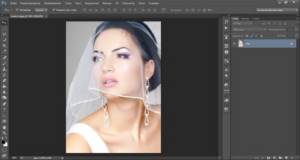
In the layers panel, click on the lock marked with an arrow to unlock the layer for further editing.
Create a duplicate layer (Ctrl+J) and rename the bottom layer to “Background”, the top one to “Girl”. To rename a layer, double-click the layer name in the Layers panel, enter a new name and press Enter. Temporarily hide the visibility of the “Girl” layer by clicking on the “eye” next to the layer in the layers panel.
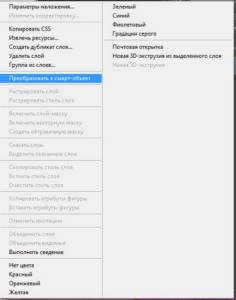
In the Layers panel, right-click on the “Background” layer and select “Convert to Smart Object.” After this step we will be able to edit the settings applied to the layer. But more on that later.
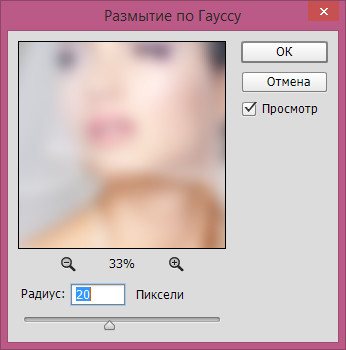
Go to the menu Filter-Blur-Gaussian Blur and blur the “Background” layer. We use a fairly large blur radius. The values for blur will depend on the size of the source - the larger the image, the larger the blur radius. Due to the fact that the “Background” layer is a smart object, we can edit the values of the applied filter at any time, just click on the Gaussian Blur filter line in the layers panel.
Above the “Background” layer, create a new empty layer and name it “Haze”.
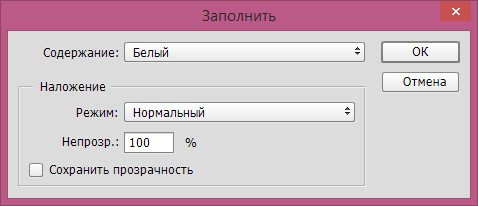
Fill the “Haze” layer with white. To do this, go to the Edit-Fill menu and in the window that appears, select “White” in the top line.
Change the blending mode of the “Haze” layer to Soft Light and lower the layer’s transparency.
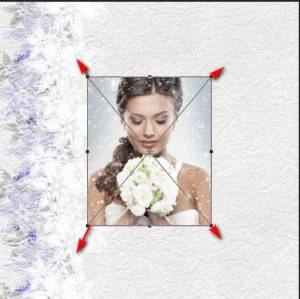
Restore the visibility of the “Girl” layer. Press the keyboard shortcut Ctrl+T to invoke Free Transform. Hold down the Shift key to maintain proportions and Alt so that the transformation occurs from the center and drag the corners of the frame inward to make the photo smaller.
In the Layers panel, double-click on the “Girl” layer to open the Layer Styles.
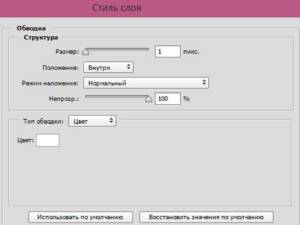
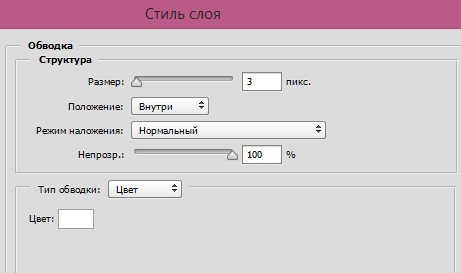
In the Stroke tab, enter the settings as in the figure below.
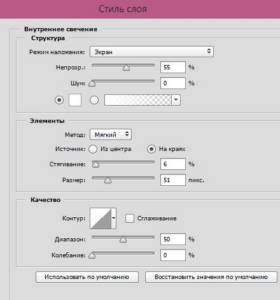
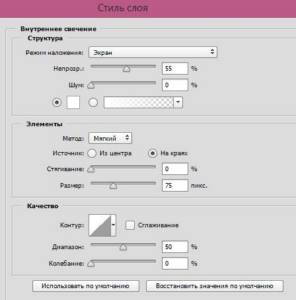
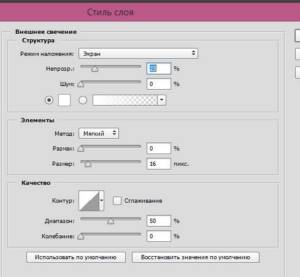
For the Inner Glow tab, use the parameters as in the screenshot.
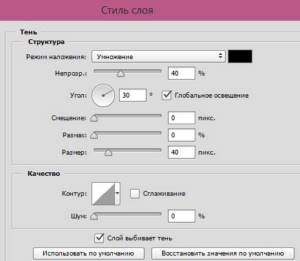
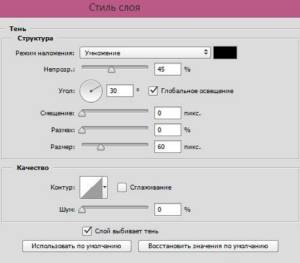
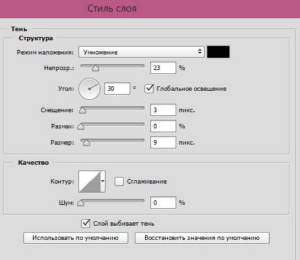
In the Shadow tab, enter the following settings.
The result after applying layer styles.
Second way.
Open the texture from the source folder in Photoshop (Ctrl+O).
We place a photo with the second bride in the document (File-Place). Hold down the Shift key and drag the corners of the frame outward to enlarge the photo.
Using the Move tool, place the image as in the figure below.
Double-click on the bride's layer to open the layer styles.
In the Stroke tab, enter the following settings.
In the Inner Glow tab, enter the settings as in the figure below.
In the Shadow tab, change the settings as follows.
You can use other settings for the above tabs, experiment and try different options!
The result after applying layer styles.
Above all the layers, create a new empty layer and call it “Corner”.
In the color panel, set white as the main shade. To do this, first press the D key on your keyboard to reset the colors to the default (black and white), then press the X key to swap the foreground and background shades.
Activate the Brush tool and load a set of brushes with corners from the source folder. To do this, with the Brush tool active, right-click on the canvas to bring up the brush selection menu. In the brush selection menu, click on the “gear” on the right and select “Load Brushes.” The set with the loaded brushes will appear at the end of the list of loaded brushes. Choose any brush with a corner that you like, for example, as in the picture below. To change the brush size, use the square bracket keys on your keyboard - the “X” and “Ъ” keys in the Russian layout. In the top settings panel of the Brush tool, click on the brush panel icon marked with an arrow. In the Brushes panel, check the “Flip X” option. On the “Corner” layer we make an imprint with a brush. Using the Move tool, place the corner on the canvas, as in the picture below.
Double-click on the “Corner” layer to open the layer styles.
In the External Glow tab, enter the settings as in the figure below.
In the Shadow tab, change the settings to the following.
The result after applying layer styles.
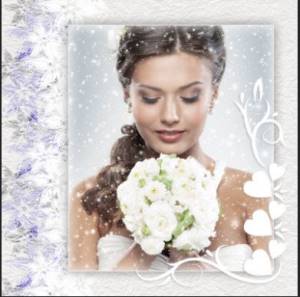
You can use other brushes and textures, of which there are many on the Internet, try different options and shades for layer styles.
For comparison, the result is before and after.
First option.
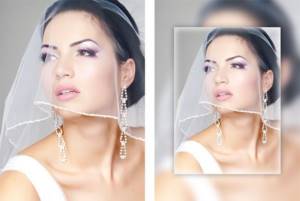
Second option

Festive mood and creative success!
FREE NEWSLETTERS OF VKONTAKE LESSONS:
If you don’t want to miss interesting lessons on creating collages in Photoshop, subscribe to the newsletter. The subscription form is below.
Seal
- Back
- Forward
Comments
0 Sergey Krotov 11/12/2018 21:47 Simple and tasteful!
Reply | Reply with quote | Quote
0 Olga 03.11.2018 15:07 Good lesson! I think it will be useful to many when designing photos! Thank you!
Reply | Reply with quote | Quote
0 Svetlana 11/01/2018 20:14 Thank you very much! As always, interesting and accessible.
Reply | Reply with quote | Quote
0 Svetlana 10/30/2018 12:29 Wonderful lesson! Thank you!
Reply | Reply with quote | Quote
+1 Inessa 10/30/2018 02:05 Thanks for the lesson!
Reply | Reply with quote | Quote
Update list of comments
Liked? Share:
Add a comment
Enter your name, or register on the site, so that your name is inserted automatically in the answers: it will take 2 minutes! After registering, you will be able to edit your messages and will not have to enter confirmation
.
To display an Avatar
(your picture), you must have an account on Gravatar at the same email address, it’s free.
JComments
How to save wedding photos for printing and publishing on social networks?
21. Let the series rest. You should not immediately send photos processed at night to the printer or to the client without viewing them in the morning. Also, you shouldn’t send the entire series of photos to clients the next day, even if you managed to process it right away. There, the wedding is still in full swing, and no one needs your photos yet. In addition, do not devalue your work, because if you received the same amount in one day of shooting and a couple of hours of processing as the bride and groom earn per month, this may cause unpleasant feelings among the newlyweds. First, send a couple of photos, and deliver the entire series personally or send it by courier in 2-3 weeks.
22. Send for printing selected photographs that were initially assigned the highest rating and which have undergone artistic processing and careful retouching. If your service package includes printing paper photos, you can use online services to print photos and have them delivered to your home. This will save you time traveling back and forth to the printing point.
23. Open a template for layout of a photo book and make up a photo album, placing no more than three different photographs on one page. And then send the photo book layout for printing. Some photographers coordinate the layout with clients so that the book does not accidentally include a photograph where the bride does not like herself. But often newlyweds trust the taste of the photographer from whom they ordered the shoot, and prefer that the photo book be a surprise.
23. Open the folder with the renamed photos, for example, in Lightroom, and reduce all the photos to, say, 1600 pixels on the larger side. Select the photos, then execute the command File - Export. Select the path where to save the reduced photos, their naming method, jpg format, and size: Image Sizing - Resize to fit - Long Edge - 1600 pixels. Click the Export button and get ready-made photos in a reduced size.
How to organize the transfer of photos to the newlyweds?
24. You can collect 3-5 weddings, write the photos onto flash drives, put the printed photos into boxes, add flash drives, photo books, business cards and accessories, and then send them to all customers by courier service. This saves a lot of time.
25. You don’t have to wait until you process a bunch of weddings, but hand over the photos to the couple personally as soon as they are ready. It will take more time, but sharing photos in person will give you the opportunity to reconnect with your subjects, see clients' genuine reactions to your work, and strengthen your partnership. Here it’s up to you to decide whether to save time at this stage or not.

Photo: Sergey Arinokhin
Share on social networks VKontakte
4500
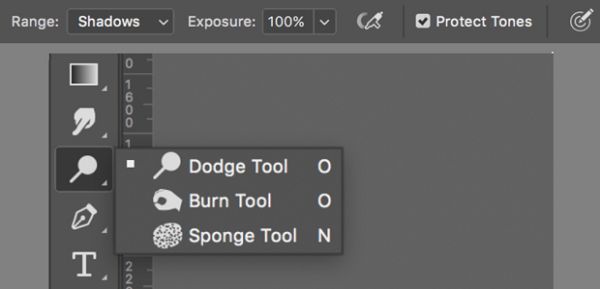
Darkening and brightening details
In the process of photo processing, quite often you have to lighten or darken certain details in order to achieve the desired result. I want to show you one trick that works with all photos. Hold Alt and click on the create a new layer icon at the bottom of the layers panel. As a result, a window with layer parameters will open, in which you can set the name of the layer. Now we will darken and lighten the details on it.
On this layer you can paint white or black on certain areas to lighten or add contrast to the skin. Don't forget to set the opacity of the brush to no more than 10%. As a result of working with a brush, you can add additional depth. For example, lighten the cheekbones or darken the cheek area. In addition, you can use the useful Dodge Tool (O) and Burn Tool (O).