Lovers approach the choice of wedding rings with trepidation. This is how it should be, because this wedding gift remains as long as love lives in the hearts of the newlyweds. This is what determines the desire to have special rings that have no analogues.
Previously, wedding rings looked very simple, without any additions or graces: ordinary smooth, flawlessly polished gold rings. However, somewhere in the Middle Ages in Europe, the first wedding rings with drawings and engravings began to appear.
With diamond
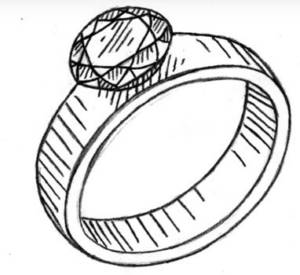
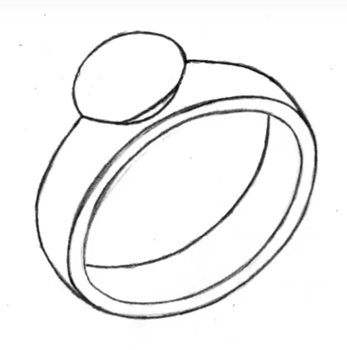
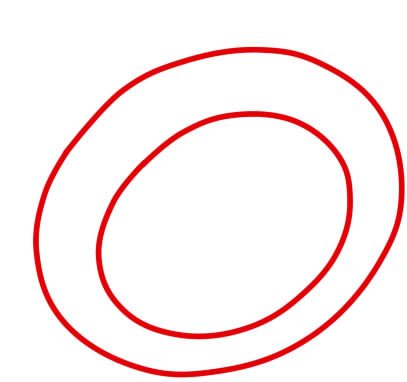
The first example we'll look at will show us how to draw a diamond ring step by step. An important point in drawing this accessory is that all lines must be smooth and neat, otherwise the drawing will look awkward and very strange.
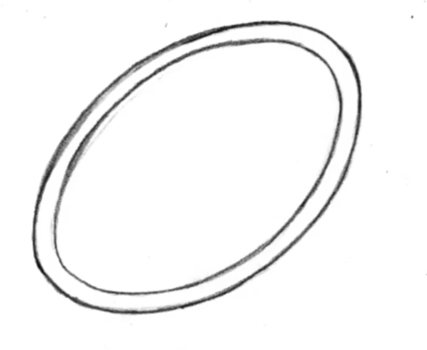
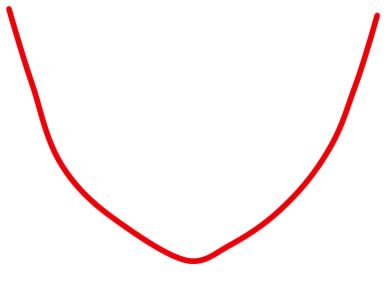
The first stage of drawing will be the image of two ovals of different sizes. They form the side part of our drawing.
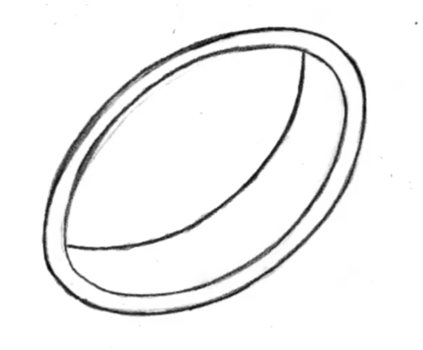
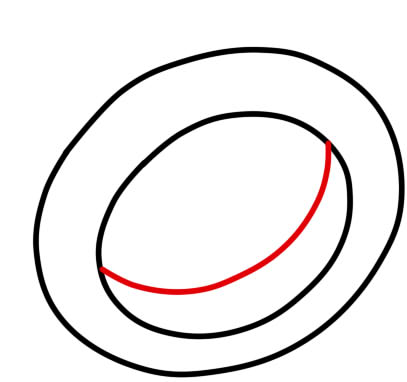
Since our ring is at an angle, we must draw it in volume. Therefore, we draw a line at the bottom inside the circles. Thus, we have drawn the inner side, which is always in contact with the finger.
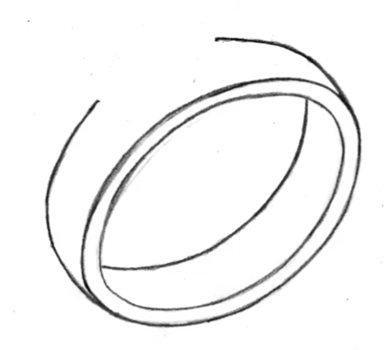
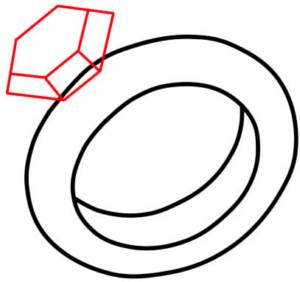
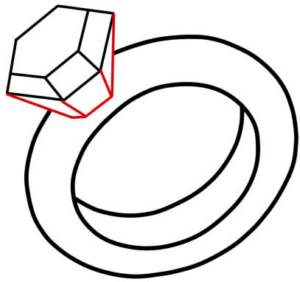
Now we draw the outer part, but since we still need to insert the diamond, we do not draw the lines to the end and leave an empty space approximately in the middle.
We fill the empty space with the contours of our diamond.
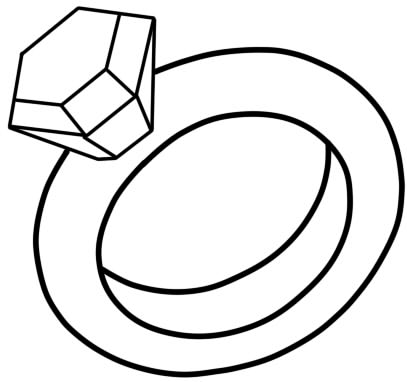
Draw a web of edges.
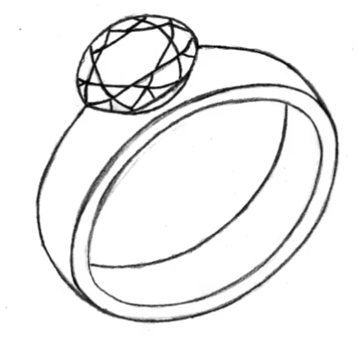
The last stage will be the image of chiaroscuro. We will draw chiaroscuro in the form of stripes; as a rule, the more often the stripes go, the darker it is in a given place, and the less often, the lighter.
In the previous example, we looked at a complex half-turn view. This time we will look at how to draw a ring with a pencil from the side view. And if you mastered the previous method of drawing, then you will master this one even easier.
Let's make a simple sketch. To make it neat, use a compass or a round glass. Our ring will have a diamond, so we will draw the contours of the fastening on one side and the other.
Don't press the pencil too hard, because some lines are auxiliary and we will erase them in the future.
We have already drawn the outer contours in the previous step, now it’s time to work on the inside. We draw a circle, and work on attaching the diamond above it.
Let's detail our gemstone by depicting its edges.
We take an eraser and erase all the auxiliary lines with it; we no longer need them. Also, let's color our ring. We chose an unusual color, namely, sea green. If you want, you can choose more popular colors such as gold or black.
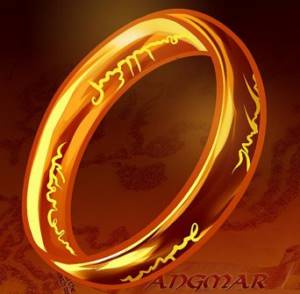
This time we will draw a magic ring from The Lord of the Rings. It has an interesting feature: if you erase all the hieroglyphs from it, it will look like a wedding ring.
Despite the fact that we will draw a complex perspective in half a turn, it is depicted very simply. Just six simple steps and your ring will be ready!
Additional Tips
If future newlyweds want to choose wedding rings with a pattern, then they should decide in advance what type of pattern they prefer. Also, do not forget about the shape of the jewelry.
Wide wedding rings with a pattern look more interesting, especially if ethnic motifs are traced in the design. But this option is not suitable for everyone. Such accessories will look best on thin fingers.
An ornament is already a self-sufficient decoration, so in most cases the ring does not require inlay with precious stones. If a couple still wants to choose jewelry with stones, then it is better to give preference to small and discreet shades. They should be in the recesses so as not to protrude above the level of the pattern.
We draw jewelry: crown, earrings, necklace and ring
How to draw a decoration.
Hello, friends! In this lesson you will learn how to draw jewelry step by step with a pencil. As you can imagine, decorations can be very different, and I simply physically cannot touch on all of them in one drawing lesson, so I chose only four decorations that I like the most. So, here we will figure out how a beginner can draw:
We will draw each of these decorations according to the list, and I will break the drawing of each object into simple steps to make it easier and more understandable for you. Well, let's start drawing.
Peculiarities
Wedding rings have a rich history, and they have always been associated with endless love, devotion and fidelity between spouses. Such decorations not only indicate the marital status of people, but also help believers legitimize their relationships before higher powers.
If future newlyweds decide to purchase wedding rings with a pattern, then they need to select models in such a way that the pattern reflects the character, tastes or hobbies of the young people. In this case, jewelry that is simple at first glance will give the couple a certain mystery in their relationship.
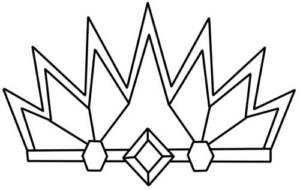
Drawing a crown
Every girl dreams of becoming a queen or at least a princess. But what is a queen without a crown? You can turn any drawn girl into a queen just by adding a crown to her. So how do you do this?
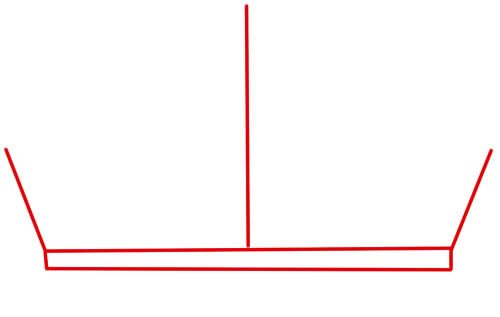
In order to draw a decoration such as a crown, we need to work on the base. For the base we need two horizontal lines connected at the sides. From the corners of this structure we draw two lines inclined in different directions, and from the middle the line should be straight. Make sure it looks like the picture below.
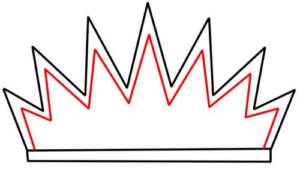
Now we need to connect the edges of the lines with zigzag lines, like this.
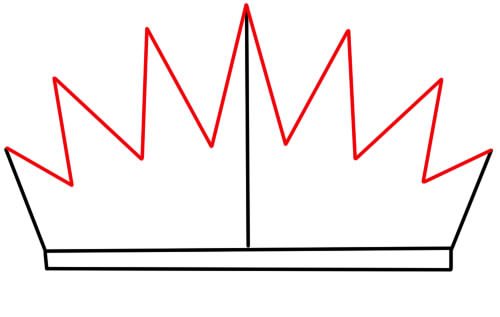
Under this line we draw exactly the same one.
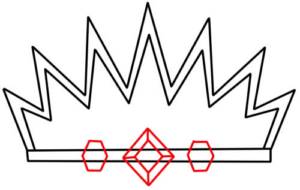
Now that the crown is almost ready, you need to decorate it. I settled on precious stones. Draw one large gem in the middle, and two small ones on the sides.
Erase the extra lines under the stones and connect their edges with the corners of the zigzags.
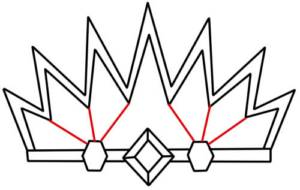
This is what you should get. You can decorate the crown as you wish - add patterns, embellishments or stones and color it as you wish.
Symbolism
According to an old belief, it is believed that wedding rings should be classic, without jewelry, stones or ornaments, then family life will be smooth, without difficulties along the way. Patterned jewelry violates this concept, which is why some superstitious people avoid this option.
Wedding rings with ornaments are suitable for people who are immune to prejudice, since otherwise there will always remain some doubt that difficulties in family life arose due to an unsuccessful choice of jewelry. Such accessories are chosen by extraordinary people who have one talent or another and an unusual way of thinking, since the classics seem too simple and faceless to them.
Drawing a ring
So, we move on to drawing the next decoration. This time it's a ring.
In order to draw a ring step by step, we need to start by drawing its shape. The ring, as you know, is round, so we draw two ovals like this.
To make the drawn ring look voluminous, let’s draw a line like this.
The ring must be complemented with a precious stone. First we draw its base of the correct shape.
And then we connect the corners of the base with straight lines to the ring.
It should look like this.
Summary
Original wedding rings with a pattern can be an excellent alternative to classic models if the bride and groom are not burdened with prejudices and want to stand out from the crowd. Such decorations will be memorable if the future newlyweds choose them based on their own tastes and preferences.
Andrey Andreev
Wedding planner and wedding photography guru
Tags: engraving, ring, engagement, ornament, drawing, wedding, pattern
Previous article
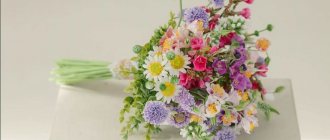
Fireworks from flowers - a bright bridal bouquet of roses and other plants: examples in the photo
Next article
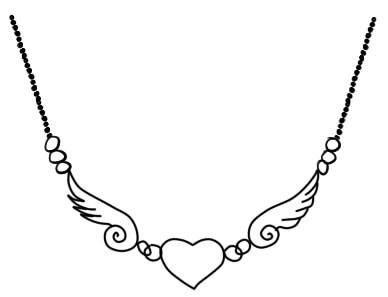
Drawing a choker or necklace
This is where there is really real scope for imagination, so it is with drawing a necklace. You can draw just a regular chain with a pendant, or a huge multi-tiered necklace, it's up to you. I'll draw a simple chain with an interesting heart with wings.
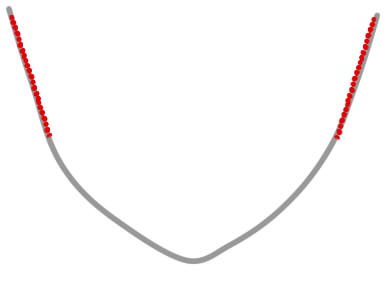
First, let's draw the shape of the necklace. If you draw this decoration on the neck, consider the angle and position of the body.
I start drawing a chain of dots along the edges of the line.
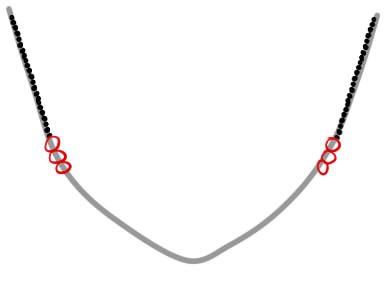
Closer to the middle, I draw wide rings that will connect the chain to the main element of the decoration.
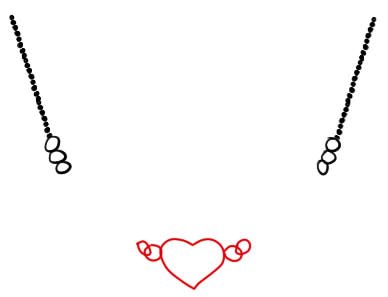
In the middle, at the very bottom, we begin to draw a heart with two rings at the edges.
We connect the heart and the chain with wings.
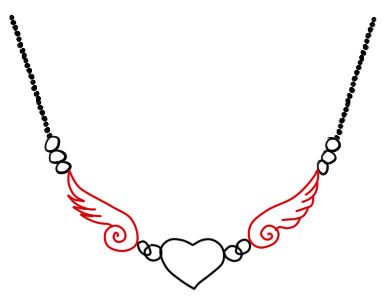
It should look like this. Now you can paint it, or you can leave it as is.
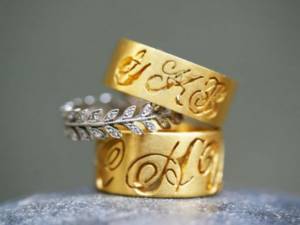
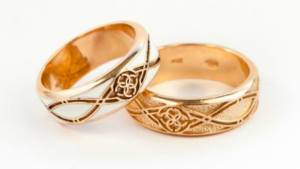
About cut engagement rings
Those who want to purchase something expensive and luxurious can choose the cut option. The base of such a ring is usually made of yellow, white gold, or platinum; the cut looks quite bright against their background. The relief pattern gives a beautiful shine, it shimmers and resembles a scattering of precious stones. Rings with diamond cuts look no less attractive than those with diamonds. Diamond cutting makes the product unusual and unique. Such models always have their own flavor. Diamond is a unique stone; our ancestors prescribed it with mystical properties. It was believed that if this stone has a greenish tint, it will help a woman become a mother faster.
This type of ring is luxury and simplicity at the same time
In any case, cut rings will be an excellent solution for an event such as a wedding. They will always look great and stylish. It is better to purchase paired options so that they become a beautiful reminder of your wedding day. Products with a wide base always look luxurious.
A simple and interesting lesson will help you make the emblem correctly
You always want to contribute to the Olympic Games, even if it's just a simple drawing. You should apply element after element to paper, enjoying the process. This is easy to do if you know how to draw the Olympic rings step by step - this was presented above. So, using improvised means or special drawing devices, you can create a real masterpiece that will decorate your house or apartment, and you can also take such a sketch with you to games. This step-by-step lesson will be useful not only for adults, but also for children. After all, at school they are often asked to make a similar emblem in drawing class.
It is worth noting that the Olympic rings were first used in 1920. After this, such a symbol began to appear on clothes, souvenirs, etc. The flag with multi-colored circles is now raised at all times during the start of games and lowered at closing time. In general, to draw the Olympic rings, you will need a simple pencil (marked T or TM), an eraser (soft), high-quality paper (whatman paper of any size from A1 to A5), markers (multi-colored) or pencils (different colors).
In this tutorial we will look at another option for using the “Layer Style” (“Blending Styles”), with which you can add volume to the drawn ring.
Step 1.
Open a new document (
Ctrl+ N
).
(The size of the document doesn't matter.) Take the Ellipse
(U), in
Shape Layer
.
Stretch out an oval shape. Then press Ctrl+ T
to position the shape as in the screenshot.
(if you need to reduce or enlarge the shape in proportion to the center, hold down the Alt key and drag the corner of the frame, reducing or increasing its size.)
*The color of the figure is not so important, the main thing is that it differs from the main background. The author took this color : #B2B7BB
*
Step 2.
Ellipse
tool settings, set it to
Subtract from shape area
(-) and draw another oval.
Ctrl
key (+- will change to a black arrow), click on the edge of this shape (4 squares should appear along the rim of the shape).
Press Ctrl+
T
and place the shape as in the screenshot.
*or use the Path Selection
(
A
) to select the desired shape*
This is what the layers palette looks like at this stage:
Step 3.
Duplicate the shape layer (
Ctrl+ J
).
Change the shape's color to Black ( #000000
). And swap these layers (on the Layers palette).
Step 4.
While on the duplicate layer, use the
Path Selection Tool (A)
, or simply hold down the
Ctrl
, click on the small oval of the ring and move it down a little. This will draw the inside of the ring.
*the color may not necessarily be black, you can also apply a Gradient Overlay to this layer*
The shape of the ring is drawn, now all that remains is to apply a Layer Style to give volume to our ring.
Step 5.
Shape 1
layer in the Layers palette .
Open the Layer Style window (right-click on this layer and select Blending Options
, or just double-click on this layer). In the Layer Style, set the following parameters:
Inner shadow:
Inner glow:
Yes, I often pay attention to girls and their jewelry. But I must admit that this is not my fault, but the merit of the opposite sex exclusively. Their evil intent and deceit forces them to decorate themselves for several hours every morning and holiday, and wear rings of incredible beauty. We will draw a diamond ring
, but to be honest this is a very rare piece of jewelry that I see more often in movies than in everyday life.
Are rings a great accessory to wear on your fingers? emphasizing them and attracting attention. But in life there are even rings for the toes, which are called “toe rings”, and there are also rings for the lips, eyes, tongue and even the navel. I for one think that rings are beautiful and they come in a variety of sizes, shapes and most importantly, price. A man gives a ring to a woman to show his love, and a woman gives a ring
to reflect your love and confess your vivid feelings and experiences.
More often, of course, this happens when a man wants to ask a woman if she wants to marry him; after all, he can’t wait to connect his life with his chosen one and is busy with everyday affairs. If she loves him, she will most likely say yes, and in particularly difficult cases, “I should think about it.” Anyway, as always, I think you guys will enjoy this tutorial on “ how to draw a diamond ring
step by step”. You can choose to draw this ring as a diamond or any other design you want. If you want more rings, let me know in the comments. Perhaps it’s worth drawing the ring of omnipotence from “The Lord of the Rings”?