Today's floristry offers real miracles in the design of a bride's bouquet. If a few years ago a bouquet in a “microphone” was considered the limit of modernity, now there are many ways to create a floral masterpiece. Attention is paid to the shape of the accessory, the choice of flowers, their composition, meaning, shades, original details and, of course, the stem of the bouquet. If the bride prefers a classic bouquet shape, then stylists advise leaving the stems of the flowers open, preserving the natural beauty of the plants. And to complete a neat and harmonious bouquet, it is recommended to decorate the leg in a stylish manner.
Ribbons
The most common way to decorate the stem of a wedding bouquet is with ribbons. Simple, stylish, modern. Pay attention to the color of the ribbons. You can choose solid colors that match the bouquet, wedding dress (be very precise with the shade), or contrasting colors. An interesting option is ribbons of several shades, alternating on the leg.
Experiment with the width of the ribbons and the pattern on them. Pay special attention to the fabrics from which they are made. Organza, for example, being a translucent fabric, can create interesting effects. Don't be afraid to combine ribbons from different fabrics. The main condition is that the ribbons must match the fabric of the wedding dress, insists the wedding portal Svadebka.ws. To add splendor to the bouquet (if you can’t afford many flowers), intertwine the ribbons on the stem of the bouquet with improvised bows.
Wedding bouquet master class on a microphone
Having even minor skills in home crafts, it will not be difficult to make a wedding bouquet with your own hands. Basic set of necessary materials:
- microphone (port bouquet) and floral sponge;
- satin ribbon, twisted cord for needlework, thin wire, decorative pins;
- heat gun, garden shears, sharp knife, double-sided tape;
- flowers (roses, peonies, arabicum) and decorative greenery (ruscus, shepherd's purse, aspidistra).
Having prepared the materials, you can proceed directly to making the wedding bouquet.
There are several ways to do this job, which boil down to basic steps.
- Remove the grille from the “microphone”, remove the sponge (oasis) and immerse it in a container of water. You should not put pressure on it; it will gradually absorb the required amount of water and, having sunk to the bottom, will be ready for further use.
- Then they start decorating the handle. The void inside it is filled with some absorbent material (toilet paper, paper towels) so that water does not leak out. The soaked oasis is fixed in a portaquet holder; for reliability, you can fix it in several places with thin wire.
- The cup of the porta bouquet is pasted over with double-sided tape, onto which strips of aspidistra are glued overlapping, fixing them in several places with pins. The handle is wrapped with a twisted cord from top to bottom, secured with a heat gun. Then, in the lower part of the oasis, a cuff is formed from broom and shepherd's purse.
- After this, the bouquet itself is formed. Leaving a 5-6 cm long stem on the flowers, they are inserted into the oasis, starting from the edge, along the circle of the port-bouquet towards the center. Small flowers are strengthened last. Add some greenery between the flowers.
- Upon completion, they begin to complete the design of the portbouquet handles, for example, tying them with a satin ribbon.
As a holder for a porta bouquet maker (for ease of work), you can use a chemical tripod, a flask or a heavy vase with a neck with a diameter slightly larger than the diameter of the handle.
Extended lines
Separately, it is worth mentioning the design of the bouquet with long ribbons. If you are going to wear a dress with a skirt no fuller than in the A-line style, then long ribbons on the wedding bouquet will add femininity to the image. An oblong skirt, a train, and a long veil (“to the floor”) allow you to add a bouquet with long ribbons (length from a meter) to this series. You will look like a real queen!
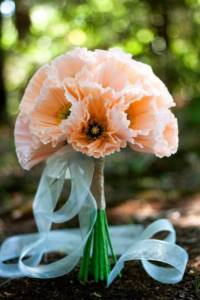
Classic is always in fashion
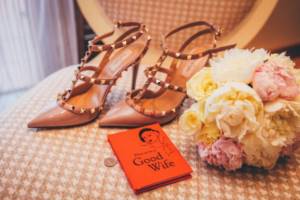
Nowadays, bouquets of powdery colors are in fashion. Photo: pixabay.com
In Europe, it is believed that the rose is a symbol of love. In the Caucasus, newlyweds prefer lilies or orchids. Tulips are a symbol of loneliness. But in fact, not everyone is superstitious, and tulips are not used simply because they are very fragile, bloom quickly, and the petals can easily fly off at any moment.
– The color scheme of the bouquet is influenced by the fashion that comes to wedding floristry from the catwalks. Not so long ago, bouquets of Morello (dark eggplant) color and fountain-shaped bouquets were popular. Now the classics are in fashion again: pastel, powdery, soft pink, warm peach shades and the round shape of the bouquet,” said Arshakuni.
This is interesting: Wedding bouquets became popular in Europe in the mid-19th century after the wedding of Queen Victoria of England and Prince Albert. Victoria complemented her image of the bride with a floral arrangement of calendula (another name for “marigold,” which symbolized the purity of the Virgin Mary.
Corset
For sophisticated brides' bouquets, it is advisable to choose something more complex than draping the bouquet's stem with ribbons or similar materials. Order a corset for a bouquet. This can be a “sleeve” of fabric that exactly matches the diameter of the leg, or a piece of fabric sewn or buttoned directly on the leg. Decorate the fabric with pearls, crystals, silk embroidery, and add accessories similar in style to the bride’s jewelry. Then the bouquet will look like a work of art.
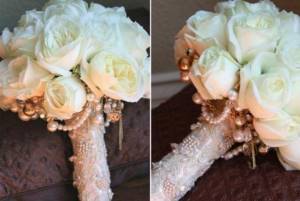
Using decorative ribbon to decorate the stem of a bouquet for a celebration
This is a classic design for bouquet legs . The most commonly used ribbons are chiffon, organza and satin. They can be combined, or you can simply tie the stem of the bouquet with a ribbon made of only one material. The color scheme of the ribbons is selected not to match the color of the bouquet, but to the main color scheme of the celebration.
Although decorative ribbon is a common material for a bouquet, before using it you must check whether it is clinging to the dress, whether it holds the bouquet tightly and whether it matches the style of the wedding.
It is worth considering that the use of decorative ribbon is relevant for classic, formal and elegant weddings. Although they can be adjusted to any other style, using decorations or varying the length of the ribbons.
It is important to remember that no matter how strong the decorative ribbon is, before you use it to decorate the stem of the bouquet, it must first be prepared.
Firstly , it is important to make sure that there is no moisture left on the flower stems.
Editor's choice: DIY butterfly for the groom. Master class with photos
Secondly , if there are a lot of flowers and the bouquet turns out to be voluminous, it makes sense to cover the stems with a thin layer of glue so that the bouquet holds on more tightly. Then you need to tie the leg with a thick elastic band, and wrap it with ribbon on top. With such preparation, you can be sure that the stem of the bouquet will hold firmly and it will definitely not fall apart.
Embroidery
Embroidery can be added either to the ribbons on the stem or to a separate piece attached to them. For traditional weddings, you can limit yourself to beadwork. For rustic or shabby chic weddings, embroider the patch yourself, for example, in a folk style, with an ornament, monograms of the bride and groom, and the wedding date. Perhaps this accessory will survive decades and will be given to grandchildren for good luck and good memories.
DIY porta bouquet holder
How to make a porta bouquet holder yourself? When creating this accessory, you need to take into account the overall style of the wedding celebration and the image of the bride. You will be able to realize all your creative fantasies. The easiest way to make a porta bouquet holder at home is from cardboard.
To create the frame you will need:
- Cardboard
- Pencil
- Scissors
- Styrofoam or floral sponge
- Knife
- Floral wire
- Glue gun
- Decorative fabric or ribbon
Next, let's start creating the product:
- Take thick cardboard and cut out a circle 20-25 cm in diameter
- Cut out a smaller circle inside
- Cut fabric (felt, organza, etc.) into strips or use ribbon
- Glue the fabric onto the cardboard, with small gatherings towards the center, forming a drapery.
- Poke holes with something like an awl on the inside of the cardboard
- Floral wire is threaded through the holes and twisted into a handle holder at the bottom
- Styrofoam or flower sponge is glued to the center
The product is ready. How to decorate a portaquet holder? To decorate it you can use paper, stones, rhinestones, lace, etc. at your discretion.
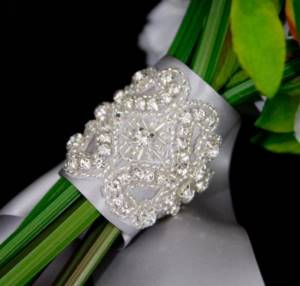
Brooch
If the stem of the bouquet is entwined with ribbons or lace, a brooch will serve as an additional decoration. This is one of the most current options for a modern wedding bouquet, concludes the website www.svadebka.ws. Pick up a beautiful crystal brooch or find an antique accessory. In any case, this is a magnificent decoration for a bouquet. The only condition is that the brooch be compatible with the bride’s jewelry.
Bouquet on a porta bouquet and “on its own legs” - advantages and disadvantages
Any bride often chooses a bouquet “intuitively”, without thinking about its advantages and disadvantages. Moreover, there is no need to talk seriously about the negative features of any of the two main options for composing a bouquet. After all, flowers are always beautiful.
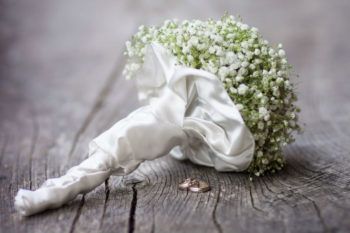
Still, it is advisable to take certain nuances into account. The advantages of a porta bouquet are beyond doubt. Wedding bouquets have been decorated in this way for many years, which is facilitated by a number of factors.
First of all, this is safety - thanks to the floral sponge (oasis), the flowers will retain their fresh appearance and will be a decoration not only throughout the wedding day, but also over the next few days. A wide selection of flowers is also important - with the help of a porta bouquet, a wedding bouquet can be decorated with almost any flowers (large, small, buds, etc.).
Ease of manufacture is also of certain importance. Any person can create a bouquet if they have the desire - the services of a specialist are not necessary.
And using a variety of fasteners and connecting your imagination, it’s easy to create a unique bouquet.
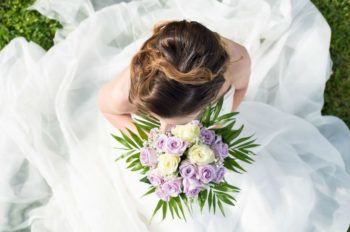
In addition, the small size of the porta bouquet holder allows you to create compact compositions - flowers are easy to carry in one hand, they do not limit freedom of action. True, this last advantage has a downside.
As a rule, port bouquets have standard sizes, which, in turn, dictate the size of the composition, which is not suitable for fans of large bouquets. In addition, such a bouquet can fall apart when thrown, which can upset the bride and guests. The second most common option is a bouquet “on its own legs”.
Its advantages include a natural “live” appearance. When creating such a bouquet, you simply need to assemble a composition of fresh flowers and tie their stems with ribbons (a good option for a minimalist wedding).
This option is also preferable for complex compositions that contain additional decorations - rhinestones, brooches, butterflies and other similar elements.
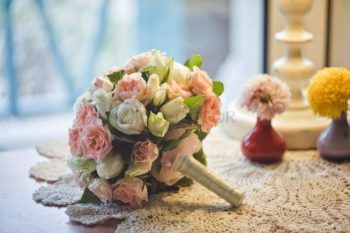
The disadvantages include the fact that such bouquets, made up of poorly chosen flowers, fade quite quickly.
To avoid this, it is advisable to consult with a competent florist who will recommend flowers that can maintain an attractive, fresh look throughout the day.
You can use a duplicate bouquet for throwing. That is, prepare two options, for example, one in a portaquet, and the second “on its own legs.”
Basic rules for packing a bouquet
Packing bouquets is a separate direction in floristry, and teachers teach this wisdom. We study new types and methods of packaging through master classes held by florist schools. After all, each type of packaging has its own rules.
There are also general rules:
- The packaging should not be brighter than the bouquet itself. The masters say to their students: “Is the meaning of the bouquet in the flowers or in the packaging?”
- There shouldn't be too much packaging. Surely you have seen bouquets where three roses stick out forlornly in the middle of multi-layer packaging. There is no need to do this. This is just a clever way to sell a supposedly “big” bouquet.
- The packaging must match the style of the bouquet. This is a delicate point that needs to be felt and studied further. For example, red and gold packaging does not match a field bouquet.
- The packaging should not interfere with placing the bouquet in a vase.
Wedding floristry! What you need to know!
53 messages
We congratulate you!
Soon there will be one more holiday in your life - your family’s birthday! Fresh flowers are always wonderful! And it will be right if on your day you have the most beautiful bouquet! My name is Kondrasheva Inna, I am a wedding planner and wedding planner. I really love and respect Igor Linnik’s flower workshop and I advise all my clients to come here! During my time working with Igor and his masters, I learned a lot of new things, which I want to tell you about today.
If you are going to buy a wedding bouquet and other wedding floristry at Igor Linnik’s flower workshop, you need to know about some of the nuances of the work so that your wedding bouquet carries a piece of YOUR personality, YOUR character and YOUR wedding!
You can see examples of wedding bouquets from Igor Linnik here: https://vkontakte.ru/album-8805378_115857970
So, before going to the florist, you need to prepare! 1. Take a photo in your wedding dress! This could be fitting, hemming a dress, or maybe even simply admiring yourself in the mirror at home. But there must be a photo! FOR WHAT? The master needs to understand what style and color of your dress, how it harmonizes with the color of your skin, eyes, whether it lengthens or shortens the image. The volume and content of your wedding bouquet, and therefore its price, depend on this.
2. Take a photograph of the dress in more detail. Embroidery, patterns, buttons, details embroidered with beads, pearls or sequins. In general, everything that is possible! FOR WHAT? For example, your dress has lilies depicted with embroidery or a decorative element, but you will want roses in your bouquet. Alas, but then the overall image will not be complete and you will not be absolutely perfect. Take pictures of everything, it won’t be superfluous!
3. Take a photo of the groom (if you are coming without him) and his wedding attire. Take note of how taller or shorter he is than you, how wide his chest is, and whether he is allergic to any flowers or elements. FOR WHAT? At a wedding, the most important thing is the COUPLE! You are now one and must work together. Just like you, your images should complement each other! Well, allergies. just to avoid unpleasant situations!
4. Complete the looks. By the time you go to the florist, you should already have all the accessories: veil, neck and ear decorations, bows on the dress, handbag and wedding shoes for the bride; tie (scarf or bow tie), cufflinks for the groom. All this must be photographed or brought with you to the meeting. It is also advisable for the bride to go for a trial hairstyle and makeup, photograph the result, or after the trial, immediately go to the florist in the image. FOR WHAT? If you want the perfect wedding, then absolutely everything should go together! The veil and hairstyle will show the pomp of the upper part of the image. After all, there are many options! You can attach a fountain veil, or you can just throw on a veil. Jewelry on the neck and ears will dictate the type of decorative elements in the bouquet, makeup and belt (bow) color style, and wedding shoes will dictate the height of the bride on her wedding day.
5. If there is a theme, a mandatory element or color for the wedding, then you definitely need to tell the florist about it! FOR WHAT? Floral arrangements can emphasize or completely kill an idea. So if you are having a field or garden wedding, then a Victorian-style bouquet is unlikely to suit you.
6. Take with you photographs of what you like: the color or shape of the bouquet, the type of flower. Think about what you want! A professional will always tell you whether it is possible to get orange calla lilies this season or whether it is better to replace them with something more suitable or affordable.
Packing a bouquet in film
Films are very different - both decorative and transport. The most famous is transparent film. The bouquet is packed in it to protect it from damage, then the film must be removed before placing the flowers in a vase. The most famous decorative film is Korean film. It is colorful, drapes easily, looks modern and stylish and does not get wet. But it also has a number of disadvantages - it often leaves creases, and besides, it is difficult to pack a voluminous bouquet in it, it is too soft and plastic for this, so it does not hold its shape.
How a composition is created
A floral sponge is a porous material that is saturated with water. The buds, which are then stuck into the sponge, receive the necessary nutrition. Therefore, a wedding bouquet in a porta bouquet holder is convenient for long outdoor events.
Interesting! Still haven't decided which wedding bouquet to choose? This article will help you decide.
Long stems of flowers are cut and inserted into a sponge. The bouquet holder helps create various compositions, so even a beginner can handle assembling the round accessory. You can remove the bud at any time and correct any imperfections.
The handle of the workpiece must be decorated with cord or ribbon. The color and texture of decorative elements are chosen in accordance with the style of the composition. To prevent the hand from slipping along the handle, florists use a combination of smooth and fleecy ribbons.
We give the bouquet various shapes.
There are a huge number of master classes on floral packaging. The main point: the packaging should not contradict the bouquet, it should complement it. We will show photos of various bouquet shapes that were achieved with the help of proper packaging.
See the photos below for ways to pack bouquets:
Packing in a frame
It is not entirely correct to consider the frame as packaging. This is a full-fledged part of the composition. Technically, the bouquet is assembled on a frame. And there are many types of frames. Commercial floristry uses ready-made frames, often made of sisal. It's fast and convenient.
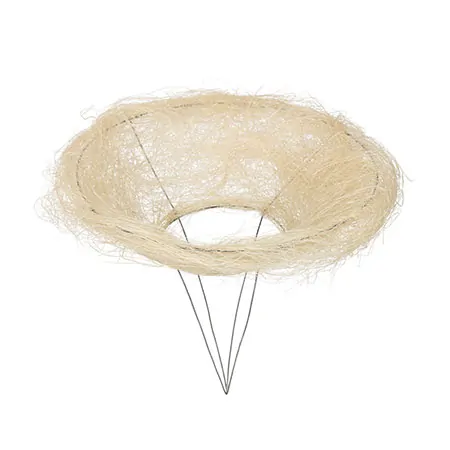
The photo shows the simplest frame, no frills. This type of frame is used for inexpensive round bouquets. In more advanced floristry, it is customary to make frames yourself. Branches, vines, leaves, cardboard, moss, and berries are used. Making frames is a separate course in florist schools. Unusual frames are also made from wire, thread, feathers, and rattan. Add beads and cones. Frames are not necessarily round. They can be of any shape: square, triangular, heart-shaped. A bouquet in a frame can be cascading, vertical - the main thing is that everything looks harmonious together, and the frame is not a separate foreign object in the composition. The frame can also be positioned vertically, as in the photo below:
