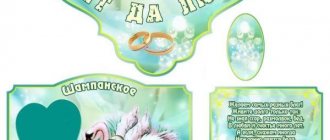
The meaning of champagne
Champagne is a symbol of celebration and carefree happiness , which fits perfectly into the wedding menu and decorations.
A sparkling golden drink accompanies the ceremony from beginning to end. Toasts, the first kiss of the newlyweds to a deafening “Bitter!” Perhaps at the banquet there is a place for a whole fountain or a tower made of glasses.
It is important that the champagne is of good quality, but if you want every little detail of the wedding to be perfect, then you should think not only about the content, but also about the form - about decorating the bottles.
Idea! If you have a themed or colorful wedding, then decorating the champagne with bright paint or other non-standard elements will be an excellent solution.
Champagne bulls
In addition, there is an interesting custom. Two bottles of champagne, for the groom and for the bride, are decorated in a special way and are not opened during the feast. They are used exclusively for decoration and as a symbol of the “full cup”; they wait on the table for the end of the celebration, and then go home to a new family.
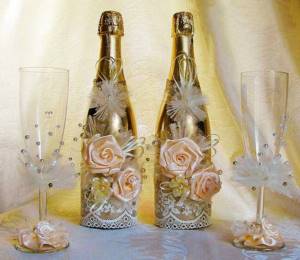
This particular pair of bottles is called "bulls". The custom came from ancient times, when instead of champagne, the newlyweds were given a bull and a cow tied by the horns, and on the first anniversary, the new family treated all guests to fresh milk.
Today, the groom's bottle is allowed to be opened on the first anniversary as a symbol of man's patience, love and ability to maintain a long-lasting union. Interestingly, the first glass of drink still goes to the wife.
The bride's champagne is opened for the birth of her first child. For obvious reasons, the mother will not get a drink on this day.
"Brilliant" champagne
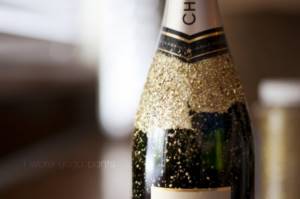
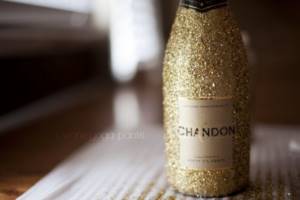
A simpler option for decorating champagne bottles with your own hands is to decorate them with shiny elements, in particular sparkles. Such accessories will look bright and impressive, creating a festive atmosphere at a wedding celebration.
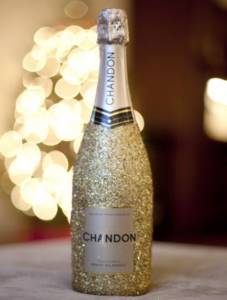
Materials and tools:
- bottle;
- glitter;
- decoupage glue Mod Podge;
- varnish;
- brush.
Time: 20 minutes.
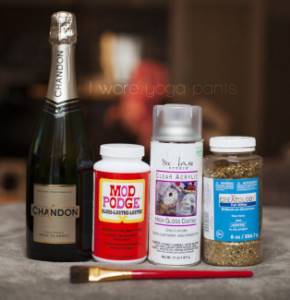
Detailed instructions:
- Apply decoupage glue to part of the bottle and sprinkle glitter on those places. Continue until the entire bottle is covered in glitter.
- Cover the bottle with varnish to give its surface even more shine and festivity. This is how, with the help of a simple master class, you can brightly and effectively decorate wedding champagne with your own hands!
Ideas
Champagne decor allows you not to limit your imagination at both an unusual and classic wedding. Bottles become a highlight, a decoration, and one of the main accessories of the holiday.
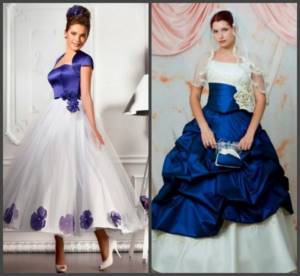
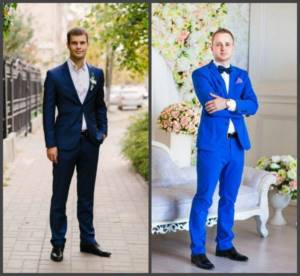
Often in their design they use motifs from the newlyweds’ costumes - the groom is dressed in a formal suit, the bride in a lace dress.
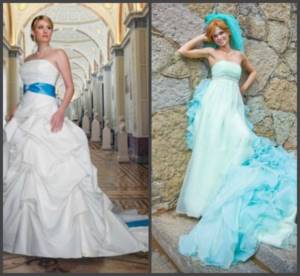
A colorful wedding encourages the champagne not to be in the classic green and gold bottle, but in a more appropriate design. Foil, fabric or paint of the desired color will add the necessary bright accents to the festive table, setting the guests in the right mood.
Polymer clay flowers
Delicate flowers, almost like real ones, but at the same time strong and durable - a wonderful option for decorating special champagne. For craftswomen who know how to create such a miracle on their own, this is also an opportunity to demonstrate their talents to all guests.
However, you can buy ready-made products in the desired color at any craft store. They also sell leaves, twigs, berries and anything else you want to use in decoration. In addition to the flowers themselves, you will need aerosol paint of the required color, usually white, Moment glue and additional decorative elements from lace to rhinestones.
Next, think over the sketch and draw with a pencil the points where you are going to glue the flowers. Now start fixing the buds on the glass. This is where “Moment” or any other quick-setting glue comes in handy.
Advice! If the flowers are too voluminous and bright, then it is better to leave the remaining space between them empty. If decor of a modest design is glued, then the voids can be decorated with ribbons, rhinestones, and beads.
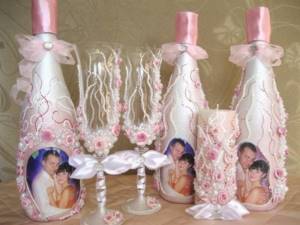
Photos of the newlyweds
Your happy laughing faces on the label along with the date of the celebration or any other inscription is an original design option that will not leave anyone indifferent. This champagne looks great both at a classic wedding and at a themed one, for example, if you design the labels in the form of a movie poster or a “Wanted” poster.
Engraving
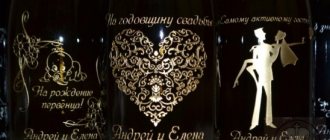
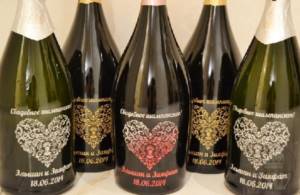
For lovers of luxury, decorating champagne with glass engraving would be a great idea. A good master will be able to apply almost any pattern, regardless of its complexity. Even simple and thin openwork lines look great on dark green glass, giving the bottle a flair of aristocracy.
Which drawing or inscription should I choose? It depends solely on your wishes - the names of the newlyweds, vows of fidelity, images of doves, angels, rings, hearts. Any pattern looks great: either a rather restrained one, with a small number of lines, or a stunning one with a riot of curls.
You should not think that the design must be gold or silver in color - a professional engraver can create a colored, transparent, absolutely any masterpiece. Of course, before choosing a master, you should look at his work. It's best to do this in a workshop to get a full idea of what your order will look like.
Decoupage of bottles and glasses
This design method is gaining increasing popularity, as it combines ease of execution and chic results. It is used not only to decorate bottles, but also to decorate newlyweds’ glasses.
Decoupage is the gluing of paper elements onto a glass surface treated with acrylic. The paper must be thin; for example, napkins with the desired pattern are suitable - delicate flowers, hearts, angels or something more original.
Before starting work, remove the label from the bottle, degrease it with alcohol and dry it. Our master class will help you create an original design and enjoy the creative process.
Next, you need a primer for a smooth and uniform surface. You can do it in two ways - buy a special primer for glass in a specialized store or prepare a mixture yourself from acrylic, water and PVA glue. Then apply the mixture to the glass in a thin layer. You can do this with a brush, but it is much more convenient to use a foam sponge. After drying, add the next layer of acrylic.
When the surface is completely dry, we begin gluing the paper elements - in this case, glue can be used either special for decoupage (sold in any craft store), or regular PVA or even a glue stick. The wrinkles that inevitably appear along the edges must be carefully smoothed out with a piece of sandpaper, but be careful, because the napkins are easily torn.
So, the bottle is ready. Now you can decorate it with sparkles, rhinestones, feathers or any other additional decor. The decoupage technique looks gentle, festive, and allows you to realize almost any fantasy.
Progress
Choose your fabric thoughtfully.
You will need very little of it, but the external attractiveness of the entire work will depend on it. As the front fabric, you can use cotton with a bright pattern, velvet, or even denim if you want to give the case a more brutal appearance. The main thing is that the fabric is nice and does not stretch too much, maintaining its shape (therefore, it is better not to use knitwear, it will stretch and simply slide off the cup or bottle). For lining, it is better to take a soft and dense fabric that will help maintain the original temperature of the drink. Personally, for these purposes I used a baize with a dim pattern that matched the tone of the front fabric. However, you can, on the contrary, choose a contrasting option or even make a double-sided case, decorating both sides.
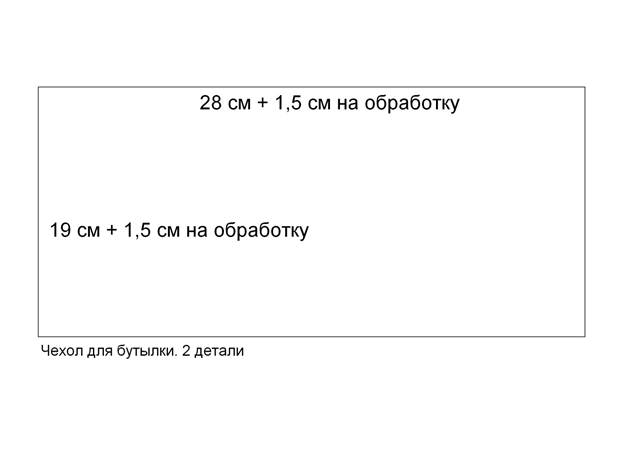
We select the appropriate decor for the selected fabrics (buttons, ribbons, braid, etc.) and cut out two rectangles according to the pattern. The pattern is given based on the calculations of a standard wine bottle, since their sizes are quite universal, unlike, for example, tea cups. If you are going to decorate a vessel of an unusual shape, the pattern should be adjusted to its actual dimensions. This is easy to do with the help of a tailor's meter, not forgetting to add allowances for processing.
Tip: if you are making a cover for a container for hot drinks, you can insert a padding made of batting or padding polyester inside the cover so that it better maintains the temperature.
Before sewing the details of the cover, you should design its front side. This is the moment in which you can show maximum imagination and use all the little things at hand: scraps of fabric, ribbons, stripes, buttons, beads, etc. I suggest making a small felt pocket on the front side, into which you can insert, for example, a card with the name of the donor or a banknote, and use it in a tea cup to store a tea bag or candy. You can give it the most bizarre shape, the main thing is that it does not turn out to be too big.
I suggest sewing it on with decorative stitches using thick, bright threads such as iris or floss. The rule is simple: we do everything that you want to sew or embroider at the very beginning; we leave small parts that we plan to simply glue to the case until the product is almost completely ready.
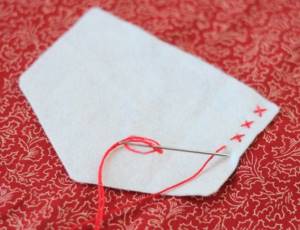
We also sew buttons on the front side, with the help of which our cover will be held. 4-5 pieces, located at an equal distance from each other, will be enough. When sewing on buttons, be sure to leave about 2 cm between them and the edge of the fabric - this is the seam allowance.
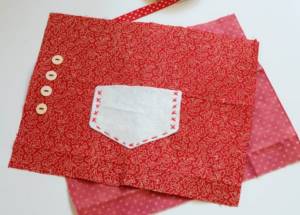
Tip: you can replace buttons with a zipper. It will look especially impressive in combination with denim. And if you want to make a more feminine and romantic version of the packaging, the buttons on both sides can be replaced with ribbons that are tied with cute bows.
If the decor has already taken its place, it’s time to sew together the parts of our cover, folding them with their right sides inward. The most convenient way to do this is with a sewing machine, but if you don’t have one at hand, you can do it manually. For this, I recommend using a frequent running stitch or a forward stitch with a needle, then the parts of the fabric will be connected quite firmly.
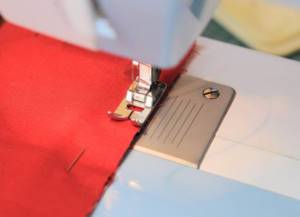
We sew the side opposite to the one on which the buttons are sewn only along the edges, leaving an open area for the loops. Through the same hole we turn the product right side out.
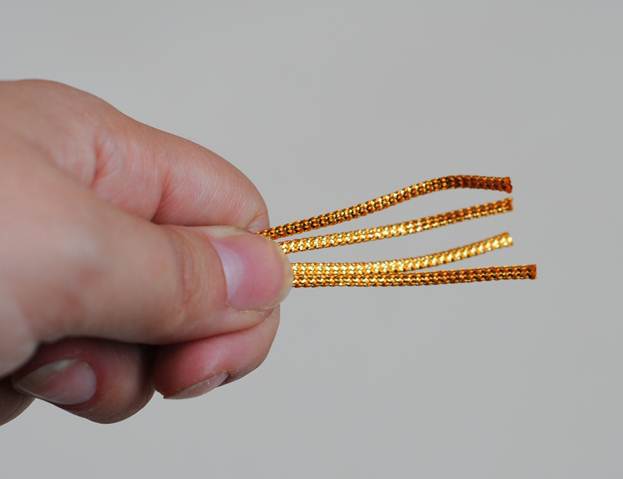
For the loops, we make blanks from braid, twine or ribbon by eye. The main thing is that the case fits the bottle or cup tightly enough. Using pins or a pencil, mark the location of the loops exactly opposite the buttons. They can be sewn by hand with a blind stitch, topstitched on a sewing machine, or simply glued in place using a hot glue gun or special fabric glue that can be found at any craft store. The hinges must be securely fastened and the opening in the case must be completely closed.
Our gift case is almost ready. All that remains is to glue buttons and bows to it, to your liking, insert a greeting card and solemnly hand it to the recipient. The beauty of such packaging is that it will make even a simple gift very personal and can be used, reminding you of you, for a long time.
DIY decor master class
If you decide to create a unique design yourself, then first you need to prepare the surface of the bottle.
The easiest way to remove the label is to place the bottle in a basin or large pan filled with warm water, add dishwashing detergent and leave for half an hour. After soaking, removing the paper and glue will not be difficult.
Advice! Be careful with the water temperature, too low will not bring much effect, and too high can spoil the taste of the drink. The best option is a little warmer than room temperature.
Next, be sure to degrease the surface. Any alcohol-containing solution or even regular acetone will be suitable for this. Both alcohol and acetone can only be applied to a completely dry bottle.
Satin ribbons
A shiny, flowing material, beautiful both on canvas and as details , is perfect for decorating wedding bottles. Such decor does not have to be pure white. You can easily add soft pink, blue or lilac, and if the wedding theme allows, then a rich, bright palette.
You will need:
- satin ribbon (or several if you want a combination);
- glue gun (if you don’t have it, a regular Moment will do);
- scissors;
- various decor - beads, rhinestones, lace, brocade ribbon.
Decoration steps:
- Measure and cut the required length of tape. Apply a small amount of glue. You need to start gluing the bottle from the neck, slowly going down. The right end of the tape will cover the left;
- Cut off the next piece - it will be a little larger as the bottle expands. Lubricate with glue and secure, also leaving the right end on top;
- Apply two to five more layers , depending on the width of your tape. When the bottle becomes smooth, the top is ready, and you can move on to decorating the bottom part;
- Cover the bottom with even stripes , leaving a seam on the back of the champagne;
- Mask the joint with another tape glued vertically;
- The champagne is ready , now all that remains is to add details for beauty and disguise the inevitable irregularities. Bows look good both from the same satin ribbon and from a contrasting fabric of a different texture - brocade or lace.
To make the design more solemn, add several strips of brocade ribbon. Usually in the center - the fifth and sixth layers of the top decoration, and at the very bottom.
Velvet suits
The velvet design looks luxurious and aristocratic. The material has excellent stretch, which makes it easy to sew the necessary champagne clothes of almost any style from it. The colors can be any, but the classic combination is a white bottle for the bride and a black bottle for the groom.
You will need:
- stretch velvet in the required colors;
- threads matching the shade;
- paper, graph paper is best;
- well-sharpened scissors - cutting velvet is not so easy;
- pencil or narrow piece of soap;
- if desired, additional decor, for example, lace, rhinestones, beads.
Idea! If you have chosen a themed, non-classical wedding, then it is wise to reflect this in the champagne decor. However, in any case, the bottles of the bride and groom should be at least slightly different from each other so that you do not confuse them.
Decoration steps:
- First you need to find a pattern that suits you and transfer it to paper;
- We transfer the pattern to the velvet from the wrong side. You can draw either with a pencil, it will still not be visible, or with a piece of soap - its traces will disappear even faster;
- Cut out the resulting blank. Remember that velvet is an extremely capricious material, so it is necessary to cut it in a slightly stretched state and very carefully;
- We sew the details and get “suits” for champagne . We put them on bottles;
- Now you can start decorating. The groom's champagne is usually decorated with a miniature tie or bow tie; an equally charming option is rhinestones in the form of buttons on a suit. You can also use regular buttons. Another interesting idea is a miniature hat or top hat. For the drink, brides often make a tiny veil from a piece of lace or organza; they also add flowers, ribbons, and any other feminine elements.
How to make a bottle outfit for a wedding with your own hands? Step-by-step instruction
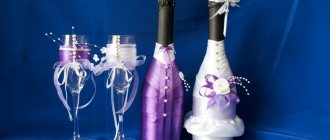
Bottles of champagne decorated to match wedding dresses look original and at the same time elegant on the wedding table. Today, many people choose not classic outfits: a white dress for the bride and a black suit for the groom, but dresses and suits in original colors. The decor of the bottles can be based directly on your wedding dresses.
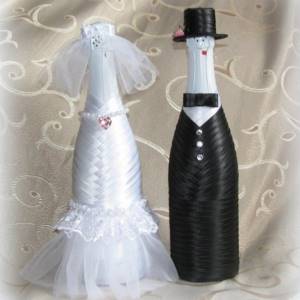
Photo of how to decorate bottles for a wedding with your own hands
So, how to make bottle wedding clothes? The task is not difficult and even an inexperienced craftswoman can master the technology of sewing clothes. You will need several small pieces of fabric of different colors and structures, pearls, golden sequins, small flowers, tulle and any other decor at your discretion:
- Sew pieces of white fabric (tulle, satin, velvet) in the shape of flounces.
- Decorate the dress with sparkles, pearls, beads, possibly flowers.
- Place on the neck of the bottle.
- You can additionally make a veil and attach it to the cork using a glue gun.
- Additionally, you will need white ribbons for decoration.
- Making a tuxedo for the second bottle of champagne is also not difficult. Take measurements of the bottle in terms of volume and height, cut out a square pattern. From black fabric, cut out a square onto which you need to sew a white flap like a collar, sew on beads (instead of buttons) and make sleeves. The neck can be decorated with a butterfly, and a small black hat can be placed on the cork.
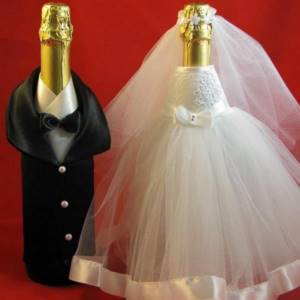
Photos of decorating bottles for a wedding with your own hands
Recommendations
- Be sure to prepare the glass before starting work - remove the label, degrease and dry;
- Remember that too much heat can negatively affect the taste of the champagne;
- When choosing a design, focus on the theme of your wedding , the overall decor of the festive table, as well as the groom’s suit and the bride’s dress;
- Study how much time is needed for this or that stage of work in order to finish everything before the ceremony in an emergency mode. For example, acrylic pre-hardens 30 minutes after application, but remains weak for several more days - this is important to consider if you are going to glue something on it;
- Decorating bottles for the bride and groom allows for a variety of experiments, but it is worth remembering about moderation in order to create a truly elegant design.
mamakuban.ru
Details DIY ribbon flowerLeotheme templates
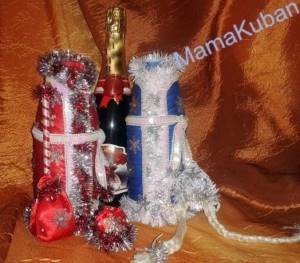
One day I was faced with the question of how to decorate champagne in the form of Santa Claus and the Snow Maiden for the New Year. I started looking for MK on the Internet, and there were practically no answers to this question, but I wanted the suits to be removable and to please my customers for many years.
My fate brought me together with a wonderful person who happily agreed to share her idea of removable clothes, she told me everything in detail and showed me how to do it. Thank you, Natasha. Here is a link to her page, you can take a look and see her works, they are worthy of attention and your ratings! (Original Handmade jewelry).
Let's get started!
For decoration we will need: bias tape in two colors (satin ribbon is also suitable, but it is more difficult to work with); cardboard or gift bag; for finishing fur coats - faux fur or padding polyester or tinsel, whatever you want; beads, rhinestones, sequins and festive braid.
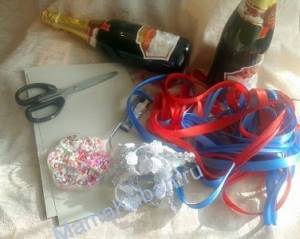
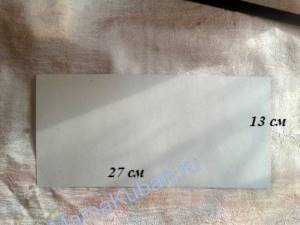
Cut out a rectangle from cardboard with sides 27 and 13 cm.
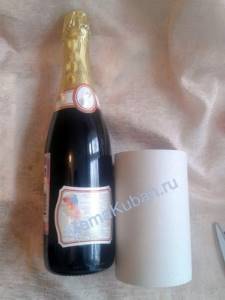
We glue the bottle, but so that the cardboard slides freely over the bottle and is removed without effort - this will be the frame of our clothes.
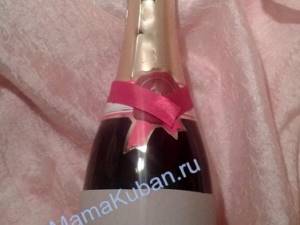
Let's start gluing everything up! Take a strip of tape and cover the neck of the bottle.
Next, take the second strip and glue it to the first. We apply glue on the back side, where it is shown by the arrow. We glue it carefully so that our strips do not stick to the bottle, so we constantly scroll our product around the bottle.
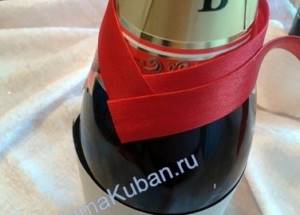
That's it, now all that remains is to seal it around the bottle with tape to the very bottom. Once again, I draw your attention to the fact that they glued the strip, moved it, and checked that it did not stick to the bottle. If this happens, carefully peel it off immediately!
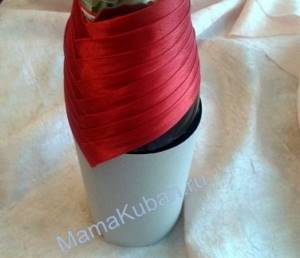
This is what should happen.
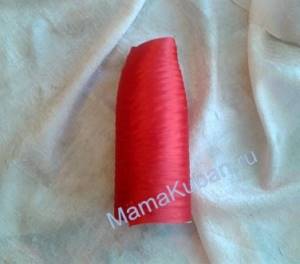
This is what it looks like from the inside.
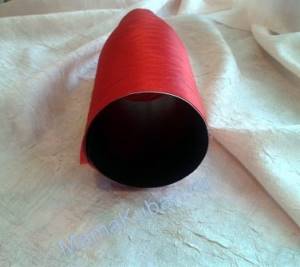
And now the most interesting and enjoyable part - creating the image of Father Frost and the Snow Maiden!
I really like using artificial fur, but after running around the shops, I, unfortunately, didn’t find it, I don’t really like the padding polyester, so I decided to decorate it with tinsel, it’s all so New Year!
We begin to glue tinsel around the neck, in the middle to the bottom of the bottle and in a circle at the bottom of the bottle.
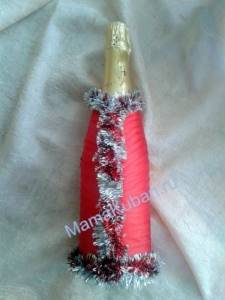
Then I decorate with braid, you don’t have to do this.
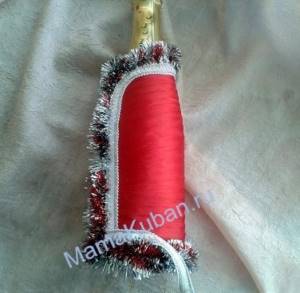
Then we glue snowflakes, rhinestones, and half-beads.
We do the same with the Snow Maiden’s clothes.
Making a kokoshnik for the Snow Maiden. Cut out the parts from cardboard.
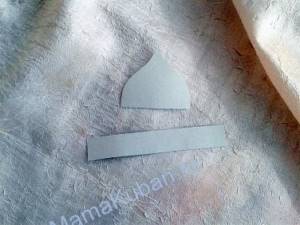
We cover them with tape and glue them together.
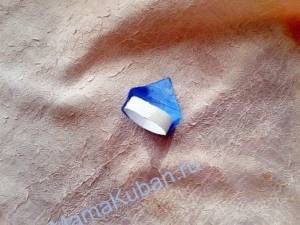
I sewed a hat for Santa Claus and decorated it with tinsel.
This is what my bottles look like, all that remains is to decorate them with rhinestones and make a staff and a bag for Santa Claus.
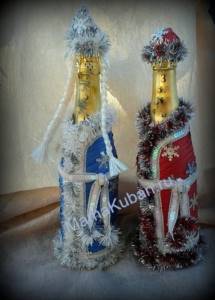
I make a staff from a pencil and cover it with tape. I sew the bag from fabric to match the suit.
My couple is ready.
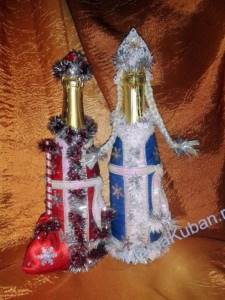
I would like to note that it is not necessary to decorate the bottles, as I suggest, figure out for yourself how and with what to decorate your couple.
And this is my first pair of bottles.
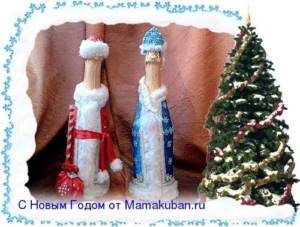
This is Natalia's work!
If you have something to say about this material, you can leave a review here .
Copy this MK only with my permission and a link to the source!
pregnancy 20 weeksSouth Goa beachesJoomla templates by BonusThemes
- < Back
- Forward >
