Most newlyweds will agree that a special event consists of dozens of details, namely they complement the style and set color accents. Therefore, it is worth writing in advance a list of all the things that need to be thought through.
It all starts with choosing the bride's dress and venue, and ends with purchasing accessories for the guests. Although you can make butterflies for the groomsmen with your own hands.
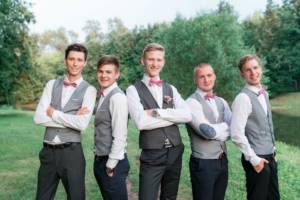
Particular attention should be paid to the appearance of the bridesmaids and groomsmen. These people will be constantly in the frame, and they must look perfect.
Future spouses should decide in advance on the color and theme of the wedding. Then they can imagine the guests' outfits in advance. For example, the groom needs to think about what item in his wardrobe will distinguish his comrades from other invitees. An excellent solution, for example, is butterflies for the groomsmen. The fashion for this accessory has been going on for several years.
History of the accessory
At its beginning, the bow tie looked like a bow, which appeared in the 17th century in Europe. And it received its modern appearance only in 1904 at the premiere of the opera “Madama Butterfly”. It was thanks to the name “butterfly” that the shape of the tie was invented. All the musicians in the orchestra wore it, thereby advertising the performance. This wardrobe item created a real sensation among fashionistas.

Since then, this men's accessory has become very popular. Now every year, men and boys continue to choose these ties for important events.
Interesting! Instead of butterflies, you can use other attributes - boutonnieres. We wrote in this article how to make them yourself and what they are.
What looks is it suitable for?
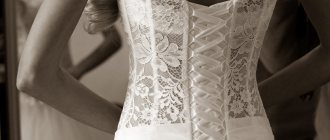
First of all, we associate the butterfly with a classic suit: white shirt, suspenders, black trousers and jacket. In this version, everything looks chic, so black is a must for the accessory.
- A more relaxed look in the style of a “cocktail party” involves colored shirts, which are combined with dark-colored butterflies with a small ornament.
- With a “smart casual” style, try bolder colors of the accessory, but not too bright. In any case, it will stand out, because a jacket is not required here.
- “Casual” is considered a free style, so feel free to wear any color tie with patterns and ornaments. The main thing is that it matches the chosen wedding theme.
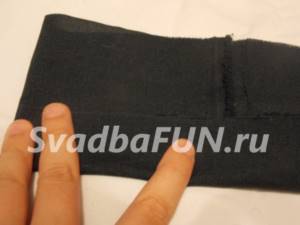
Stage 2
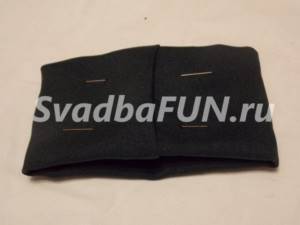
We take the large strip by the edges and fold it inward so that the edges meet exactly in the middle.
READ ALSO: Wedding leg garter - master class
[justified_image_grid ids=”1608,1609"]
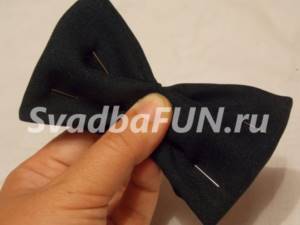
Now we need pins. We bend the edges inward again, but not along, as we did the first time, but across.
We pin each fold with pins.
[j[justified_image_grid ids="1611,1612"]p>
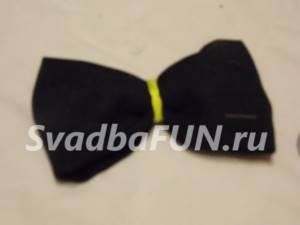
Then fold the edges inward again.
We take our blank and squeeze it in the center so that we get our butterfly.
Carefully rewind the junction with any thin ribbon. We take out the pins.
Kinds
Oddly enough, although the bowtie itself is a type of tie, it also has its own subspecies, each of which fits a certain image and suit.
- Classic. The same version from the beginning of the 20th century. Suitable for a weekend suit with a tuxedo. But by changing the fabric of the product, you can try other wardrobe options.
- Big butterfly. It is also suitable for a tuxedo or tailcoat.
- Narrow option. It looks modest and modern. It is worn with casual and casual looks.
- A “diamond” shaped butterfly is a combination of a classic piece with a triangular one on top. Suitable for extravagant and bold style.
- A small bow tie with rounded ends looks playful and goes well with a casual look, even without a jacket.
Whatever look you choose, don't forget about the main theme of the wedding. Whether it is formal or rustic, you can always find the right accessory for friends of a friend.
Step-by-step process for making a ribbon butterfly
We make a butterfly from a satin ribbon with our own hands:
- It will consist of two bows. For the 1st, a tape of about 20 centimeters is taken, for the 2nd - 30 centimeters.
- Take a short ribbon and fold it in half so that the ends overlap each other slightly.
- Sew in the middle.
- Tighten the thread, twist in the middle to give the shape of a bow.
- Also make a second bow.
- Cut the required length for the base from a thin strip.
- Cut out a small piece from it for the bridge of the bow.
- Burn the edges to prevent them from unraveling.
- Glue or sew two butterflies. The small one should be on top.
- Attach a large bow to a thin ribbon.
- Close all layers with a jumper. Its ends should be sewn so that the ribbon on which the butterfly is held is not sewn to it. This is necessary so that the bow can be moved to the side if necessary.
- Sew on the fastener.
Which ones can you choose?
There are many ways to make a bow tie with your own hands. It all depends on the shape and fabric chosen. Therefore, there are simpler or, on the contrary, more complex ways. Some of the options:
From the tape
You will need: thread and needle; fabric glue; satin ribbons (26cm – length and 5cm – width; 1cm – width); pins; organza ribbon (26cm length, 4cm width); lighter.
- Place the organza ribbon face up on the front side of the wide satin ribbon. Align the fabrics and singe the edges.
- Turn the ribbons wrong side up, overlapping the ends in the middle.
- Pin the result in the middle, and then sew the ends together.
- Pull the thread to create a butterfly and secure it.
- From a narrow satin ribbon, cut a long base for a tie to fit your neck. Also prepare a ribbon 4 cm long and 1 cm wide.
- Use glue to attach a long ribbon to the center of the butterfly.
- Glue a small tape to the place where the thread is pulled together, fastening the ends on the other side.
- All. The ribbon butterfly for the groom's friends is ready! Decorate the accessory as you wish.
Interesting video: a simple way to do it
You can sew both by machine and by hand. You will need: 3 pieces of fabric (4.5x7.5cm, 10x19cm, 11x20cm), thread, needle, iron, fabric for the strap, clasp, scissors.
- Bend the longest ribbon in half and sew.
- Turn out the resulting rectangle. Iron it so that the seam is in the middle.
- Fold the product in half with the seam on the outside.
- Sew the rectangle on one side where the hole is.
- Then turn it inside out and iron it so that the seam is in the middle.
- Repeat the same steps with the other two ribbons.
- Place the middle one on the large piece, and then thread both through the small one.
- To secure, sew a long piece of fabric, bringing the ends together.
- Thread it through the middle of the tie into a small rectangle.
- Attach a clasp at the ends.
Classic version
You will need: fabric (2 pieces - 22x10cm, 3x8cm and 3x55cm), scissors, thread, fastener and pins.
- On 22x10cm pieces, fold the long sides 1cm towards the center from the wrong side, ironing them.
- Then connect the other opposite sides in the center.
- Sew the edges in the middle.
- Then make a fold in half and sew it. The butterfly itself is ready.
- Place a small piece of fabric face down. Bring the sides together in the center, stitching them together.
- Do the same procedure with a long ribbon.
- Attach the clasp to the long belt.
- Use a small ribbon to close the thread on the outside of the butterfly.
- Attach the belt and the ends of the small ribbon to the wrong side.
- Carefully sew the fabric together.
There are also other ways to make a butterfly with your own hands. But these variations are the most common and simple.
Master class: DIY butterfly for the groom
Why has everyone forgotten about the groom? And about such a fashionable accessory as a butterfly? This master class describes in detail how to sew your own butterfly in the color and texture of your wedding!
CHOOSING FABRIC First of all, you should find a suitable fabric. It is better to choose a tighter one so that the butterfly keeps its shape and does not sag on the neck - this is perhaps the most basic rule that is always worth remembering. A trial version can be made from an old curtain or worn-out camouflage pants (a more fashionable option). If you are satisfied with the end result, you should experiment with materials and turn to the fabrics from which all major manufacturers traditionally sew butterflies.
wool
silk
cotton
tweed
HOW TO SEW YOURSELF A BUTTERFLY Instructions in eight steps

In fact, we have already done half of this step for you - all that remains is to download the file with the patterns, print it on paper and cut it out. Now these same patterns need to be carefully pinned to the pre-ironed fabric (if it is double-sided, pin it to the wrong side) and traced along the contour with chalk or a pencil, leaving five to seven millimeters of seam allowance. link

You need to cut out two parts - a short one and a long one (each in two copies). If the fabric is too soft, there is a risk that it will not hold its shape. To prevent this from happening, manufacturers use non-woven lining (you can buy it at any fabric store). The lining is cut according to the same pattern as the main fabric (only without seam allowance) and glued with a hot iron to the wrong side of the part.

Now the parts need to be folded with their right sides facing each other, pinned with needles for security and sewn so that there is half a centimeter from the thread to the edge. It is best to sew the parts together using a sewing machine, but you can do it by hand. In the second case, it will take an order of magnitude longer and the quality of the product will certainly suffer. In the middle of the product, you need to leave an unstitched area a couple of centimeters wide, so that you can then turn the butterfly inside out through it. The same must be done with the other two parts.

Now that both parts are sewn together, the seam allowances and sharp corners must be cut off, then turn the resulting part inside out through the unstitched area (it is best to use a pencil or brush for these purposes) and iron it with an iron. The same must be done with the other half of the butterfly.

The final stage - the two halves of the butterfly need to be connected to each other. This is done with the help of plastic sliders, or, more simply put, regulators, for which you will have to make an exhausting trip to the fabric and accessories store.

You should start with the long half of the butterfly. Its thin end must be threaded through both holes of the first slider (it will be able to move freely and allow you to adjust the size of the butterfly) and then through one hole of the second.

Now the free end of the tape must be passed through both holes of the first slider and the resulting complex loop must be sewn, as shown in the figure. It will be more convenient to sew by hand, especially since this stitch will still not be visible under the collar of the shirt.

All that remains is to connect the second half of the butterfly with this design. Its narrow end must be threaded through the free hole of the latch and the resulting loop must be sewn with thread. That's it - the butterfly is ready.
Now you have two options ahead: use the butterfly for its intended purpose or come up with a name for your own brand - then you can launch a new line of accessories. The market now, of course, is tight, but there will always be a place for a good product. It is worth considering that sonorous names of prominent historical figures such as engineer Garin or Anton Pavlovich Chekhov are especially popular as names for domestic brands. Perhaps this is where the secret of success lies. And if so, we will even dare to offer a couple of options from ourselves - Platov or, say, Mariengoff.
But seriously, having learned to carry out this simple procedure on your own, fans of the butterfly as an accessory will discover a whole new world for themselves - you can experiment with fabrics, patterns, patterns and colors, creating individual pieces each time.
How to choose the best accessory
Some tips:
- Decide on the shape of the butterfly. It depends on the style of suits of the groom's friends. If you are having a rustic wedding, then a small look is suitable, and for an elegant celebration - a classic model.
- Then choose a color. This will be easy to do if you have an official color for the occasion. Only then should this shade not be widely used in a suit or only on a tie.
- Pay attention to quality. Such an accessory will always be in plain sight, so you won’t need any protruding threads or a falling fastener.
Options for using bow ties
Once you've made a lot of unusual bow ties, you can hand them out to your guests, and then you'll be guaranteed fun, interesting photos. Butterflies in bright colors and unusual patterns go well with suspenders, creating a casual, foppish style.
Editor's choice: How to correctly calculate the menu for a wedding at home
By experimenting with shape, size and color scheme, it is quite easy to create a whole collection of butterflies. Their use will allow you to change the image of a young man for all occasions. Here you can see photos of various models of butterflies, which will become a source of ideas and unusual solutions.
Dresser
Check the clasp on the belt to ensure it holds the accessory well around your neck. Otherwise it will cause problems throughout the celebration. Boykova Maya
Summary
If you want to make a bow tie yourself, then you need to practice in advance. Although the technology for creating many types is simple and accessible to anyone. You will receive an accessory that will satisfy you completely. Imagine how the photos will look in which the groom’s friends are wearing identical bow ties - the photo is guaranteed to become a winner in the creativity competition!
And if there is absolutely no time, then entrust the preparation of butterflies to one of your friends or your girlfriend. Find someone who can definitely do this. Then you will have a detail that will complement your wedding, and will not stand out from the overall theme.
In order not to waste time, of course, it is easier to buy a ready-made option. The main thing is to choose the right and suitable bow tie in both cases.
Irina Vasilyeva
Wedding fairy
Previous article
An original bride price in quest style: a scenario with an original plot
Next article
Choosing fabric for the bow tie for the groom's suit
A bow tie can be made from a wide variety of fabric textures. Velvet, velor, cotton, silk, satin are appropriate here, the main thing is that the fabric is dense enough and holds its shape well, not allowing the ends of the butterfly to sag. There are also leather, knitted and crocheted butterflies, and even wooden ones. As for the color scheme, it is not at all necessary to opt for a black or white tie. Depending on the taste of the newlyweds and the style of the wedding, the butterfly can be of almost any color, and also have a striped, checkered, polka dot, or floral design. Two-color butterflies look good. It is only important to take into account that the color of the butterfly is in harmony with the color of the bride’s outfit.
Editor's choice: The bride's morning before the wedding. Tips with photos
Bottom line
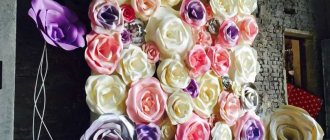
Butterflies symbolize love and fulfillment of desires. Therefore, beautiful multi-colored creatures are increasingly used in wedding decor and are even chosen as the theme of the holiday. Fireworks for a wedding are often ordered by newlyweds in the process of preparing the celebration.
Guests can order it as a gift for newlyweds. Such an original gift will evoke bright emotions in the newly married couple and all guests invited to the celebration, and will remain in memory for a lifetime. We wish you the wedding of your dreams!
https://www.instagram.com/p/BL06-cggh0H/
What do butterflies symbolize?
Wedding butterflies across different continents symbolize love and romance. These beautiful and airy creatures are shrouded in legends and beliefs. Butterflies are especially revered by Buddhists. According to legend, Buddha himself read one of his sermons to winged beauties.
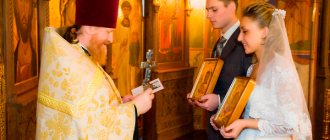
In Greece they symbolize the human soul. On some Christian icons, a butterfly is drawn on the hand of little Jesus, symbolizing the resurrection and rebirth of the human soul. In Mexico, it symbolizes not only immortality, but also wisdom. In Japan, many coats of arms of noble dynasties included a butterfly to help all representatives of the family get married happily.
One of the popular Indian legends says that for a wish to come true, you need to quietly whisper it to a caught butterfly and then release it. She will take her wish to heaven on her wings, and then it will definitely come true. With the help of butterflies you can make your most cherished dream come true.
https://youtu.be/—O3cI_BDpw
In Russia, some wedding planning agencies offer couples to use butterflies made from a variety of materials to decorate their summer weddings. At the holiday itself, the newlyweds can, instead of the traditional release of doves into the sky, launch a live fireworks display of colorful exotic butterflies.